This easy herb roasted turkey breast is perfect for small gatherings or a Thanksgiving dinner for two or three people! Start with an easy salt, herb, and honey brine (it only needs a few hours in the fridge!), then roast the turkey and build a quick white wine gravy in a single cast iron skillet.
Alright, friends: It's time to talk turkey!
If you're hosting a small group (or not hosting at all!) for the holidays, a whole turkey can feel like, well, a lot. But you can still have a fabulous, classic Thanksgiving meal without having to deal with a whole bird!
When you want the ease of a small Thanksgiving dinner and you want to enjoy a full holiday feast, a single turkey breast is the way to go.
It makes just enough meat for 3-4 people (plus a few leftovers!), cooks entirely in a cast iron skillet (no roasting pan necessary!), and is ready in a fraction of the time a full turkey usually takes.
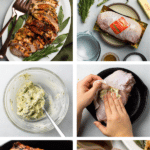
If you're a regular reader, you'll notice this recipe feels a bit longer and more involved than our usual stuff - don't be afraid! We've included a ton of notes, step by step photos, and helpful tips here to help you nail this recipe on the first try. Be sure to read the entire post and recipe before you start cooking, and drop a comment or shoot us an email if you need any help at all!
PS - Want extra support? Download our FREE Thanksgiving planner for done-for-you Thanksgiving cooking timelines, planning guides, and more!
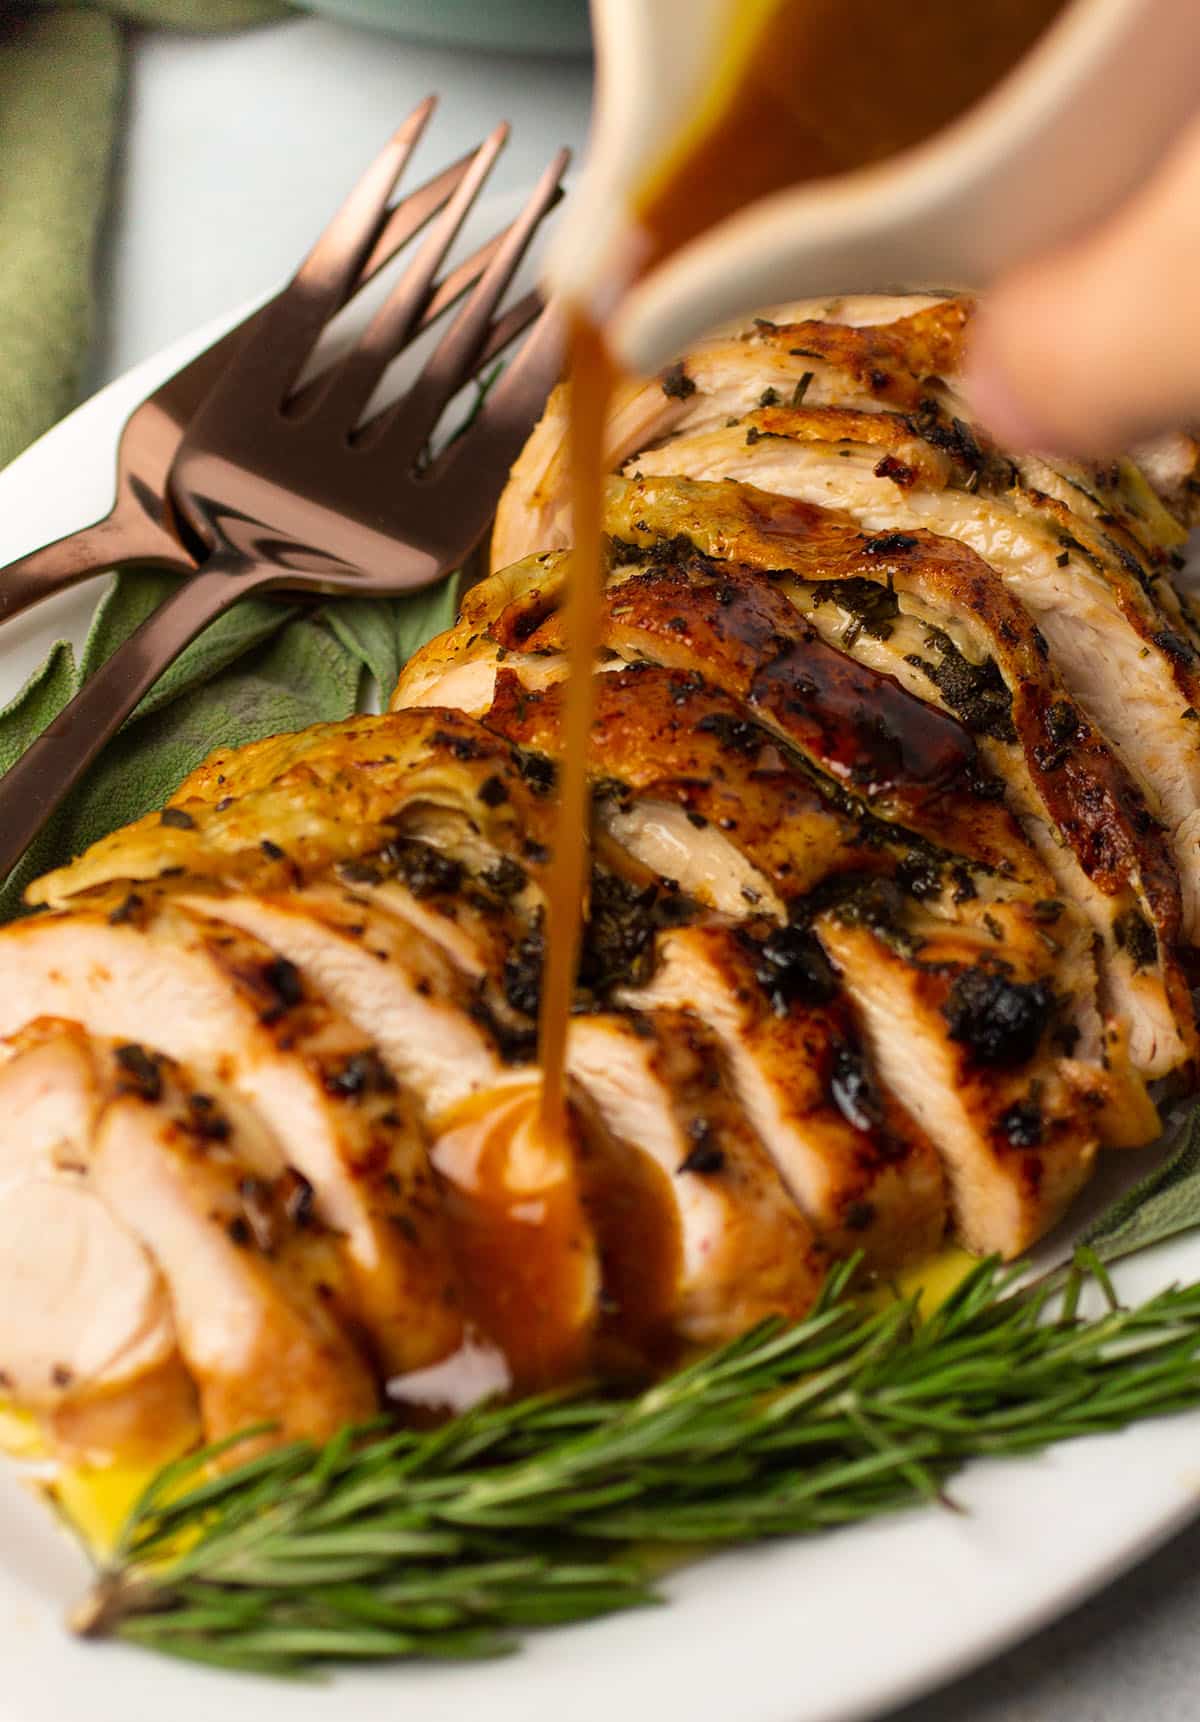
There are 3 main steps to this turkey:
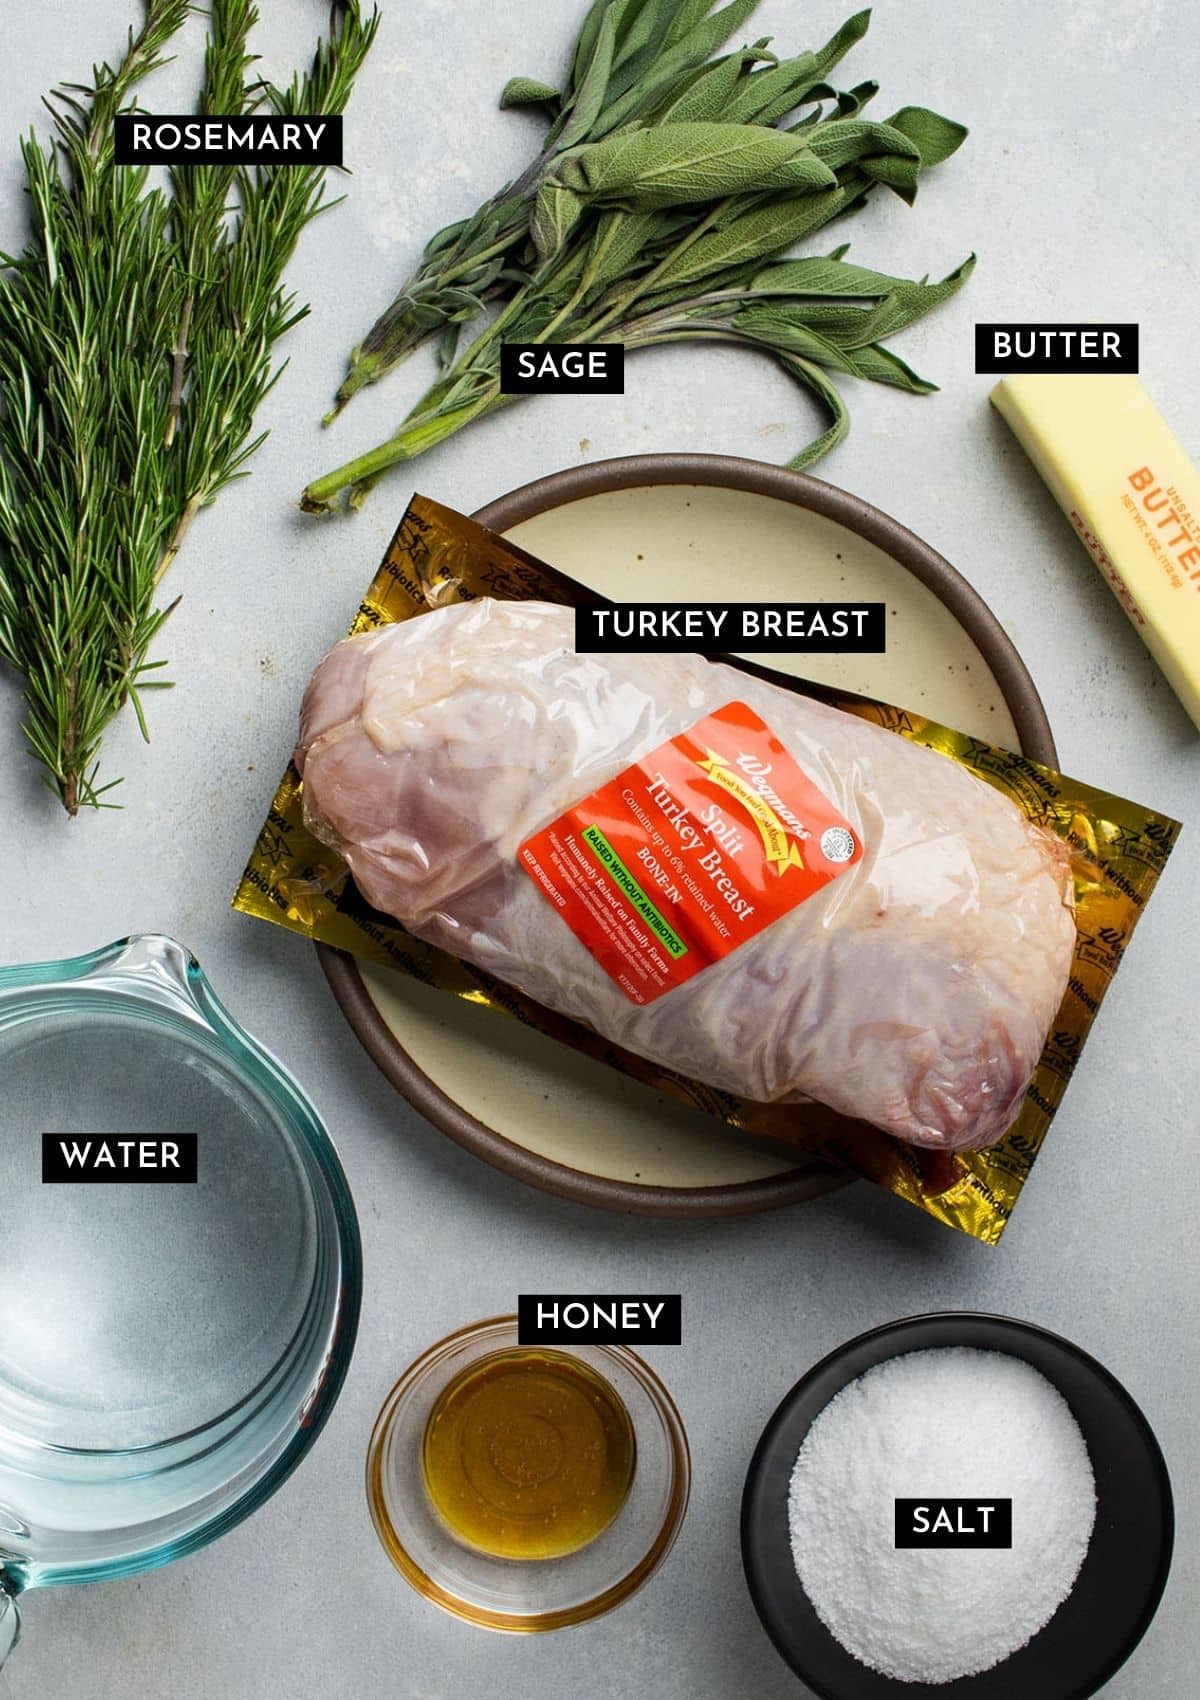
- The Brine. You'll start by making a simple brine out of kosher salt, water, honey, and some herbs. The turkey breast will soak in this brine (in the fridge!) for about 6 hours. The brine is an important step - it helps get salt (and more broadly, flavor) deep into the turkey meat so you have well-seasoned, juicy meat all the way through.
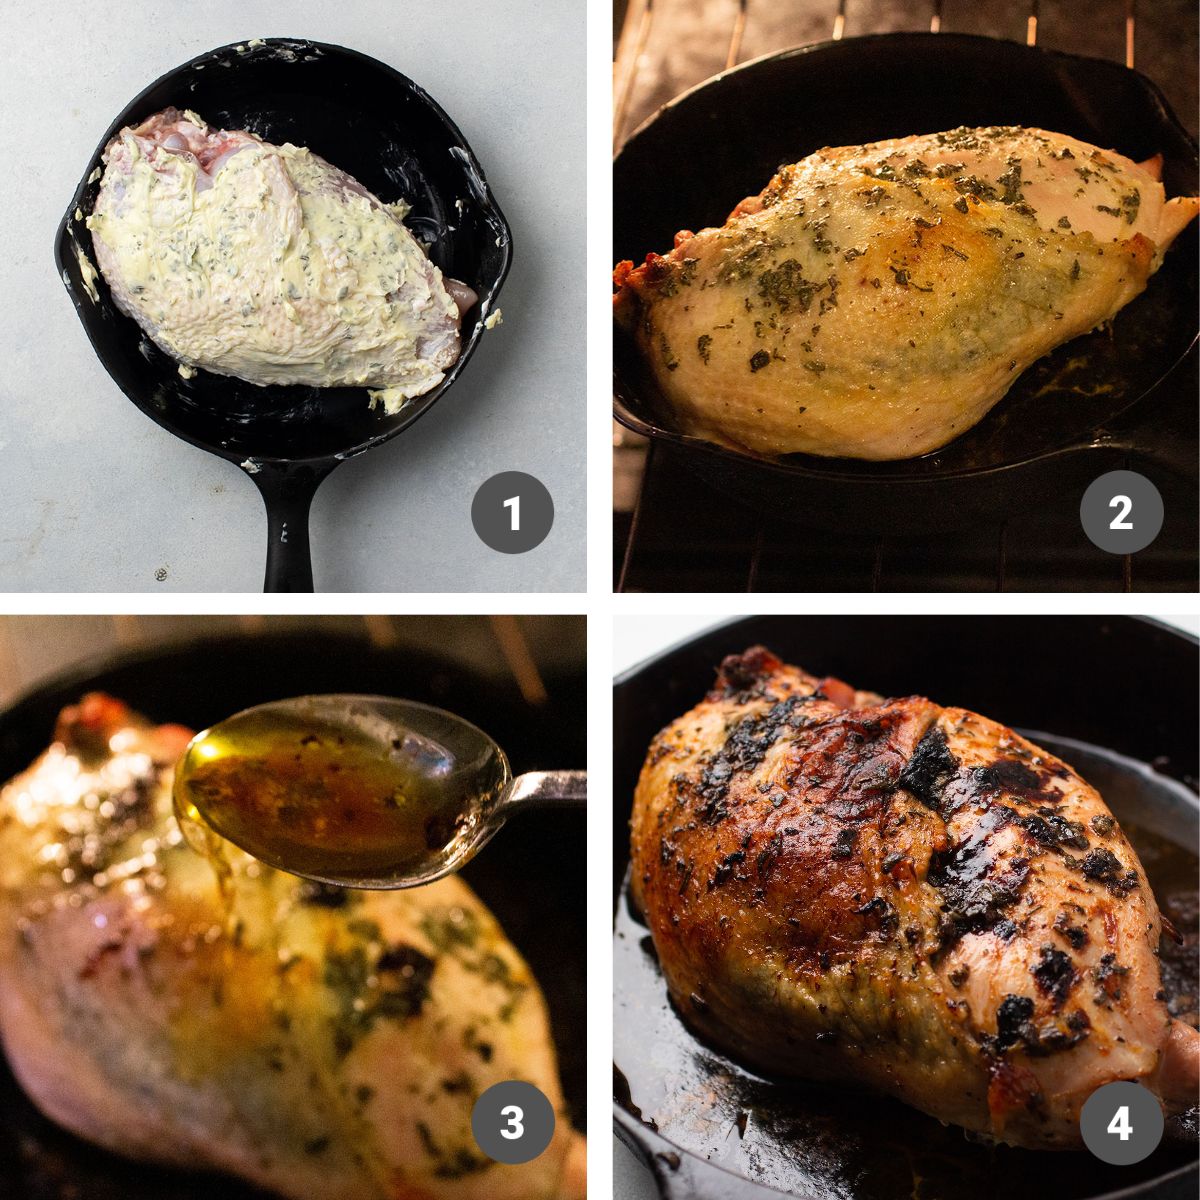
- Roasting with Compound Butter. When the turkey breast is brined, pat it dry and then slather it with compound butter (softened butter mixed with finely chopped fresh herbs). Then roast it in a cast iron skillet for an hour or two (depending on the size of your turkey breast), until it reaches an internal temperature of 165° F at its thickest point.
- The Gravy. Once the turkey is cooked, transfer it to a cutting board to rest (this lets the juices settle and redistribute so they don't run out of the meat as soon as you start cutting it - giving you a juicy, moist turkey). While the turkey rests, you'll make a quick pan gravy with some white wine, a cornstarch slurry, and the drippings that are left in your cast iron skillet.
Turkey Cooking Timeline
This roasted turkey breast is very simple, but it does involve a few different steps. Here's a bird's-eye view of our process (and a sample timeline) for this recipe:
- 8:30 AM: Make the honey salt brine, place turkey in the brining liquid, then cover and refrigerate for 6 hours. Also: take a stick of butter out of the fridge to soften.
- 2:45 PM: Stir fresh chopped herbs and softened butter together to make your compound butter.
- 3:00 PM: Remove turkey from the brine and pat it dry with paper towels. Gently pull the skin away from the meat to create a big pocket, then spread the compound butter all over the turkey and under the skin. Transfer to a cast iron skillet and bake!
- 3:30 PM: Time to baste! Spoon any butter and drippings from the bottom of the skillet over the turkey a few times, then return it to the oven.
- 4:00 PM: Check the temperature! Use a meat thermometer to check the temperature of the turkey at its thickest point - the turkey will be done when it reaches an internal temperature of 165° F at the thickest part of the breast. If the turkey isn't done, continue cooking (baste and check the temperature with a meat thermometer every 15-30 minutes) until it's cooked through.
- 4:45 PM: Remove the cooked turkey breast to a large cutting board and let it rest for 15-30 minutes before slicing. While the turkey rests, move the skillet to the stovetop and make the gravy with the remaining turkey drippings.
- 5:00 PM: Slice and serve!
Note: This sample timeline assumes the turkey breast is already thawed and ready to go on the morning of Thanksgiving. Check out this article on defrosting turkey for some extra guidance!
What cut of turkey to use
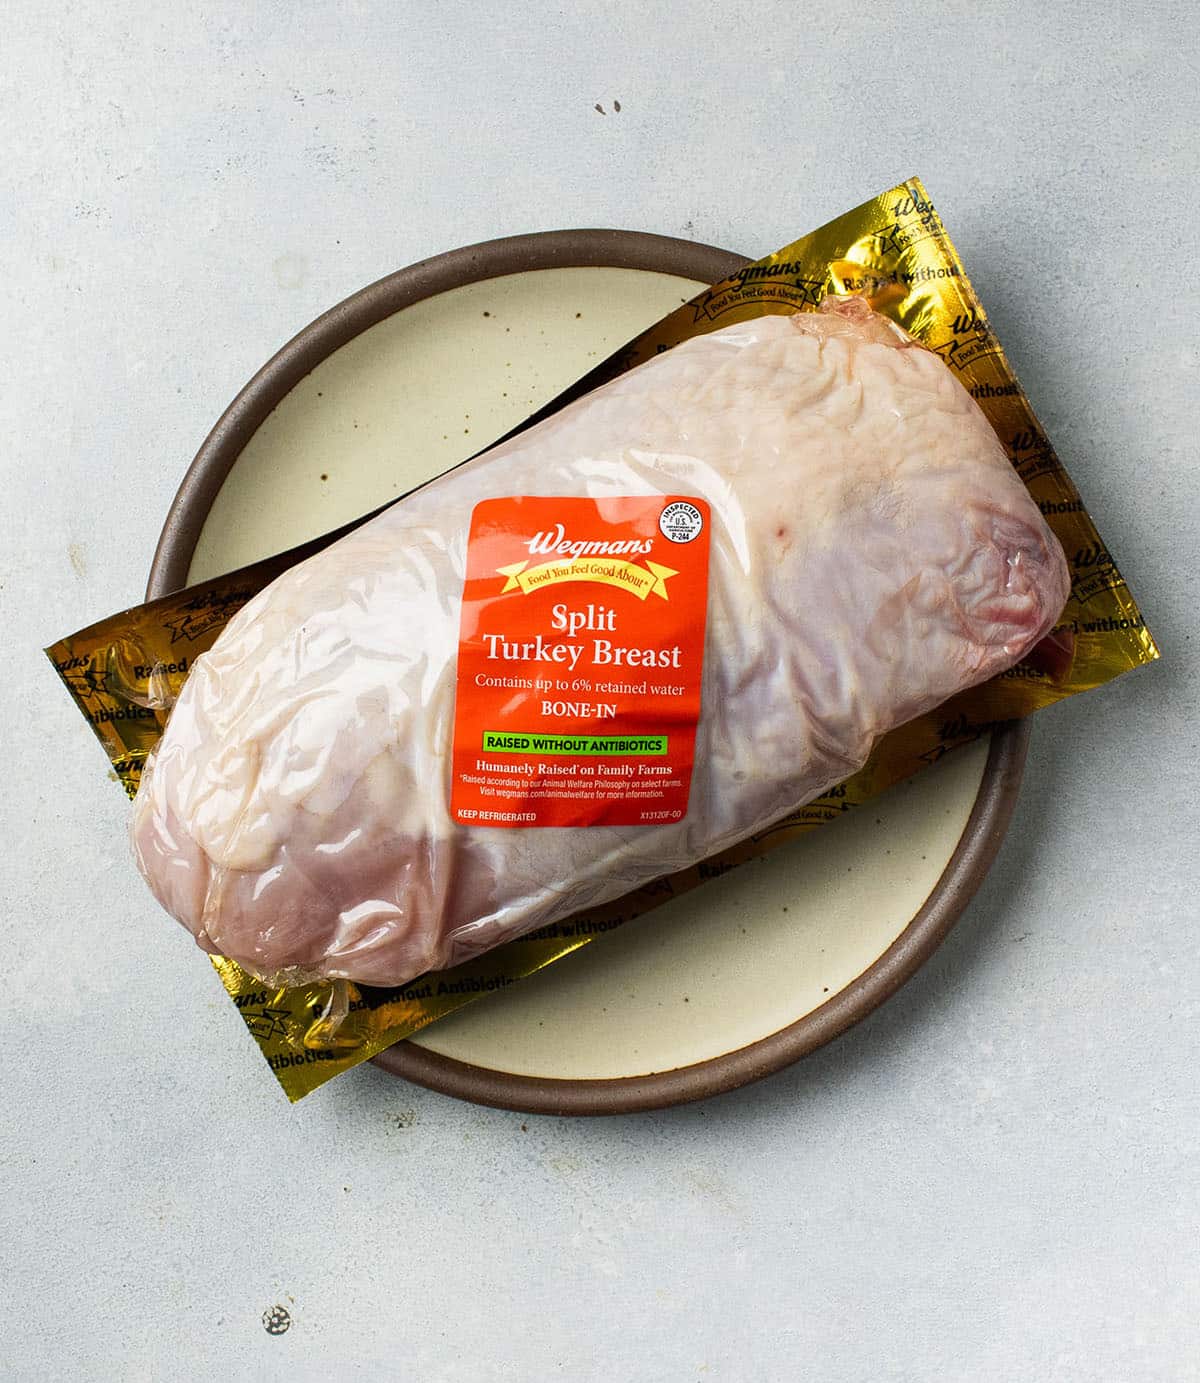
Look for a single turkey breast (often called a "split" turkey breast) that's bone-in and skin-on. We developed this recipe for a 2-2.5 pound split turkey breast, but you can grab a smaller or larger size if you like (you'll just need to adjust the total cooking time).
These bone-in, skin-on turkey breasts are typically easy to find in major grocery stores a week or two before Thanksgiving. If you don't see any single or split turkey breasts next to the full Thanksgiving turkeys at the store, check the regular meat sections (we often find this cut of turkey right next to the chicken breasts or ground turkey!) or ask someone at the meat counter. Your local butcher shop will also likely have split turkey breasts available!
Can I use a boneless skinless turkey breast?
We did test this recipe with boneless, skinless turkey breast: While it works in a pinch, the turkey will be much drier and won't retain as much flavor. If you can't find bone-in turkey breast, that's ok - the difference in flavor between bone-in and boneless is pretty minimal. The skin, though, makes a big difference, since it holds the butter in one place as the turkey cooks and helps retain more moisture. We recommend using skin-on turkey breast for best results!
Can I use a different cut of turkey?
Yes - use a full (double, not split) bone-in, skin-on turkey breast (with both sides intact) if you need a bit more meat. You can also use bone-in, skin-on turkey thighs if you prefer (we don't see this cut in major grocery stores as often, but local butchers will often have it in stock!)
If you can't find turkey breast options near you, this recipe is also great for roasting a full chicken (you'll just need to adjust the cook time).
Note: You will have to adjust the total cooking time for alternative cuts of meat. Use a meat thermometer to monitor meat as it cooks and be sure to cook all meat until it reaches an internal temperature of 165° F at its thickest point.
In the morning: Brine the turkey breast
If the word "brine" just filled you with total, utter dread: stick with me. I know a brine can feel intimidating - but I promise it's worth it (and easier than you think!)
This easy salt, honey, and herb brine gives this turkey breast SO much flavor. (We tested this recipe both with and without the brine: The turkey with the brine was much more moist and juicy).
How to make the brine
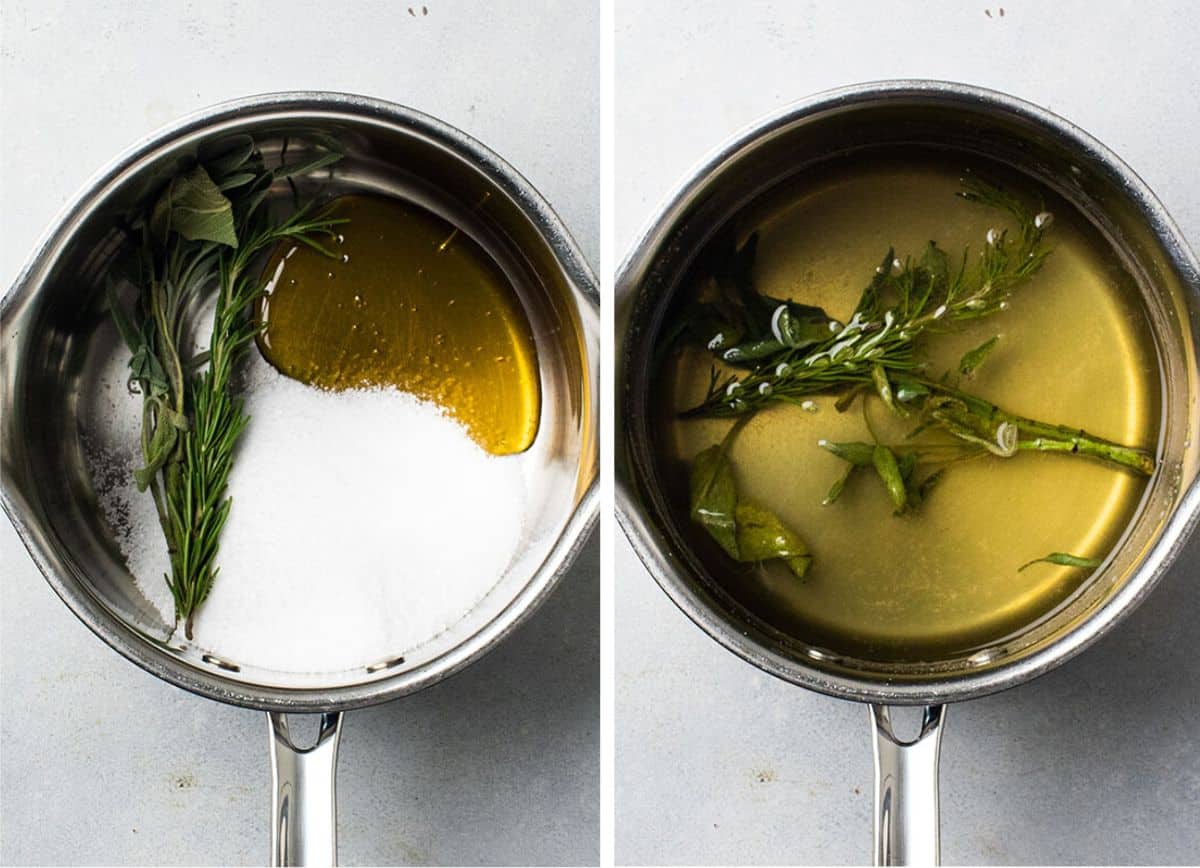
- In a small saucepan, heat a cup and a half of water with the rest of the brine ingredients (honey, herbs, and lots of kosher salt) just until the salt dissolves.
- Let this mixture cool completely, then transfer it to your brining container (a very large mixing bowl or a large sauce pot with high sides both work great!)
- Add 6 more cups of cold water and submerge the turkey in the cold brine. Note: Your brine should be cold - less than 40° Fahrenheit - when you add the turkey. If the brine is too warm, it risks the turkey hanging out in what's called the "danger zone," where bad bacteria thrive. Make sure the brine is cold before you add the turkey (use an instant-read thermometer to double-check the temp!), then immediately transfer it to the fridge so it stays nice and cold.
Make-ahead tip: Make the brine itself the night before, store it in an airtight container in the fridge, and pop the turkey breast into it the next morning. If you prefer, you can also skip the wet brine here and opt for a simple dry brine instead.
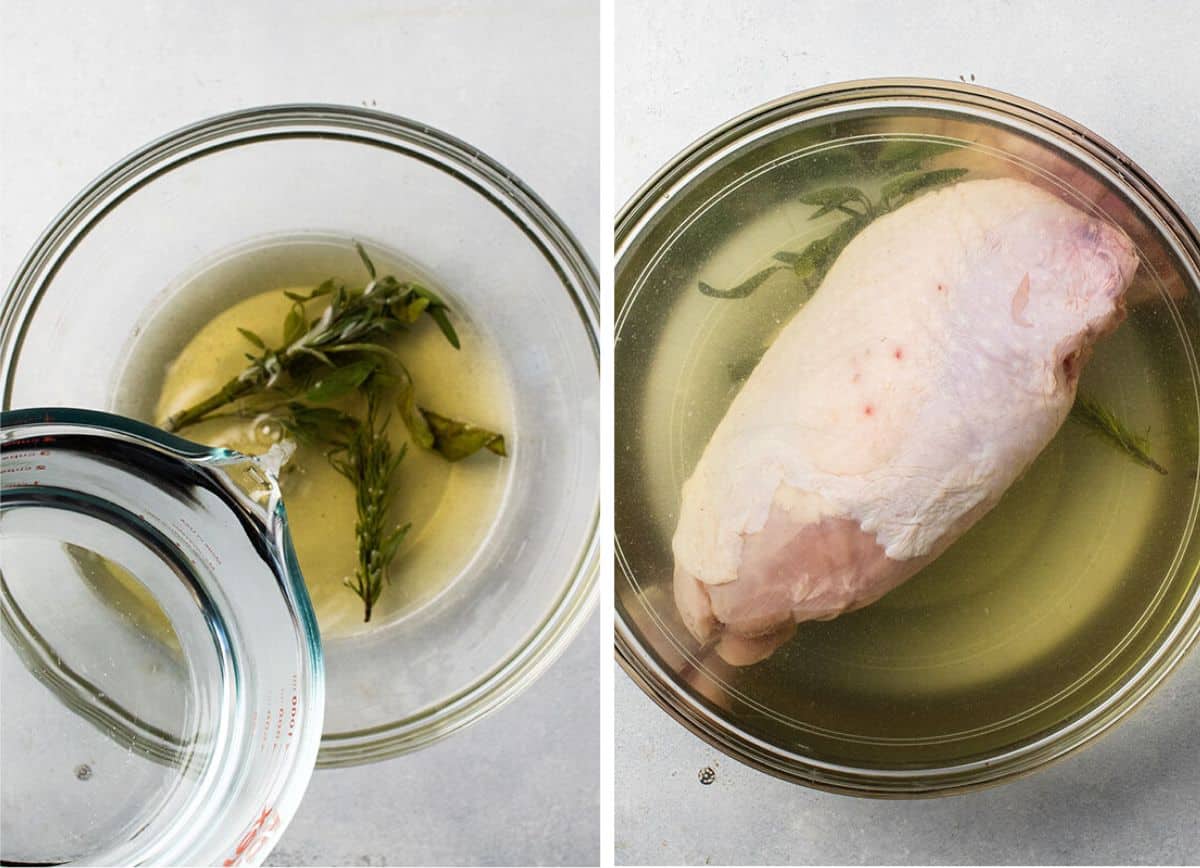
Because a turkey breast is a relatively small cut of meat, a brine here is actually very manageable (as opposed to a full turkey, where a liquid brine can make an enormous mess).
Brining equipment and prep
You don't need much for a successful turkey brine. Here's what we recommend using:
- A bowl that's large enough to hold the turkey and its brine. We used a large mixing bowl to brine the turkey breast in these photos, but you can also use a large stock pot if you don't have a bowl that's big enough. Try to choose a container with high sides in order to leave a bit of space between the top of the brine and the top of the container - this helps prevent sloshing and spilling as you move the turkey in and out of the fridge. If you prefer, you can also use a large zip-top bag or a specialty turkey brining bag to hold the turkey and the brine.
- A way to cover your brining container with an airtight seal (you can use plastic wrap for this, use the lid that came with your stock pot, or grab an airtight silicone bowl cover - we love these from Food52!)
- You'll also want to clear a spot in the fridge ahead of time (preferably on a bottom shelf, away from other food) so your brining container can sit comfortably.
- Pro tip: Set your brining container on top of a rimmed baking sheet before you place it in the fridge. The baking sheet will catch any spills, which helps keep the brining liquid away from other food in the fridge.
Make this your first activity of the day on Thanksgiving - because the turkey breast is so small, it doesn't need a ton of time in the brine. We don't recommend doing this the night before: too much time in the brine causes the turkey to absorb too much water and makes it a bit mealy. 6-8 hours is the maximum brine time here!
Note: If you're in a hurry, you can brine the turkey breast for less time! Even 1-2 hours in the brine will give it a noticeable boost in flavor and moisture.
Prepare the turkey for roasting
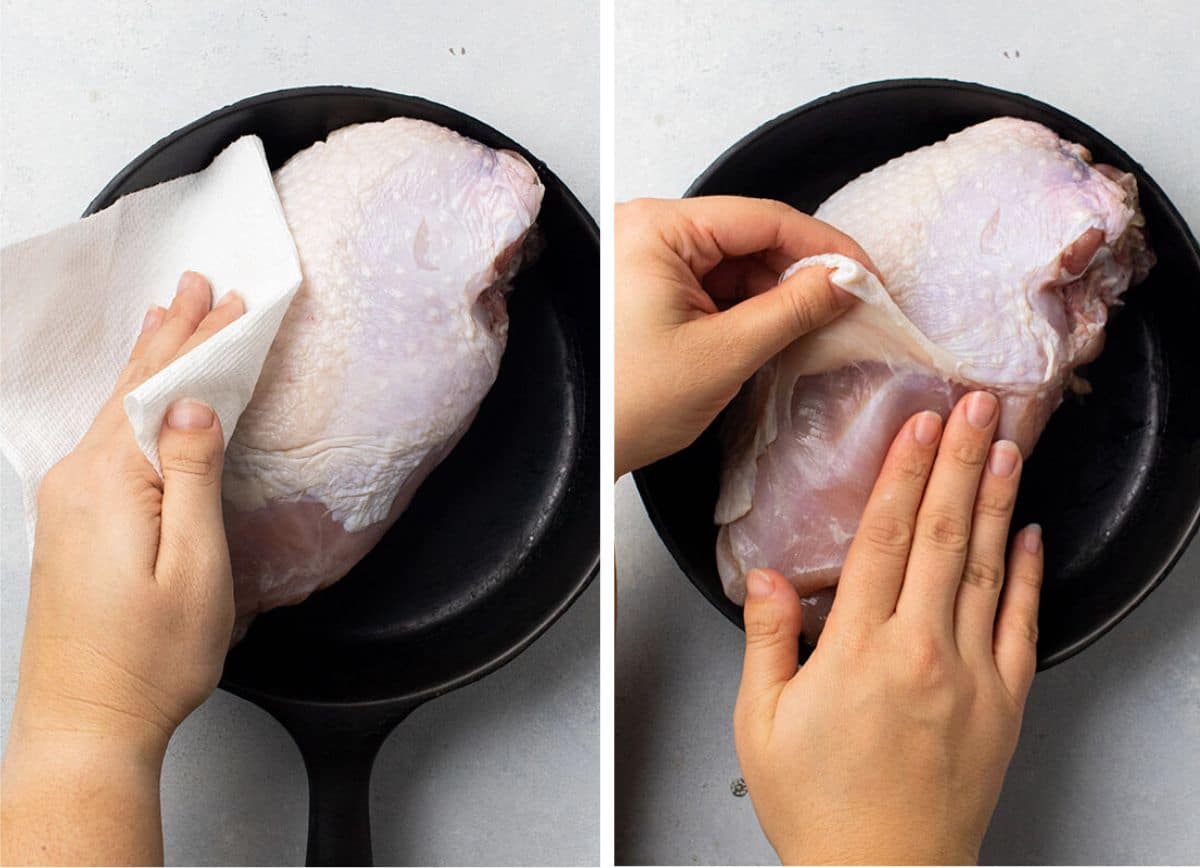
After six hours in the brine, you're ready to prep your turkey breast for the oven! Here's what to do:
- Remove the turkey from the brine, and discard the brining liquid.
- Use paper towels to pat the turkey completely dry (this is a key step to ensure the skin crisps up beautifully in the oven!)
- Gently pull the skin away from the meat to create a big pocket. Don't pull the skin all the way off the breast - leave the far edges attached and just gently nudge your way in under the skin a little at a time. This pocket is where the bulk of our compound butter will go, which will give us a lovely, moist turkey breast.
- Place the turkey in a cast iron skillet and store it in the fridge, uncovered, until you're ready to roast it. This keeps the turkey cold while you make the compound butter, and the fridge air will help make sure the turkey is very dry so we get nice, crispy skin after baking.
Our secret weapon: Compound herb butter
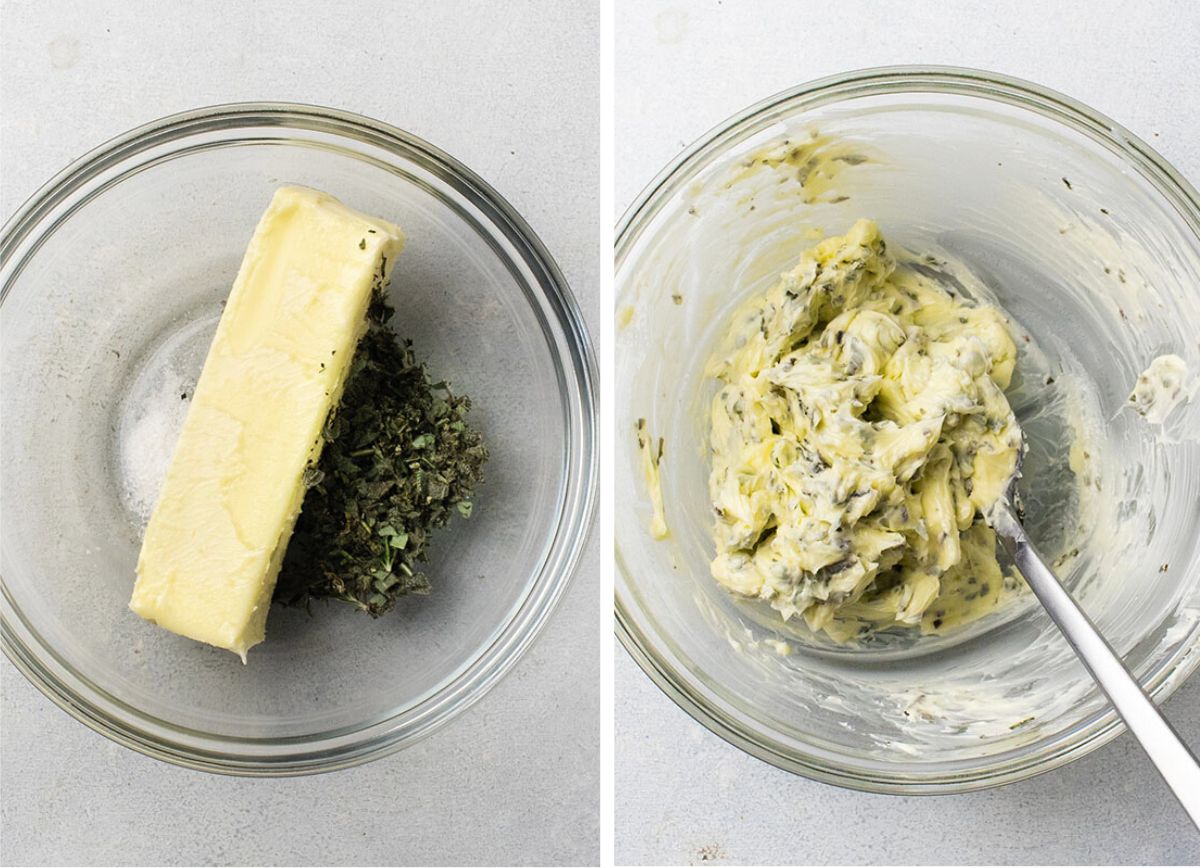
When the turkey is prepped, it's time to make the butter! Mix softened butter in a small bowl with plenty of fresh chopped herbs and a pinch of salt.
Make-ahead tip: Make the compound butter 1-2 days before you need to serve the turkey. Store it in an airtight container in the fridge, then bring it back to room temperature on the counter the day you're ready to use it (take it out of the fridge when the turkey goes into the brine!)
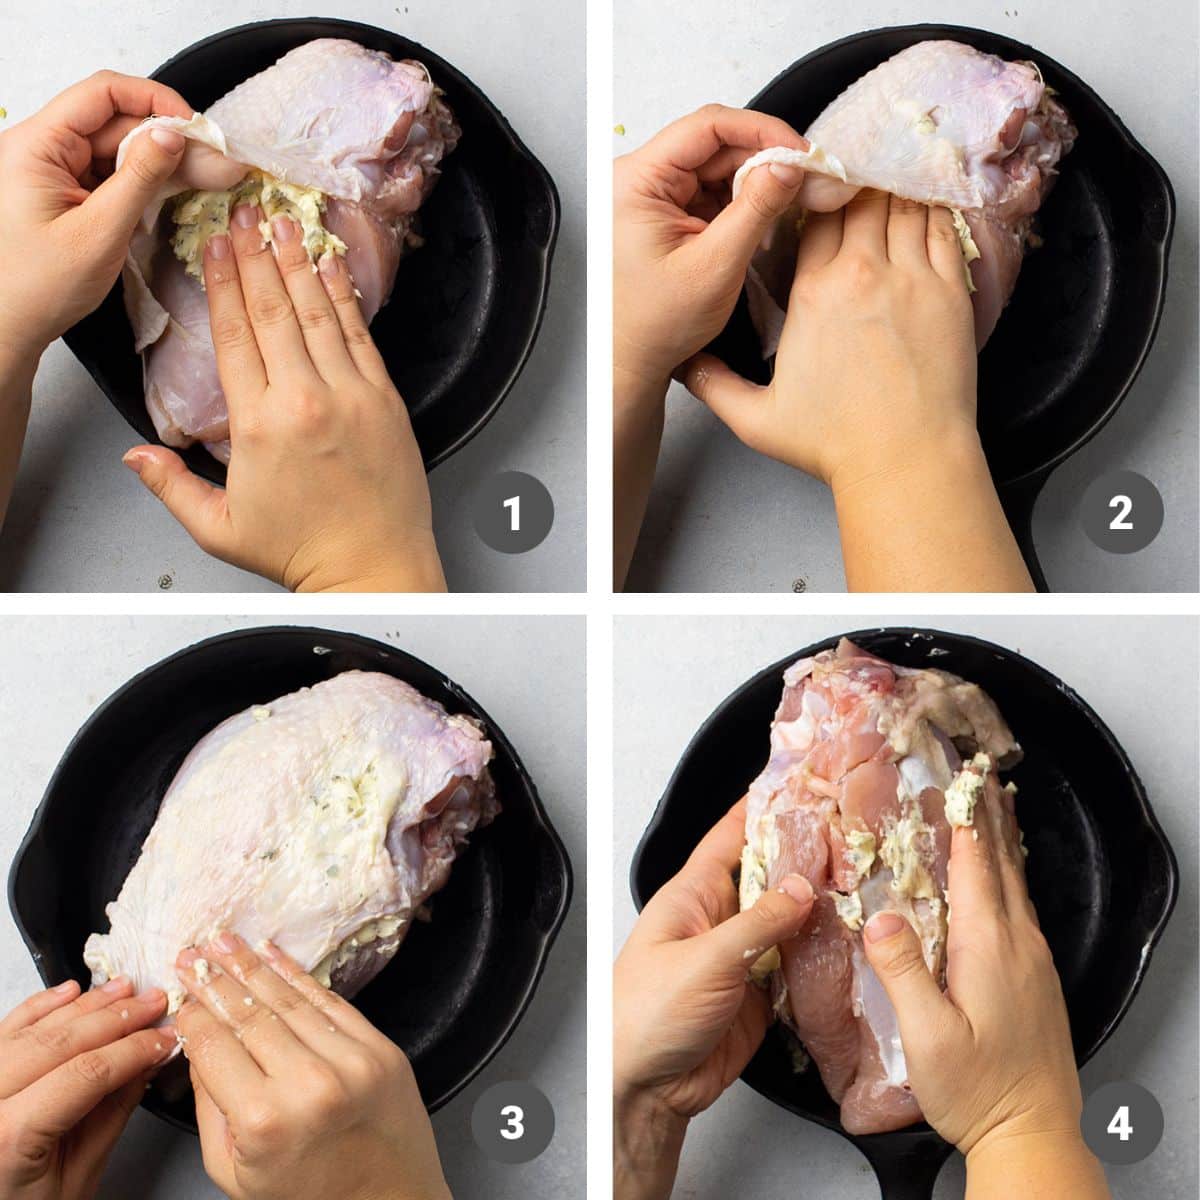
Use clean hands to spread the compound butter all over your turkey breast. Start by taking about ½ of the butter and gently pressing it into the pocket you created earlier, between the skin and the meat. Try to be gentle here so as not to tear the skin - you want it to trap the butter inside to keep the turkey nice and moist!
Once most of the butter mixture is inside the pocket, gently press down from the top to smooth it out into a relatively even layer. Spread the remaining butter over the entire surface of the turkey breast, focusing on building a thick layer on top of the skin.
Wash your hands well, and then transfer the cast iron skillet to the hot oven.
Pro tip: As soon as you get the turkey into the oven, clean and sanitize any surfaces you used (like fridge shelves, sinks, countertops, etc) before you continue cooking the rest of your menu! Cleaning and sanitizing as you go is an important food safety step.
For best results, baste the turkey
You can skip this step if you have a lot going on, but basting is the key to a crispy, golden brown skin. We recommend basting the turkey every 15-30 minutes, or as you have time.
You don't need a fancy turkey baster here - just grab a spoon and gently spoon the melted butter and turkey drippings from the bottom of the skillet over the turkey breast! Use an oven mitt to hold the skillet at a slight angle to make it easier to grab the turkey juices for basting.
Cook turkey to 165° Fahrenheit
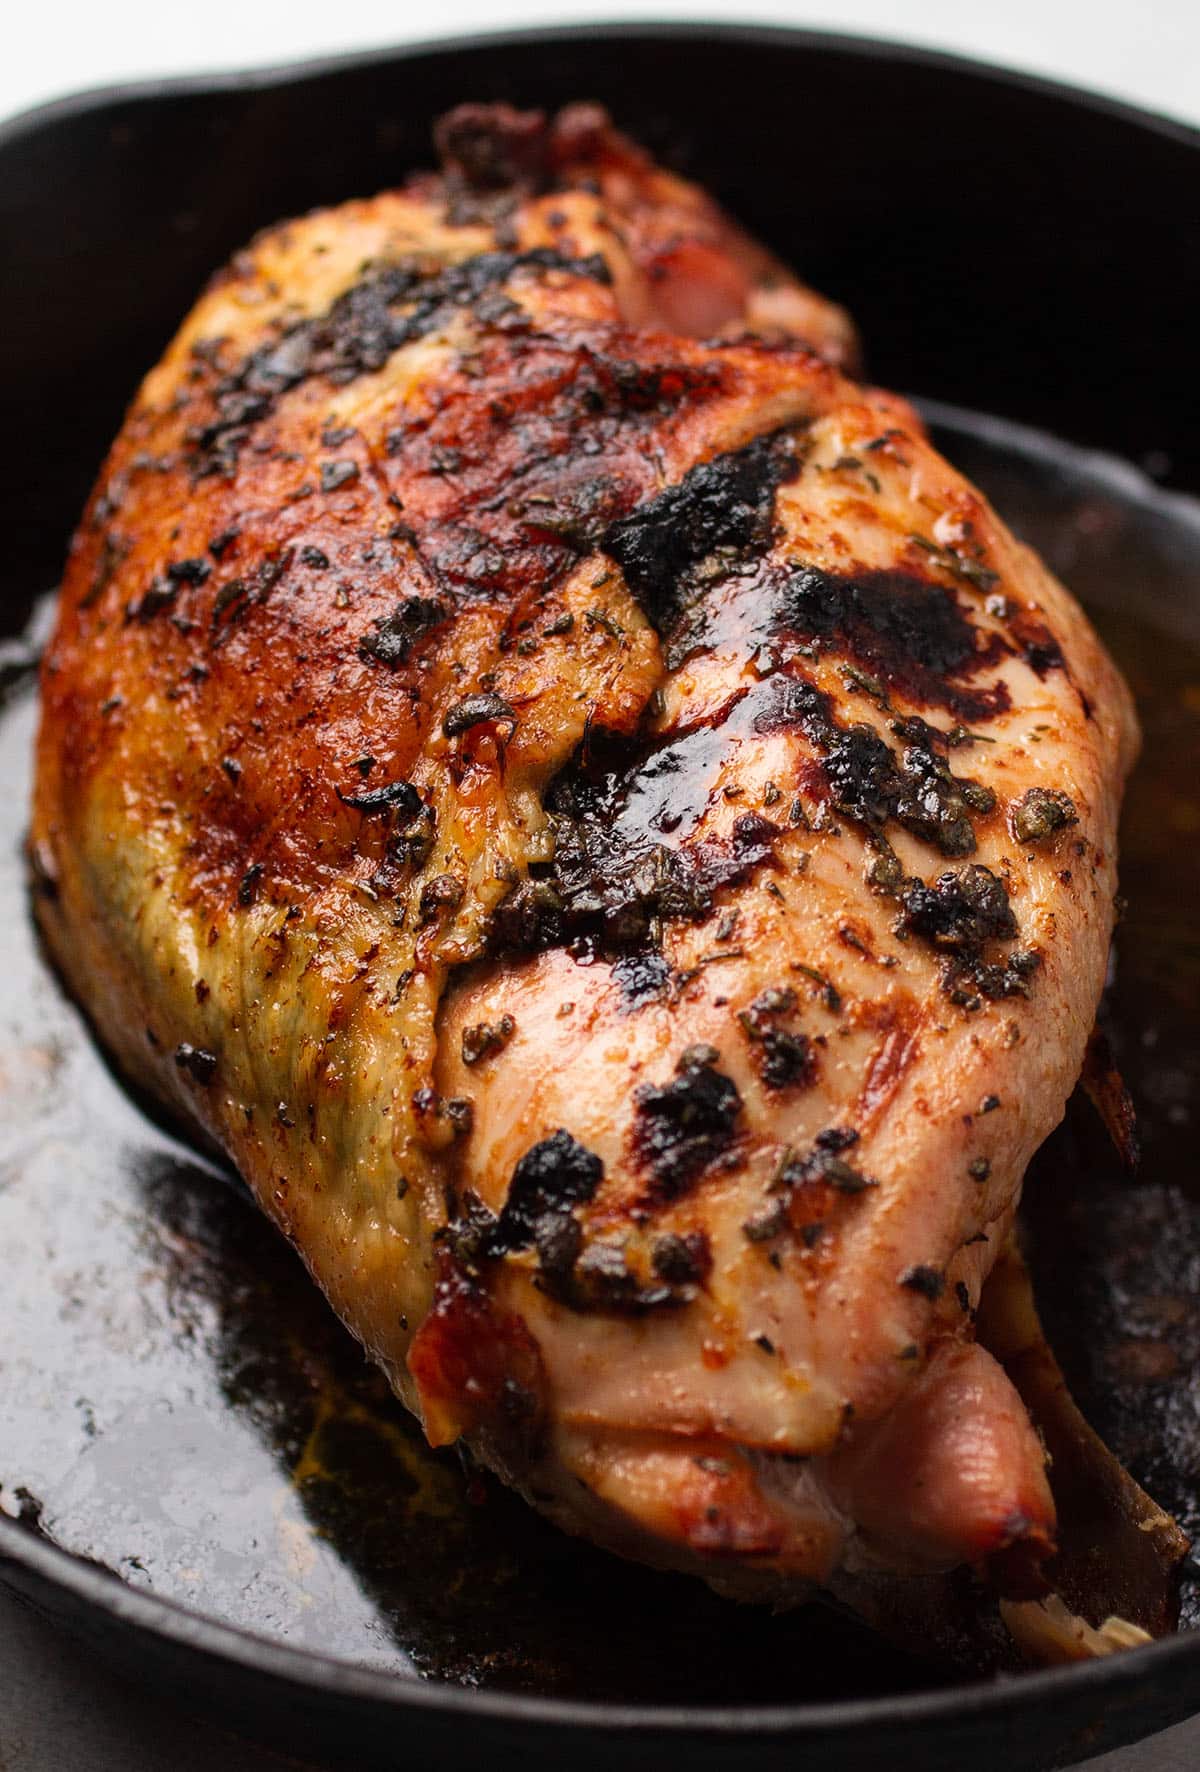
Your turkey breast is "done" when it reaches a food-safe internal temperature of at least 165° Fahrenheit (per the USDA guidelines). Check the temperature by inserting an instant-read meat thermometer into the thickest part of the turkey breast.
Once cooked, rest the turkey
When your turkey is done, transfer it to a cutting board and let it rest for 15-30 minutes (make the gravy and finish any last minute dinner prep while the turkey rests!) This lets the juices settle a bit, which keeps the turkey moist and makes it easier to cut.
A long side note on brining turkey
We went back and forth on whether to do a wet brine or a dry brine for this recipe. We ultimately settled on a wet brine because that little bit of honey and a few herb sprigs just work really beautifully here. And also, because we really don't mind wet brining!
Still, a wet brine requires a bit of extra attention. Whenever you're working with poultry - and especially if you're brining raw poultry - it's important to follow proper food safety guidelines, including:
- Wash your hands immediately before and after handling raw turkey.
- Sanitize surfaces (like the sink or refrigerator shelf) that have been in close proximity to the raw meat.
- Place dishes and utensils that have touched raw turkey into the dishwasher immediately (or clean and sanitize them in a clean sink - don't leave them on the counter!)
- Always place raw meat on the lowest shelf in the fridge, where it can't drip or spill on other things (we also recommend placing a rimmed baking sheet under the brining container to prevent spills).
ALL THAT SAID: If the idea of a wet brine freaks you out, or if you don't want the extra work of managing/disposing of a brine and sanitizing sinks/surfaces, or if those extra steps are just a little too much right now - skip the wet brine and do a dry brine instead.
And if you need to skip the brine entirely? That's ok, too. The turkey will be drier without a brine - so if you do need to skip that step, make sure you get a skin-on turkey breast, really slather it in the compound butter, baste frequently, and add lots of gravy for best results.
A lot of recipes (ours included!) have a lot of *opinions* about how food should be prepped, or cooked, or served - but please remember: The best Thanksgiving dinner is the one that works best for YOU.
About this white wine gravy
Now that the turkey is done (*pats self on back*) it's time to talk GRAVY!
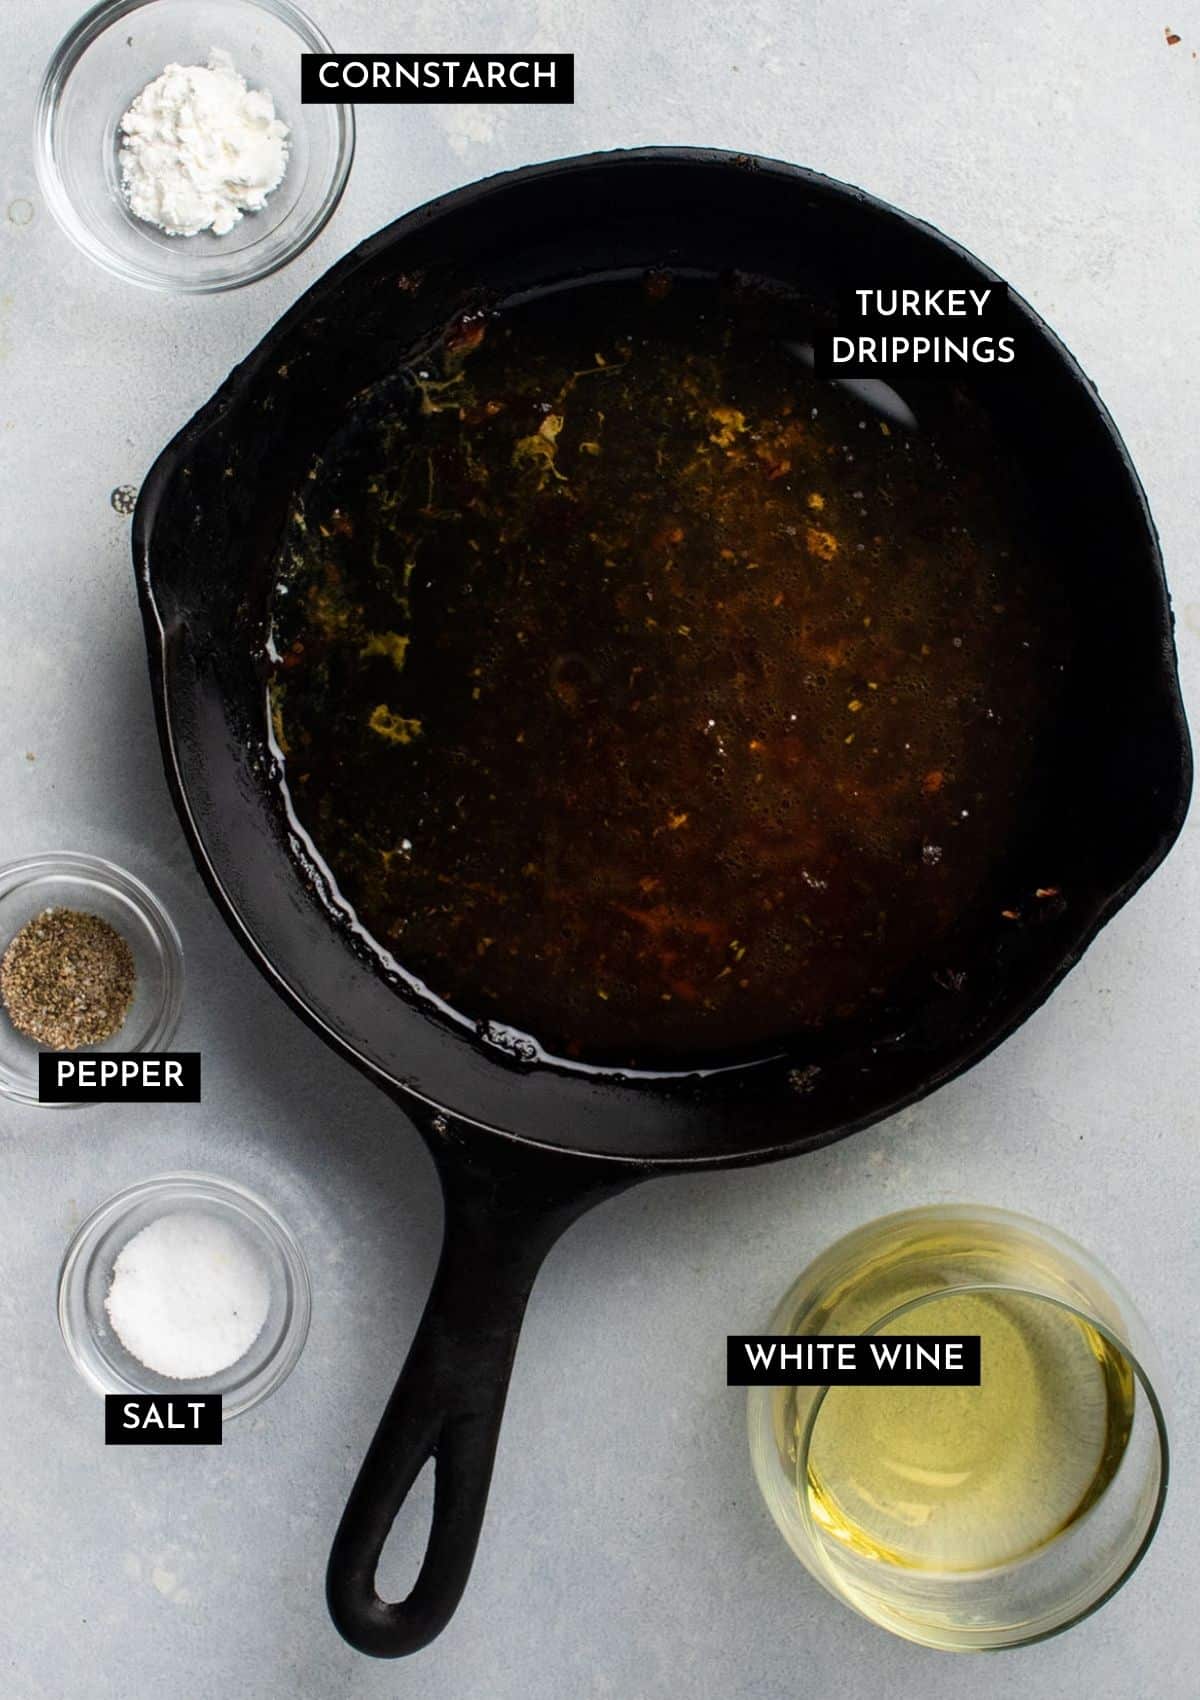
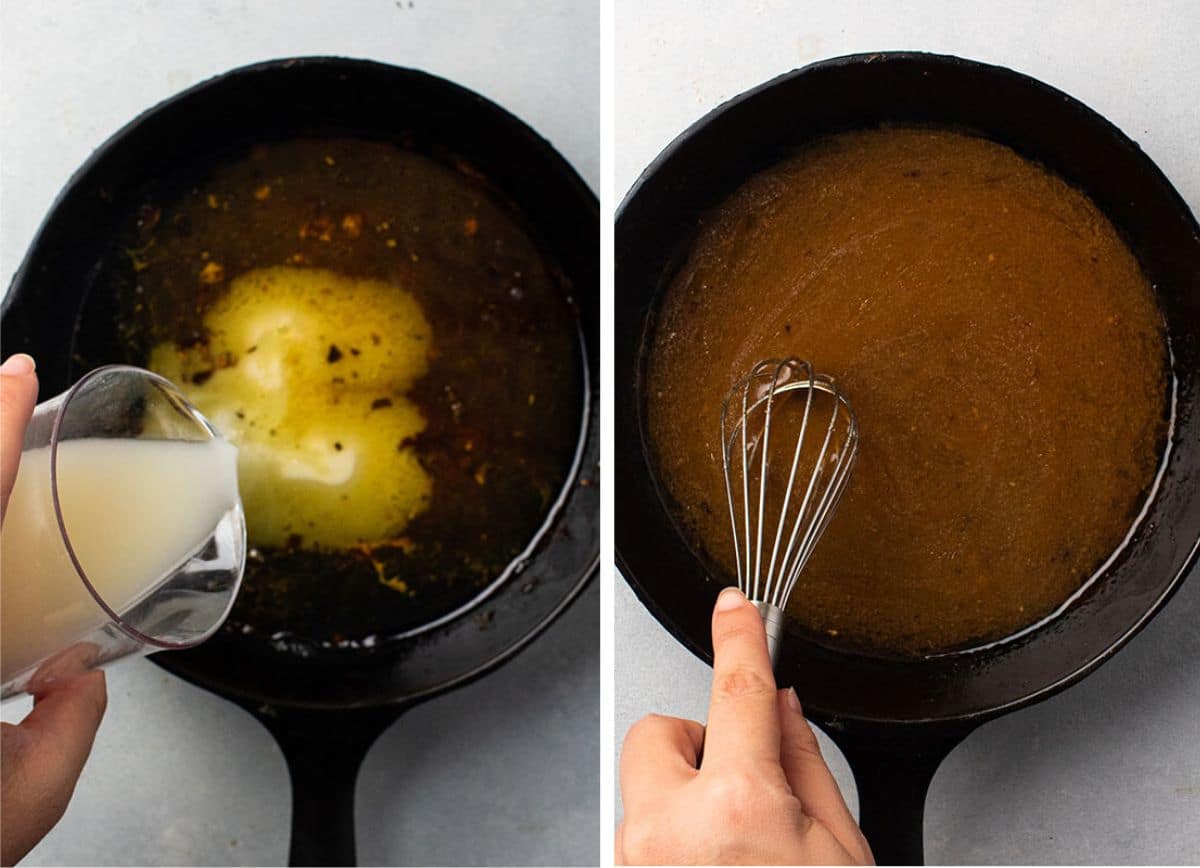
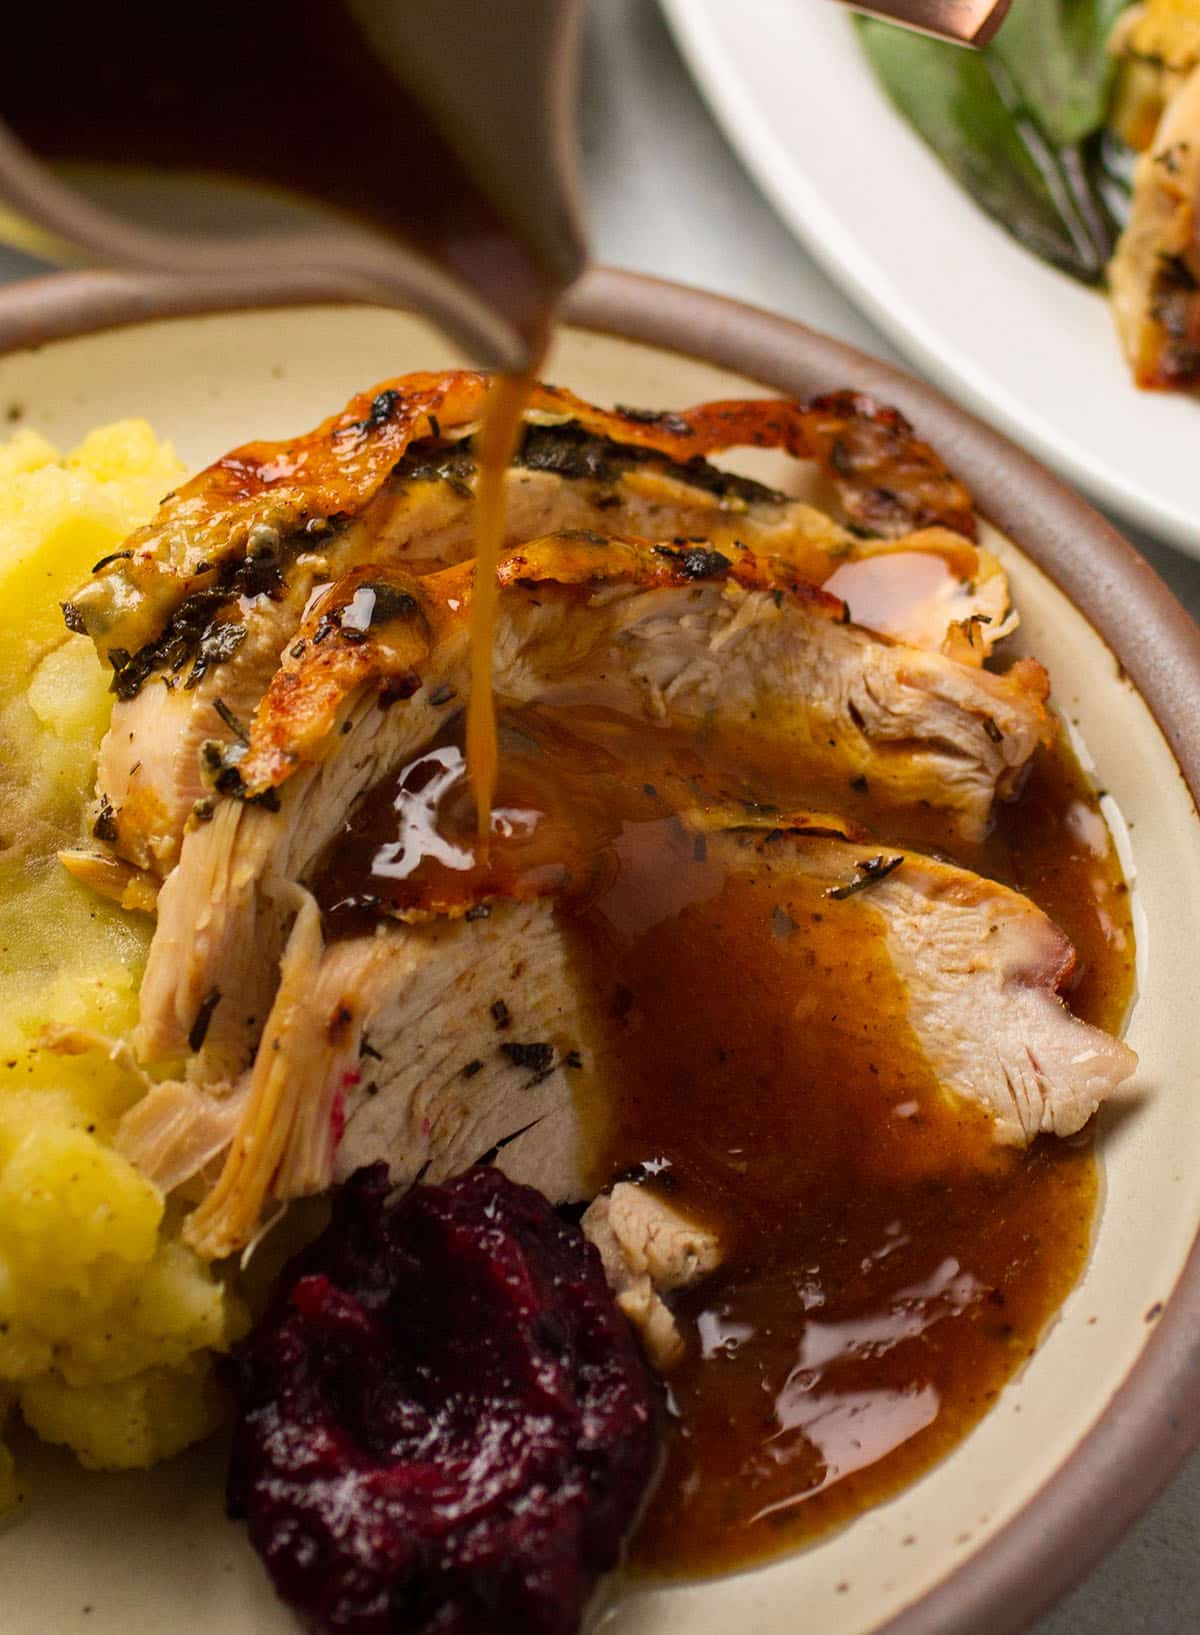
We're keeping it SUPER simple with this gravy: The turkey drippings and leftover butter in the cast iron skillet will form the base. To that, we'll add a bit of white wine (for flavor and to increase the overall amount of gravy) and a quick cornstarch slurry (to thicken it up). Whisk everything together over low heat on the stovetop until it's thickened.
Because our turkey drippings consist mostly of leftover melted butter, this gravy can take a minute to come together. If it looks like it's separating at first, don't worry - just keep whisking!
Once the gravy is thickened, transfer it to a gravy boat or measuring cup with a spout for easy pouring. Give it a good stir again before serving to re-incorporate any melted butter that's risen to the top.
This is a thinner, darker turkey gravy than some folks might be used to. If you'd like a lighter, creamier, more traditional gravy, follow this tutorial on making turkey gravy from drippings!
Slicing the turkey
When the gravy is made, the turkey is rested, and the Thanksgiving sides are ready to go, it's time to slice!
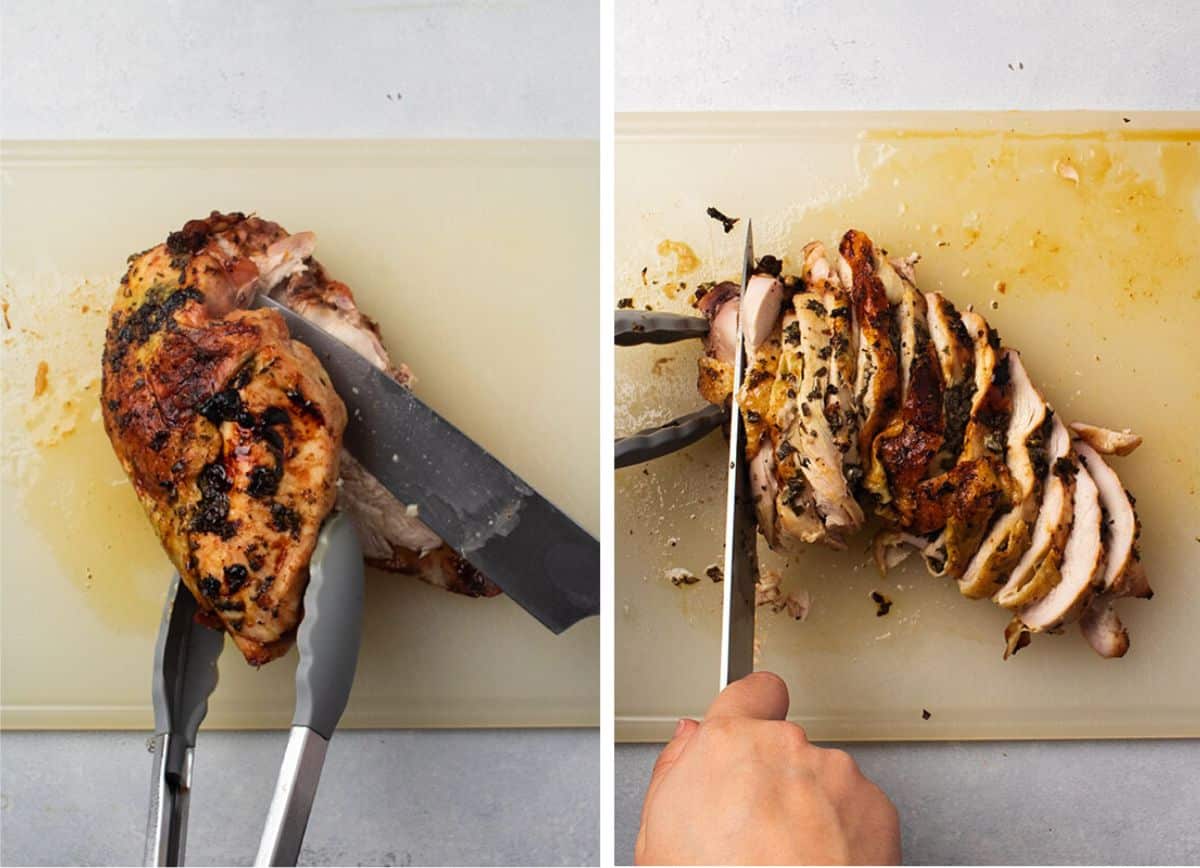
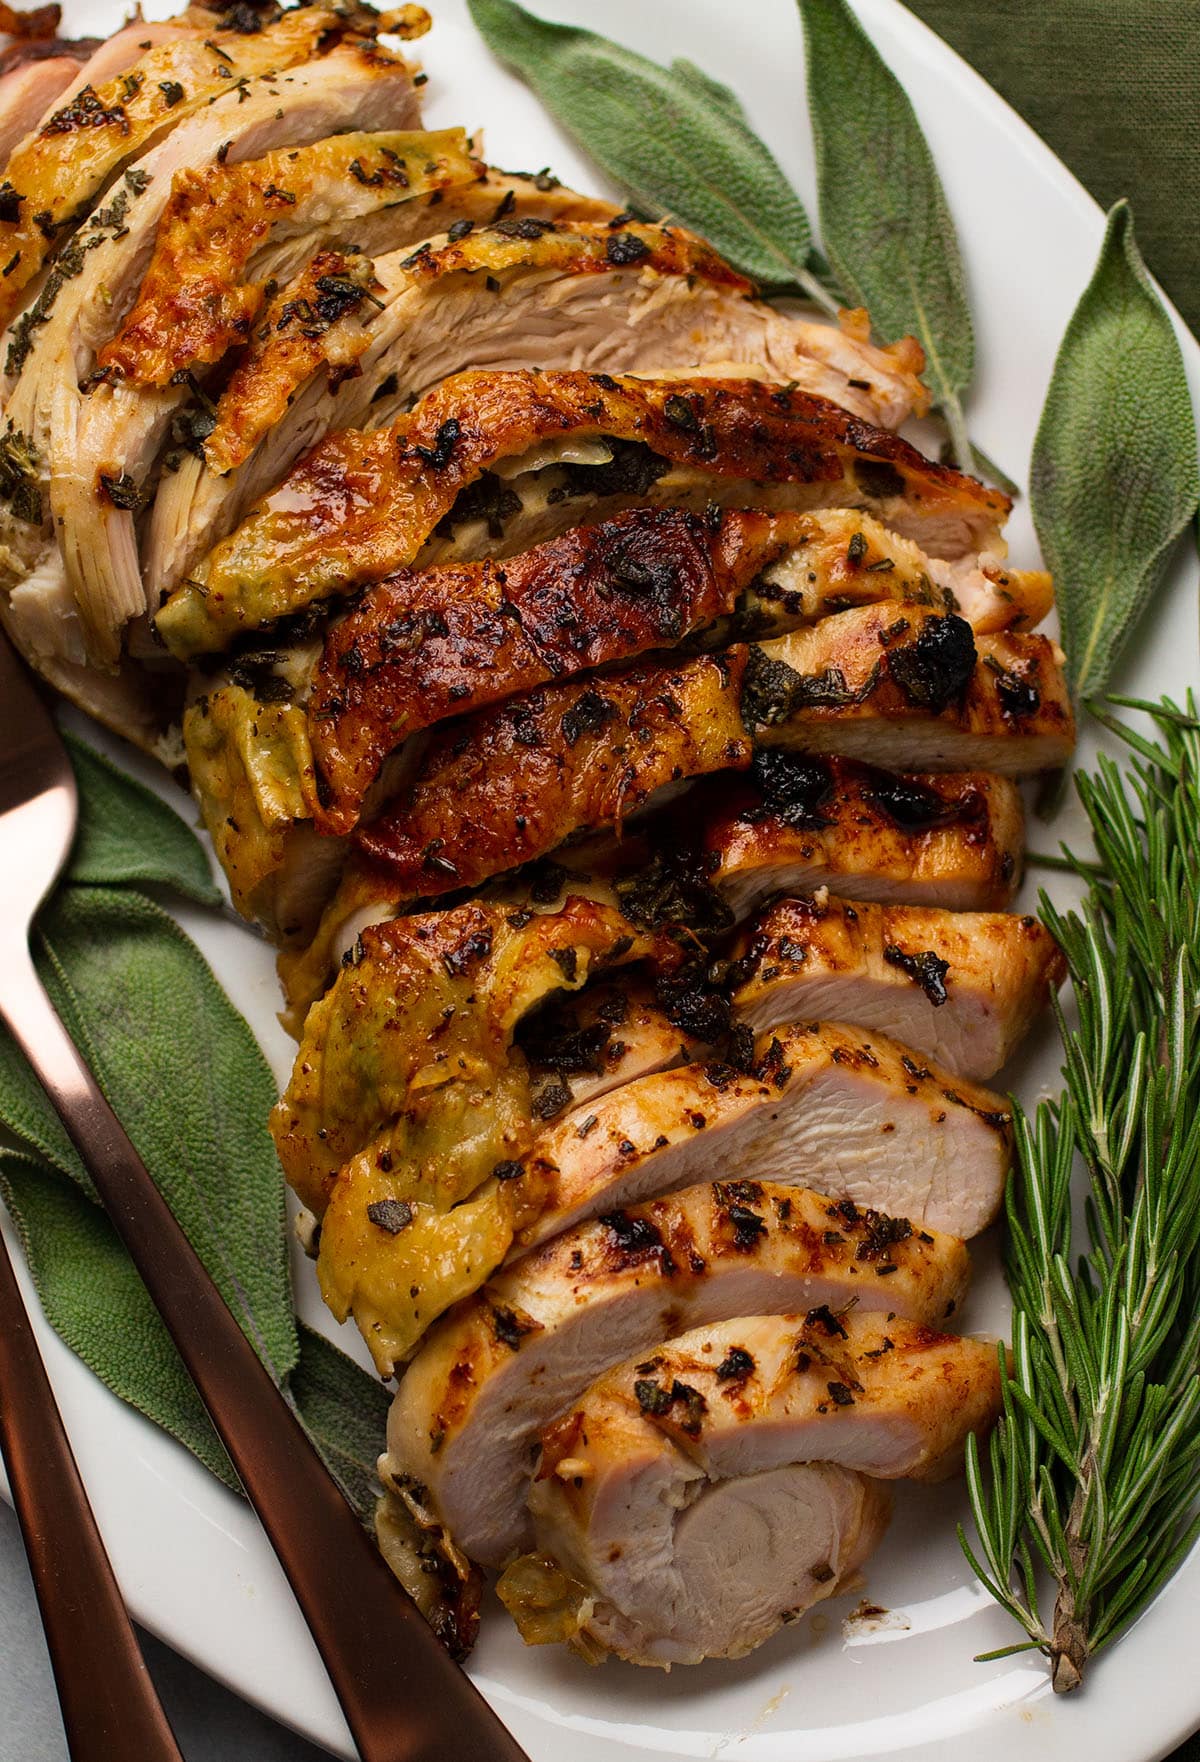
Use tongs to hold the turkey breast in place (it will still be hot!) and use a sharp knife to gently cut the turkey breast off the bone, then slice it and transfer it to your serving platter. (Save the breast bone to make turkey stock later!)
Riffs and Substitutions
Despite the 2000+ words we've already written for this article, this turkey breast recipe is actually deceptively simple - and it's pretty forgiving if you want to try other flavor combinations! A few of our favorite tweaks:
- Use a roux instead of a cornstarch slurry for the gravy (we love this recipe for creamy gravy from turkey drippings!) You can also make the roux ahead of time if you like. You can also use chicken or turkey stock instead of white wine in the gravy here if you prefer.
- Dry brine your turkey breast. If a wet brine feels like too much work, skip it and do a dry brine instead.
- Mix up the herbs in your compound butter. We used rosemary and sage in these photos, but this recipe is also good with thyme, oregano, and/or parsley.
- Use dried herbs instead of fresh. If you're substituting dried herbs, use ⅓ as much as you would if using fresh - for example, use one teaspoon of dried herbs for every one Tablespoon of fresh herbs called for in a recipe.
- Add roasted garlic to the compound butter. This recipe is great with some roasted garlic in the mix!
- Roast the turkey with some aromatics for extra flavor. Place some roughly chopped onions, celery, carrots, or whole garlic cloves under the turkey breast when you put it in the oven for extra flavor and a beautiful aroma. Once the turkey is roasted, compost or discard the extra veggies or save them to make turkey stock.
A few FAQs
No - this compound butter is also excellent for roasting a whole chicken!
If you have other dishes (like our pumpernickel stuffing or salted dinner rolls) that require a higher oven temperature, you can absolutely roast this turkey in a hotter oven! It will do just fine at 350°, 375°, or even 400° Fahrenheit. Just remember that a hotter oven will cook the turkey more quickly and can dry it out more - so keep an eye on it, baste often, and check the temperature frequently so you can pull it out right when it's done. If you use a hotter oven and the turkey skin starts to brown too quickly, tent it with foil while it finishes cooking to prevent burning. We do not recommend roasting turkey at a temperature below 325° Fahrenheit, per USDA recommendations.
Yes! We love a cast iron skillet here because we can transfer it right to the stovetop when it's time to make the gravy, but you can roast the turkey in any oven-safe baking dish or casserole dish you like. When it's time to make the gravy, carefully pour any pan drippings into a new skillet, then make the gravy on the stovetop as directed.
Yes - we recommend using Diamond Crystal Kosher Salt (colloquially known as the "least salty salt") in this recipe for best results. If you are using Morton Kosher salt instead, reduce the amount of salt in the brine to ⅓ cup. If you need to use regular table salt or iodized salt, reduce the amount of salt in the brine to ¼ cup.
As written, this recipe makes about 1 ⅓ cups of gravy. If you'd like more gravy, add a cup of chicken or turkey stock and double the cornstarch slurry in this recipe.
Add it to made-for-leftovers recipes like our turkey pie with mashed potatoes or a leftover turkey frittata, or add leftover diced turkey to sandwiches, soups, skillet pot pie, or a creamy mushroom lasagna. (For more ideas, check out our collection of day after Thanksgiving recipes!)
Our favorite Thanksgiving sides
Pair this turkey breast with some easy, cozy side dishes for a full Thanksgiving meal! A few of our favorites:
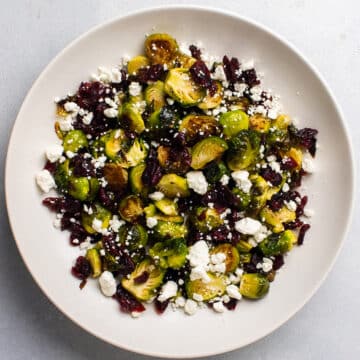
- Asparagus with blue cheese (and bacon!) or brussels sprouts with cranberry and goat cheese
- A quick apple spinach salad with maple dressing
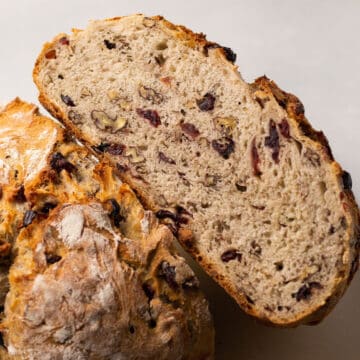
- Crusty cranberry and pecan bread
- Classic mashed potatoes (keep it simple or try our smoked gouda potatoes or cheddar Greek yogurt potatoes! And be sure to check out Mashed Potatoes 101 for plenty of tips on getting the perfect fluffy, creamy homemade potatoes).
- Thanksgiving classics like this pumpernickel stuffing, cauliflower green bean casserole, or creamed corn
📖 Recipe

Herb Roasted Turkey Breast
- Prep Time: 30 minutes
- Inactive Time: 6 hours
- Cook Time: 2 hours
- Total Time: 8 hours 30 minutes
- Yield: Serves 2-4 1x
- Category: Thanksgiving
- Cuisine: American
Description
This easy herb roasted turkey breast is perfect for a nice weekend dinner or a small Thanksgiving feast!
Ingredients
For the brine:
- 1 ½ cups water
- 2 Tablespoons honey
- 1 fresh rosemary sprig
- 1 fresh sage sprig
- ½ cup Diamond Crystal Kosher Salt
- 6 cups cold water
To roast the turkey:
- 2 - 2 ½ pound split turkey breast (bone in and skin on)
- 1 stick unsalted butter (½ cup), softened to room temperature
- 3 Tablespoons finely chopped fresh herbs (we used a mix of sage and rosemary)
- Kosher salt to taste
For the gravy:
- Turkey drippings (left over once the turkey is roasted)
- ⅓ cup dry white wine (you can also use chicken or turkey stock instead)
- 1 teaspoon cornstarch
- Salt and pepper to taste
Instructions
Make the brine (in the morning)
- Put 1 ½ cups water in a small saucepan with honey, rosemary, sage, and salt. Bring to a simmer over medium-low heat and cook until all salt has dissolved, about 3 minutes. Turn off the heat and let this mixture cool completely before proceeding.
- Clear a spot for the turkey on the bottom shelf of your fridge. Make sure you have enough room to accommodate a rimmed baking sheet with the brining container on top.
- Pour salt mixture into a large bowl or pot, then place the pot on top of a rimmed baking sheet (the baking sheet will help catch any spills). Add 6 cups of cold water to dilute the brine. Use an instant read thermometer to verify that the brine is less than 40° Fahrenheit (if it isn’t, place it in the fridge to chill until it reaches 40° F or lower - we want the brine itself to be nice and cold so that the turkey doesn’t sit in the bacteria “danger zone” while it brines).
- Submerge the turkey breast in the cold brine (if necessary, place a small bowl or ramekin on top of the turkey to keep it submerged in the brining liquid). Cover with an airtight cover or a piece of plastic wrap and place in the fridge for 6 hours.
Dry the turkey breast
- Heat oven to 325° Fahrenheit.
- Remove turkey breast from brine and pat dry with paper towels (do not rinse the turkey breast - just pat it dry!)
- Gently pull the turkey skin away from the turkey breast, leaving the far edges still attached, to create a large pocket (be careful not to rip the skin). Place turkey breast in a large cast iron skillet, wash your hands well, then place the skillet in the fridge (uncovered) until you’re ready to bake.
- Discard the leftover brining liquid and herb sprigs. Place any brining dishes into the dishwasher, clean and sanitize any counter or sink surfaces that were near the brine, and wash your hands thoroughly.
Make the compound butter & roast the turkey
- In a small mixing bowl, stir together room temperature butter, chopped herbs, and a generous pinch of kosher salt until you have a smooth mixture.
- Remove the turkey breast from the fridge. Using clean hands, grab a little more than half of the compound butter and gently press it into the turkey skin pocket you created, doing your best to form a thick, even layer of butter between the skin and the meat. Spread remaining butter over the rest of the turkey breast’s outer surface, coating all sides.
- Return the turkey breast to the cast iron skillet, wash your hands thoroughly, and then place the skillet in the hot oven. Bake at 325° for 1 ½ to 2 hours, until a meat thermometer inserted into the thickest part of the turkey breast reads 165° Fahrenheit. We recommend basting the turkey every 30 minutes as it cooks to keep it moist and help achieve a crispy, golden brown skin. (You can use a turkey baster if you like, but you don’t need one - just use a large spoon or ladle to scoop melted butter from the bottom of the skillet and pour it back over the top of the turkey a few times every half hour).
- While the turkey roasts, place any dishes into the dishwasher (or wash them well by hand), then clean and disinfect any surfaces that had close contact with raw turkey (including the refrigerator shelf where you kept it earlier).
Rest the turkey
- When an instant read thermometer inserted into the thickest part of the turkey breast reads 165° F, the turkey is done! Use oven mitts to pull the skillet out of the oven.
- Use tongs to carefully move the cooked turkey breast to a large cutting board. Let the turkey rest for 15-30 minutes to allow the juices to redistribute. In the meantime, make the gravy and finish any last minute cooking tasks you have!
Make the gravy
- Place the skillet with all of the turkey drippings on the stove over medium heat (use oven mitts here - the skillet is still going to be very hot!)
- Bring the turkey drippings to a low simmer, then add about ⅔ of the white wine. Cook, whisking occasionally, for 1-2 minutes until the wine has slightly reduced.
- Whisk cornstarch into remaining white wine to form a cornstarch slurry. Pour this slurry into the skillet gravy and whisk constantly for 1-2 minutes until gravy has thickened. Turn off the heat, then pour gravy into a gravy boat or measuring cup with a spout for easy serving. Note: As the gravy settles, some butter or turkey fat may rise to the top. Skim any excess fat off the top of the gravy with a spoon, and give it a good stir just before serving to reincorporate any butter that’s separated!
Slice and serve!
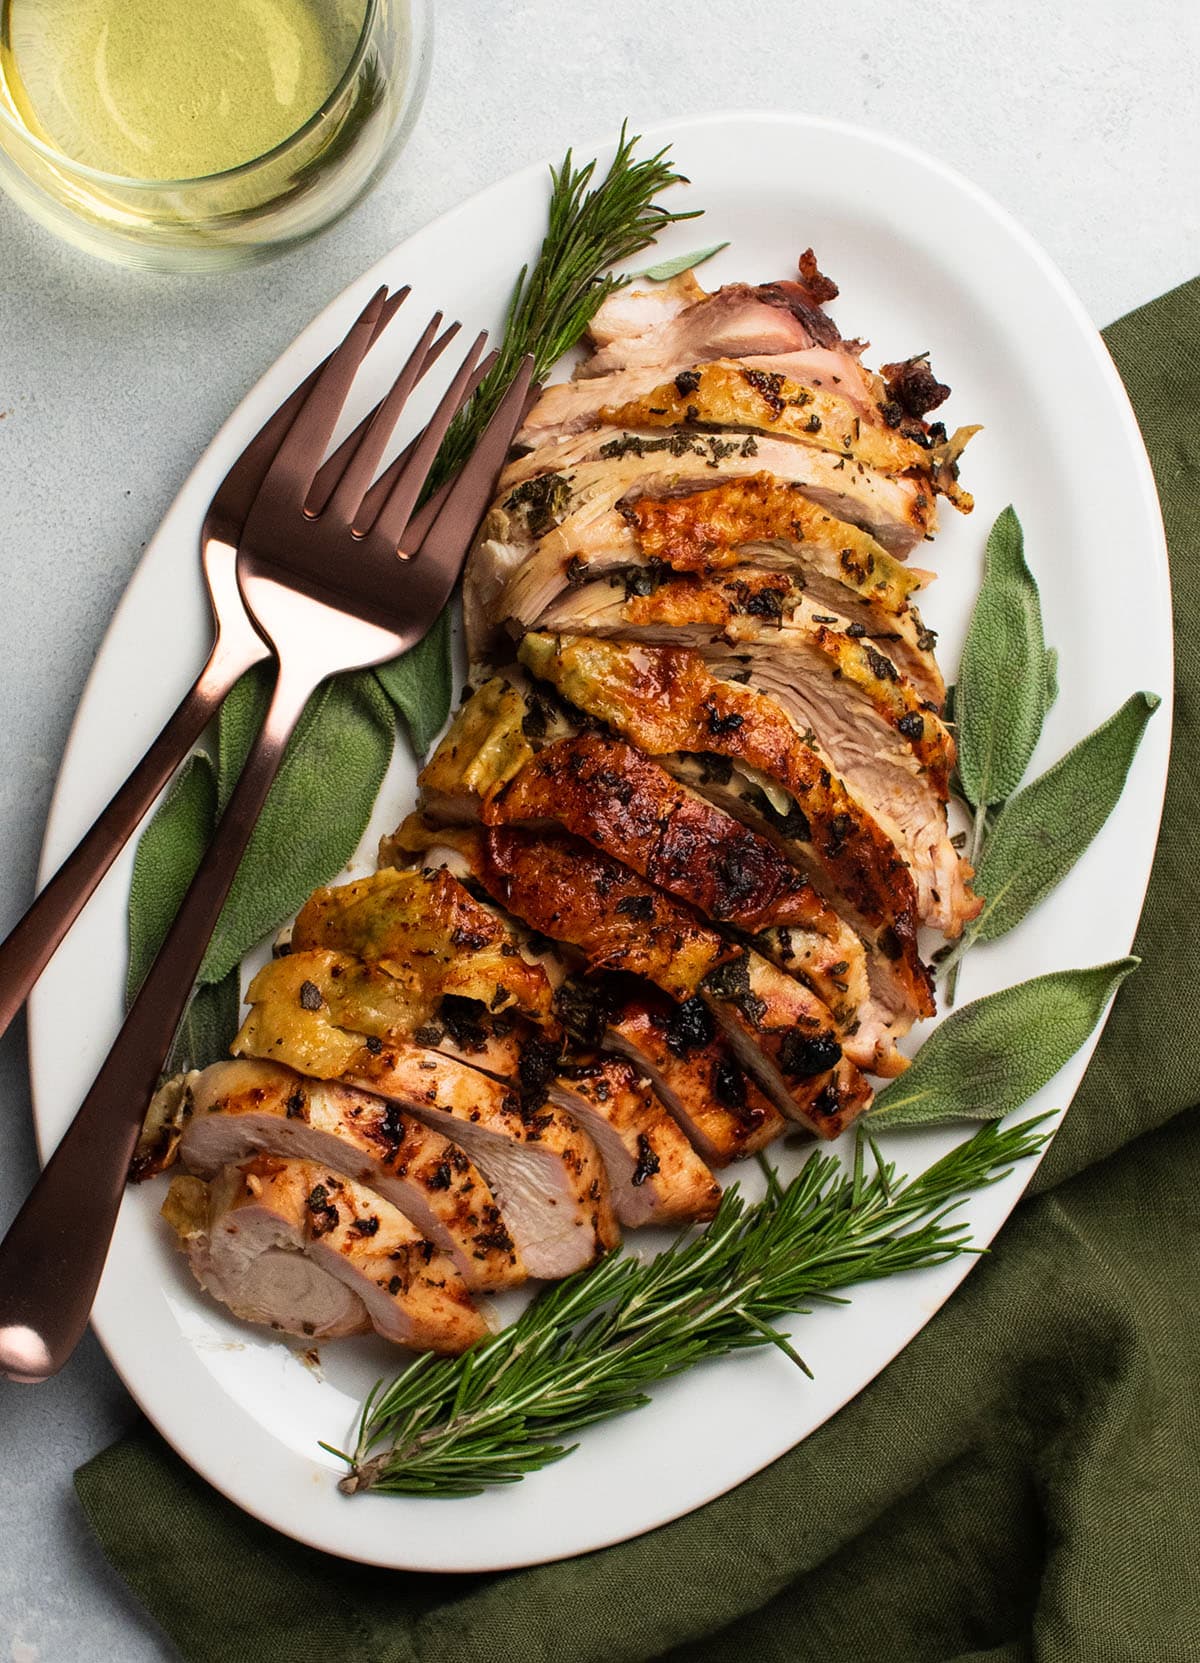
- Use tongs and a sharp knife to remove the bone from the turkey breast. Slice and serve immediately with your favorite side dishes!
- Food safety tip: The USDA recommends leaving cooked food out for no longer than 2 hours. Be sure to pack up and refrigerate any leftovers you have within this two hour window!
Notes
Please read the post above in its entirety before you start cooking - we have a TON of tips and best practices that will help you roast an amazing turkey breast!
The brand of salt you use is important! Every brand of salt is a little different: In this brine, we’re using Diamond Crystal Kosher Salt (our favorite brand of salt, colloquially known as “the least salty salt”). If you use a different brand or style of salt, the flavor will vary WIDELY. If you need to use Morton Kosher Salt, reduce the salt in the brine to ⅓ cup. If you need to use regular table salt, use only ¼ cup of salt in the brine here.
What cut of turkey should I get? Look for a bone-in, skin-on, single turkey breast (sometimes called a “split” turkey breast). If you can’t find a bone-in turkey breast, that’s ok - but the skin makes a really big difference, so try your best to get at least skin-on if you can! This recipe was developed for a 2 - 2 ½ pound turkey breast; if you use a smaller or larger turkey breast (or if you use a different cut of meat), you will likely need to adjust the total cooking time.
A note about brining. We used a classic, simple wet brine for the turkey in this recipe in order to season the turkey breast all the way through. But we recognize a wet brine adds a layer of complexity that not everyone is looking for at Thanksgiving! If the idea of a wet brine makes you nervous, or if it just feels like too much to deal with, skip the wet brine and use a simple dry brine instead. We don’t recommend skipping the brining process entirely: in our testing, a turkey breast made with no brining at all was significantly drier than its dry- or wet-brined counterparts. That said, if you just don’t have the time or the bandwidth to do a brine, it’s ok! Just be sure to baste the turkey breast frequently and have lots of gravy on hand.
Make-Ahead tips. Make the brining liquid 1-2 days ahead of time and store it in an airtight container in the fridge (without the turkey) until Thanksgiving morning. Submerge the turkey breast in the brining liquid on Thanksgiving morning when you start cooking, then proceed normally! You can also make the compound butter 1-2 days ahead of time: Store it in an airtight container in the fridge, and move it to the counter on Thanksgiving morning so it can soften up before you need to roast the turkey.
Food safety reminders! When working with raw poultry, it’s important to practice good food safety techniques to avoid cross-contamination. Wash your hands thoroughly before and after handling raw turkey and brining liquid, transfer used dishes to the dishwasher immediately (or wash them immediately if you don’t have a dishwasher), and clean and sanitize surfaces (including the countertop, sink, and refrigerator shelf) as you go along. Also, be sure to use a meat thermometer to make sure your turkey reaches a minimum internal temperature of 165° Fahrenheit at the thickest part of the turkey breast.
Substitutions and Additions. Use chicken stock or turkey stock instead of white wine in the gravy. If you’d like a creamier, thicker gravy, use a roux-based technique instead of a cornstarch slurry. Use fresh thyme or oregano in place of some or all of the rosemary and sage in this recipe. Use 1 teaspoon of dried herbs in place of every 1 Tablespoon of fresh herbs if you like. Add roasted garlic or dried garlic powder to the compound butter. Use a dry brine instead of the wet brine in this recipe if you like.
The best Thanksgiving recipes are the recipes that work the best for YOU. We’ve given you a loose blueprint here for what we think is a really delicious turkey breast - but please don’t worry about tackling brand new recipes or complex techniques if it isn’t a good fit for your life or your schedule this year! If a wet brine adds stress to your life, skip it. If you forget the fresh herbs, dried work just fine. What makes food great isn’t the recipe - it’s the company you enjoy it with. Give yourself some grace, allow yourself to relax and enjoy your day, and - if you need any help at all - leave us a comment or shoot us an email. We’re here to help!
Nutrition
- Serving Size:
- Calories: 514
- Sugar: 8.8 g
- Sodium: 15015.7 mg
- Fat: 26.3 g
- Carbohydrates: 10.2 g
- Protein: 54.3 g
- Cholesterol: 190.7 mg
Keywords: thanksgiving, holiday, main dish



Jessie @ Life As A Strawberry
We love this turkey recipe so much! I made it again for our two-person holiday this year (and I still had plenty of leftovers!)
★★★★★