These easy homemade whole wheat hamburger buns use whole wheat flour for a soft, delicious roll that's perfect for cheeseburgers, veggie burgers, or your favorite sandwich! No stand mixer required.
One thing every home cook needs in their back pocket: a great burger bun recipe.
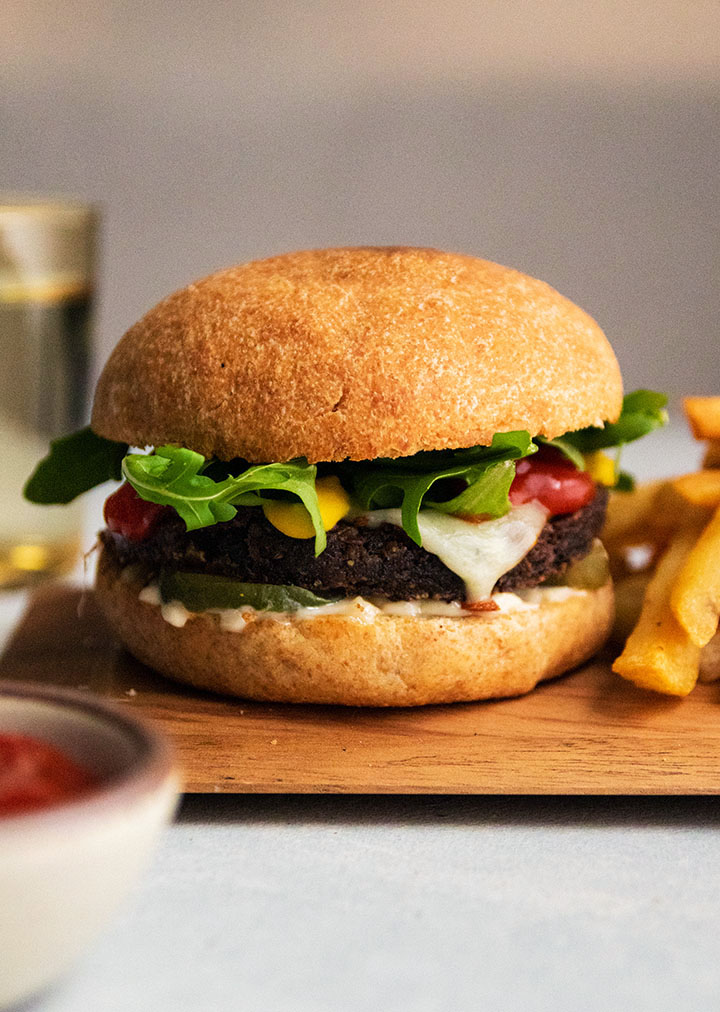
These whole wheat hamburger buns are deceptively easy to make and ready in just a few hours - perfect for your next cookout! We love serving these buns with our favorite Smoked Gouda Beer Burgers, Loaded Bacon Burgers, or a simple black bean burger.
How to make these easy burger buns:
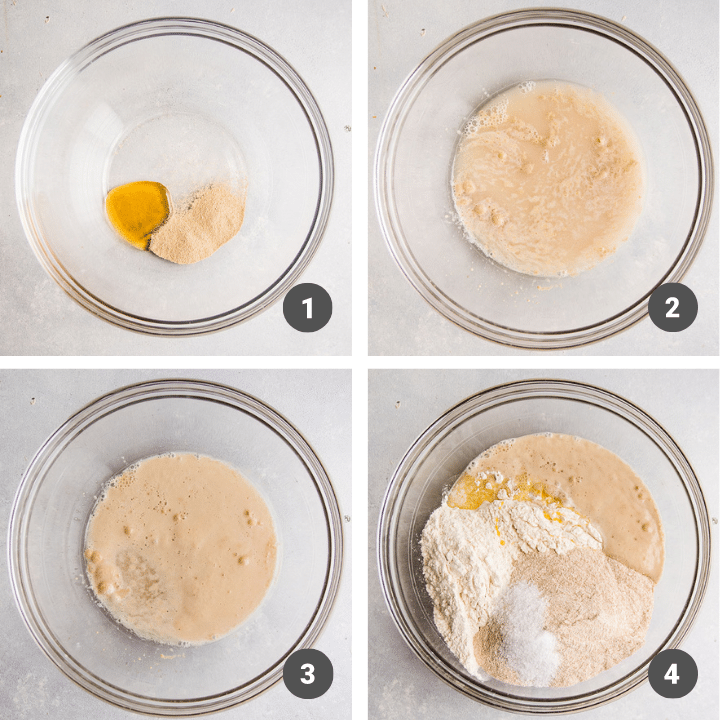
First, make the dough.
We'll proof a bit of active dry yeast in some warm water with a bit of honey, then stir in our flours (pro tip: use a kitchen scale to measure your flour!) along with some salt, a beaten egg, and a bit of melted butter.
You can use a stand mixer here if you have one, but mixing by hand is just fine!
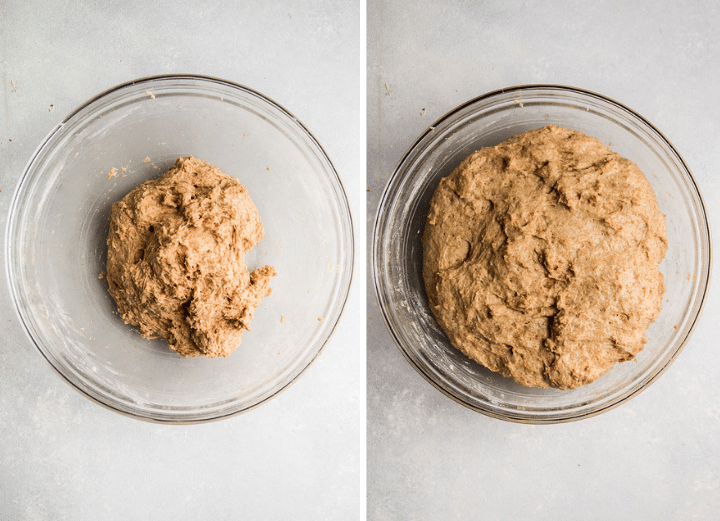
Let the dough rise for an hour.
Once the dough is mixed, cover it with a clean tea towel and let it sit on the counter for about an hour or until it's doubled in size.
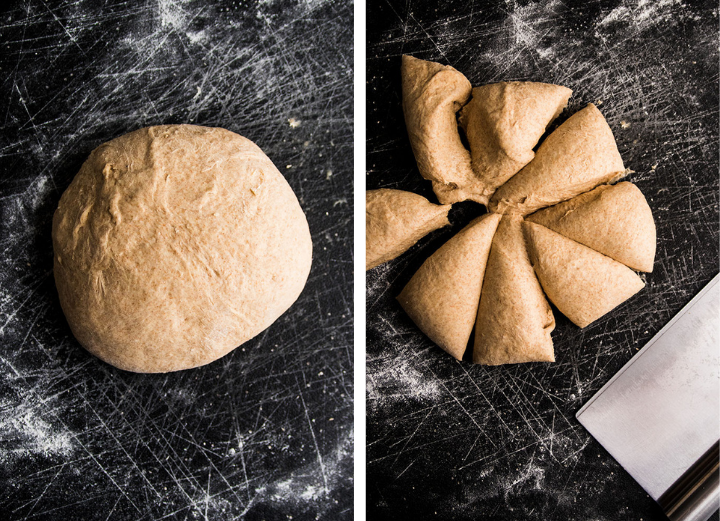
Shape your hamburger rolls.
When the dough has risen, tip it onto a lightly floured cutting board. Knead it a few times to work out any big air pockets, then cut it into equal pieces and roll each piece into a ball.
Place each dough ball onto a baking sheet lined with a nonstick baking mat, then gently press down on the top of each ball to flatten it slightly.
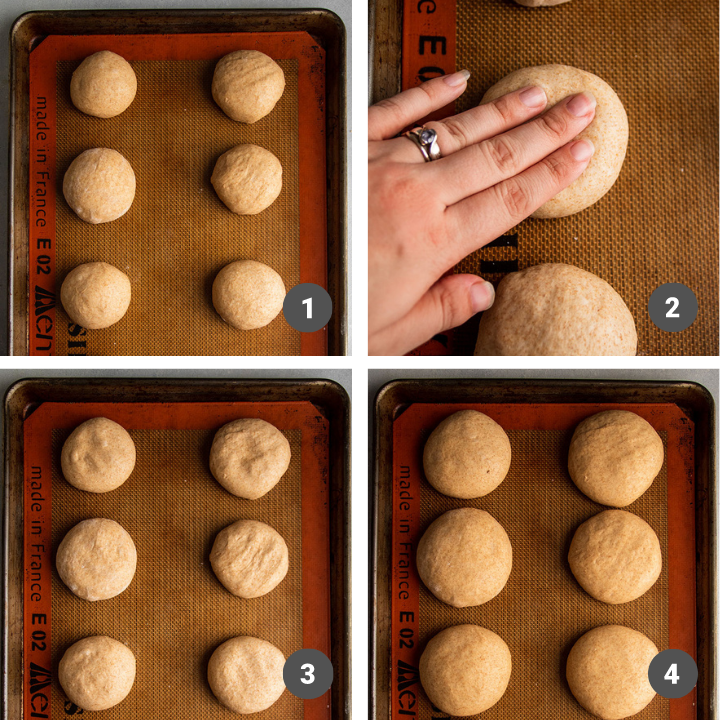
Do one final rise.
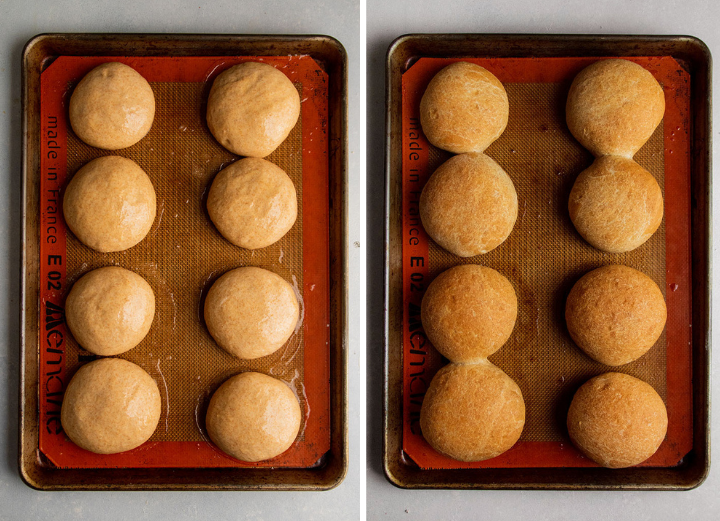
Cover shaped hamburger buns loosely with a tea towel. Let them rise another 30 minutes or so to puff up.
Time to bake!
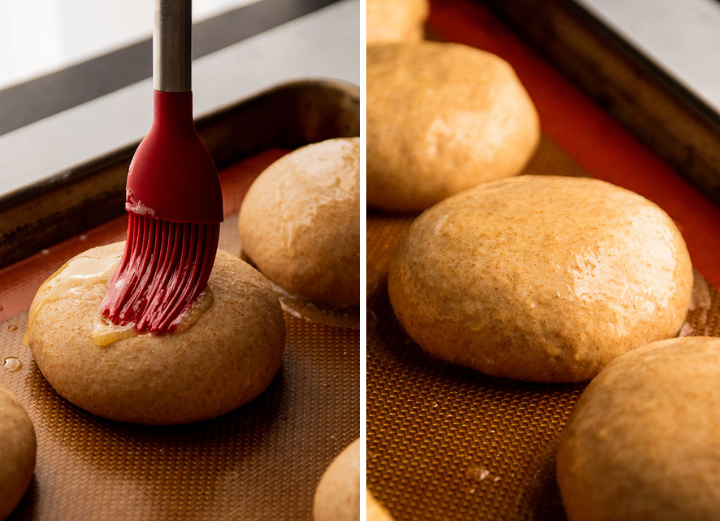
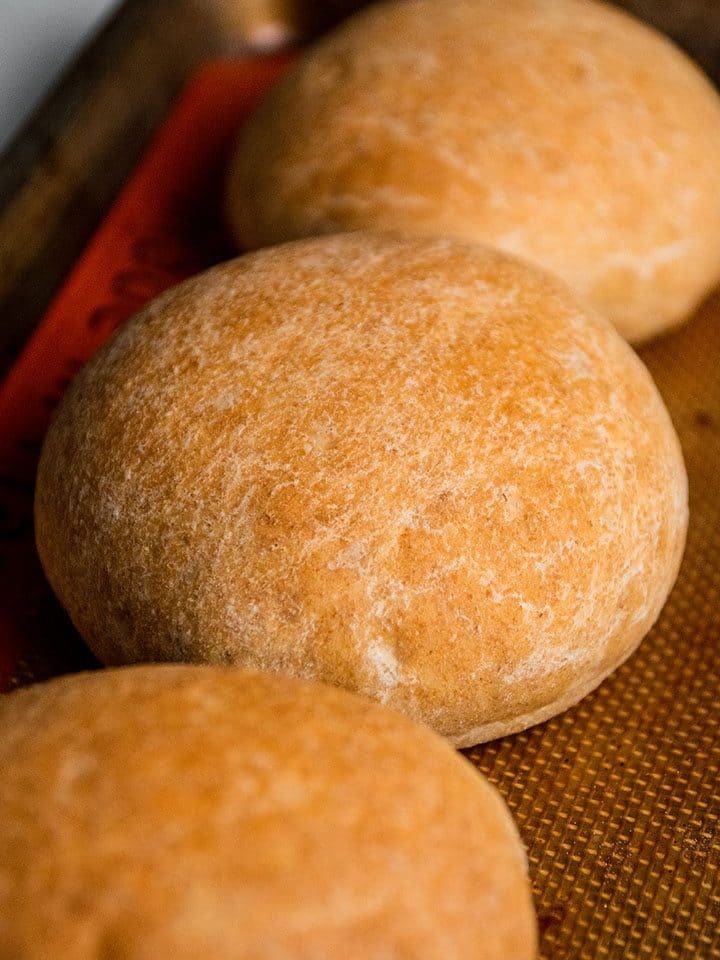
When the final rise is done, brush each bun with a bit of melted butter and bake until golden.
Riffs and substitutions
These easy hamburger buns are fairly forgiving. Some of our favorite adjustments:
- Toppings! Right after you brush the buns with melted butter, sprinkle on some sesame seeds, flakey sea salt, grated cheese, or fresh herbs for a fun twist.
- Add mix-ins to your dough. Fold in some chopped roasted garlic, fresh herbs, or shredded cheese when you mix your dough for an extra pop of flavor.
- Swap the melted butter for a quick egg wash if you'd like a glossier, richer finish.
Our #1 tip for the best homemade hamburger buns:
Use a kitchen scale to measure your flour!
Measuring by weight with a kitchen scale is much more accurate than measuring by volume (with cups). Because each person measures a cup of flour a little bit differently, it's easy to end up using way too much flour in a recipe - which results in dry, dense bread!
When you measure your flour in grams with a kitchen scale, you can measure flour perfectly every time. So if you have a kitchen scale, please use it!
No kitchen scale? Measure your flour with the scoop and level method for best results!
A few burger bun FAQs
Yes! Homemade burger buns freeze very well. We like to pop them in an airtight container (we love using Stasher Bags for this!) and freeze for 2-3 months. Let them defrost on the counter or in the fridge overnight.
Pro tip: Slice the burger buns in half before freezing so you can pop the halves into a toaster or onto a hot grill straight from the freezer if you need to!
We talk a LOT about these differences in our online course, Everyday Artisan Bread! In a nutshell, whole wheat flour has more texture because it uses more pieces of wheat in the milling process. As a result, it absorbs more water than all purpose flour and has sharp pieces that can slice through the gluten networks in your dough more easily - both of which make 100% whole wheat dough more challenging to work with, especially for new bakers. By using a mix of all purpose and whole wheat flours here, we get great whole wheat flavor but still have a dough that's easy to work with. For more about the differences between flours, and to learn how to scale up the amount of whole wheat flour in your recipes successfully, grab our Everyday Artisan Bread course!
Homemade burger buns will last for 2-3 days in an airtight container on the counter. If you won't eat them within a few days, we recommend freezing the burger buns for later.
You can use bread flour in place of some or all of the all purpose flour and whole wheat flour here. We do not recommend using any more wheat flour as it can alter the texture of the hamburger buns. We do not recommend using self-rising flour here.
Yes. If you use instant or rapid rise yeast instead of active dry yeast, reduce the total amount of yeast by 25% for best results (so, use 1 ¾ teaspoons of instant or rapid rise yeast for every 2 ¼ teaspoons of active dry yeast called for). Learn more about various yeast types in this article.
If burger buns come out dense or dry, it's likely because too much flour was added. This often happens when bakers measure by volume, with measuring cups, because it's so easy to pack extra flour into those cups and end up using more than is necessary. For a soft bun, make sure to measure the flour by weight (in grams, with a kitchen scale) to ensure accuracy. If you don't have a kitchen scale, use the scoop and level method to measure your flour (and add it a little at a time until the dough looks just right!)
USDA food safety recommendations suggest leaving perishables like eggs at room temperature for no more than two hours. This dough typically needs only 60 minutes for the first rise and 30 minutes for the second rise, putting us well within this recommended timeframe.
A good rule of thumb is “warm to the touch.” Too-hot water (typically 130-140 degrees F and above) will kill your yeast, but use too-cold water and your yeast will take too long to activate. We usually shoot for a water temperature between 95° and 110° Fahrenheit. You should be able to comfortably hold your hand under water running at about 100 degrees – it should feel quite warm, but not hot. Use a kitchen thermometer for a precise measurement if you like!
📖 Recipe

Whole Wheat Hamburger Buns
- Prep Time: 20 minutes
- Inactive Time: 1 hour 30 minutes
- Cook Time: 18 minutes
- Total Time: 2 hours 8 minutes
- Yield: 8 buns
- Category: Bread
- Cuisine: American
- Diet: Vegetarian
Description
These easy homemade whole wheat hamburger buns are perfect for summer grilling!
Ingredients
For the dough:
- 9 grams active dry yeast (2 ¼ teaspoons, or 1 packet)
- 12 grams honey (1 Tablespoon)
- 240 grams warm water (about 1 cup)
- 200g All-Purpose Flour (about 1 ⅔ cups)
- 200g Whole Wheat Flour (about 1 ½ cups)
- 9 grams kosher salt (about 1 ½ teaspoons)
- 1 large egg, lightly beaten
- 2 Tablespoons unsalted butter, melted
For baking:
- 2 Tablespoons unsalted butter, melted
- 2 Tablespoons sesame seeds (optional, for topping)
Instructions
MIX THE DOUGH AND FIRST RISE (1 HOUR)
- Stir yeast, honey, and warm water together in a large mixing bowl (you could also use a stand mixer fitted with a dough hook). Let stand for 5 minutes until the yeast is active and the mixture is foamy.
- Add all purpose flour, whole wheat flour, kosher salt, egg, and melted butter to the yeast mixture. Use a wooden spoon or a sturdy spatula to stir everything together until no dry bits of flour remain. If it gets tough to stir the dough with a spoon, use clean hands to knead the dough together until it’s well mixed.
Note: You can continue to knead this dough by hand (5-10 minutes) or with the dough hook on a stand mixer (3-5 minutes) until it’s smooth and elastic if you like; this will develop more gluten for a smoother dough and a bit more chew. If you’re short on time or just don’t feel like putting in that much elbow grease, just mix the dough until no dry bits of flour remain (it’s ok if it’s still a little shaggy and sticky!) We have tested this recipe with and without additional kneading and it’s good either way, so feel free to adjust based on your personal preference! In the photos above, we mixed the dough until it was just combined (with no additional kneading).
- When dough is mixed, cover the bowl with a clean tea towel and let dough rise at room temperature for one hour, until it’s about doubled in size.
SHAPE THE DOUGH & FINAL RISE (30 MINUTES)
- When dough has risen, tip it out onto a lightly floured cutting board.
Tip: If the dough is sticking to the sides of the mixing bowl, run your hand under cold water to prevent sticking as you pull the dough out.
- Knead the dough a few times to work out any large air pockets, then pull the dough into a round shape (this makes it easier to divide).
- Use a bench scraper or a knife to divide the dough into 8 evenly sized pieces.
- Add more flour to your cutting board if you need it, then shape each piece of dough into a ball. To shape, pull the corners of each dough piece in towards its center, then pinch the edges together and roll the dough across the cutting board to form a round shape.
- Place the dough balls on a baking sheet lined with a nonstick baking mat, leaving 2 inches between each piece.
- Gently press down on each ball to flatten it about halfway. Cover shaped buns with a clean tea towel and let rest for another 30 minutes while you heat the oven.
- Heat the oven to 375° Fahrenheit.
BAKE (15-18 MINUTES) & COOL (30-60 MINUTES)
- When the oven is hot, use a pastry brush to brush each burger bun with a bit of melted butter. Top with a sprinkle of sesame seeds (optional).
- Bake at 375° F for 15-18 minutes until golden brown.
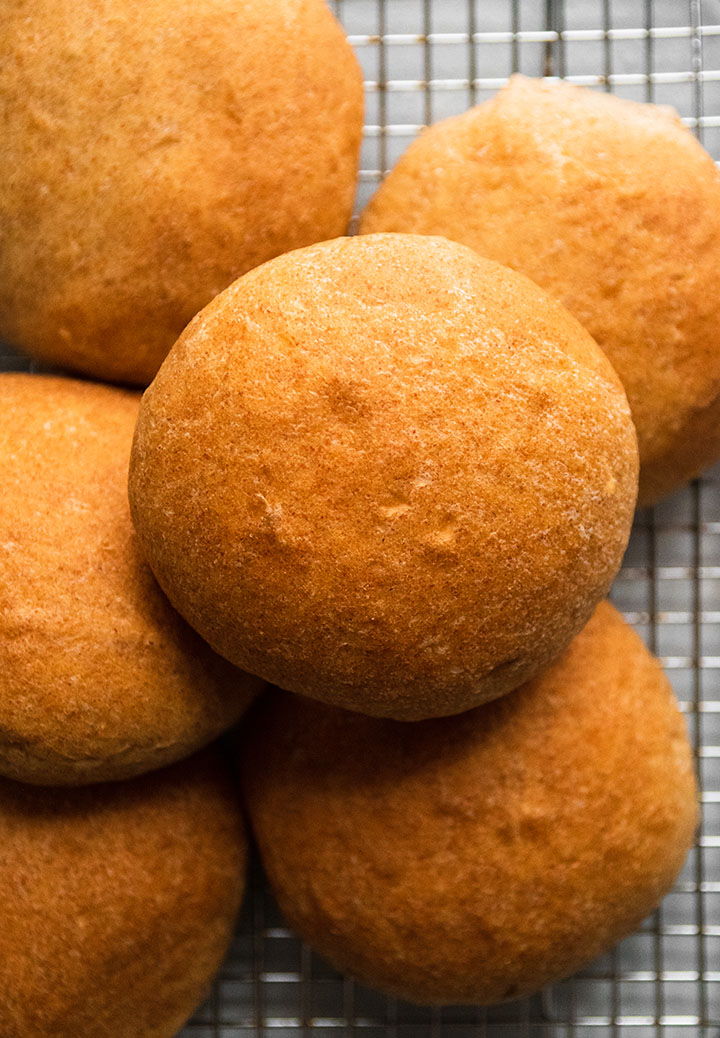
- Remove buns to a wire cooling rack. Let cool completely (for at least 30 minutes) before slicing and serving. Note: These buns might feel a little stiff right when you take them out of the oven; the crust will soften as they cool.
Notes
What kind of flour should I use? We always recommend using King Arthur Flour when baking. They're incredibly consistent from bag to bag, and King Arthur All Purpose flour has a high protein content (which means better gluten development, which means the dough is easier to work with). Bob's Red Mill flours are also a good option for baking.
Substitutions. Use sugar, brown sugar, or molasses instead of honey. Use bread flour in place of some or all of the other flours in this recipe. Use additional all purpose flour in place of some or all of the wheat flour if you like. We do not recommend increasing the amount of whole wheat flour in this recipe (see the FAQ above or our Everyday Artisan Bread course for more on flour substitutions!)
How warm should my “warm water” be? A good rule of thumb is “warm to the touch.” Too-hot water (typically 130-140 degrees F and above) will kill your yeast, but use too-cold water and your yeast will take too long to activate. We usually shoot for a water temperature between 95° and 110° Fahrenheit. You should be able to comfortably hold your hand under water running at about 100 degrees – it should feel quite warm, but not hot. Use a kitchen thermometer for a precise measurement if you like!
Please use a kitchen scale if you can! Measuring by weight with a kitchen scale is much more accurate than measuring by volume (with cups). Because each person measures a cup of flour a little bit differently, it's easy to end up using way too much flour in a recipe - which results in dry, dense bread! When you measure your flour in grams with a kitchen scale, you can measure flour perfectly every time.
Mix this dough by hand OR with a stand mixer - it works well either way! If you use a stand mixer, fit it with the dough hook and add the flour a little bit at a time to ensure the mixer incorporates everything evenly. Let the mixer run an additional 3-5 minutes once all the flour is incorporated to develop the gluten in the dough more fully for a stronger, smoother dough.
Adjusting the rise time. If your kitchen is especially chilly, you may need to let the dough sit another 15-30 minutes during the first rise.
Adding toppings and mix-ins. Right after you brush the buns with melted butter, sprinkle on some sesame seeds, flakey sea salt, shredded cheese, or fresh herbs. You can also add mix-ins like roasted garlic, fresh herbs, or shredded cheese directly to the dough when you first mix it.
Adjusting the size of your burger buns. Cut your dough into 8 pieces for standard-sized burger buns, 10 pieces for small burger/large slider buns, or 12 pieces for small slider buns. If you make smaller sized rolls, you will need to adjust the cook time (for small buns, start checking for doneness at about the 8-10 minute mark). We have also used this dough for hoagie/sub rolls.
For more ideas and instructions about flour types, dough shapes, and other substitutions and techniques, be sure to enroll in our Everyday Artisan Bread course.
Serve these buns with your favorite burger recipe! We love using homemade hamburger buns with our Smoked Gouda Beer Burgers, Easy Salmon Burgers, or Black Bean Burgers.
Nutrition
- Serving Size:
- Calories: 244
- Sugar: 1.4 g
- Sodium: 448.6 mg
- Fat: 7.3 g
- Carbohydrates: 38.8 g
- Protein: 7.2 g
- Cholesterol: 38.5 mg
Keywords: summer, grilling, bbq





John Peck
Your weights are astronomically off. It's as you've never mixed dough before. Too much water for one. Honey weighs 14 grams per tbsp. 400 grams of flour? This a recipe for disaster.
★
Jessie
Hi John! As we note several times in the post, measuring by volume can vary quite a bit from person to person, which is why the volume measurements here are approximate and we recommend following our gram measurements for best results (although if you measure your Tablespoon of honey a little bit heavier than we do, these buns should still turn out wonderfully!) These buns can feel a little bit sticky at first but actually settle into a pretty manageable dough (unlike a sourdough or focaccia, which contain more water and can be tricker to work with). Yes, there are 400 total grams of flour in this recipe. I hope you decide to give these burger buns a try - among our staff of professional dough-mixers and recipe testers, it's a team favorite. Have a wonderful day!
John Smith
I’ve made thes several several times, and they have come out perfectly delicious using my stand mixer.. measure the !
★★★★★
Team Life As A Strawberry
We're SO glad you're loving this recipe!
Dori
wow, even after kneading with dough hook and more after rising, I've never worked with a stickier, more unmanageable dough, and I make a LOT of bread and rolls. I added a bunch more flour after the rise, just because it was completely in every way unmanageable. I hope they turn out OK, but in the future will look for a recipe with a more manageable dough.
★★
Team Life As A Strawberry
Sorry to hear the dough was difficult to manage, but we hope these buns still tasted wonderful! We're happy to help you troubleshoot for next time. (We'll also have our recipe testers revisit this recipe to make sure it works as well as possible for you!) This is a relatively slack (wet) dough, so it will be a bit shaggy and sticky at first, but it will smooth out and become more elastic as it rises and again as you shape it! You can always add more flour if you need to in order to get a consistency that you feel comfortable working with. The wetness of dough can be affected by environmental factors like humidity, so if you were baking on a warm, humid day the dough may have felt stickier than expected! In our experience, this dough can also feel sticky and unmanageable when substitutions are made (like using gluten-free flour or using 100% whole wheat flour). The gluten content of various flour brands can also vary widely - we recommend King Arthur Flour or Bob's Red Mill for all of our bread recipes! In our experience, when a dough at this hydration level (with this ratio of flour:water) is sticky, it's usually because of poor gluten development (not because the dough needs more flour, although that's a common misconception!) Because whole wheat flour has some sharp, spiky edges, it can actually inhibit gluten development in dough right at the beginning of mixing (we go into this in a lot more detail in our Everyday Artisan Bread course!) If you're noticing issues with stickiness in your whole wheat doughs, we'd recommend mixing the dough until no dry flour remains (just until the dough is JUST combined!) and then letting it sit for 30 minutes BEFORE kneading it with a dough hook. This gives especially sharp wheat flour pieces a chance to soak up the water in the dough and soften, so that they won't slice through the gluten networks (which keeps the dough sticky) as they're kneaded. You can also add something called a "stretch-and-fold" midway through the first rise to build strength in your dough - we go over this in detail in our course, and you can see a similar technique in action in our whole wheat pizza dough. I hope that helps!
Marie-Christine Rochefort
Such a great recipe! I've made those 2 times because I can't find an healthy option of hamburger buns in the supermarket and everybody has loved them so far. The only thing is that I needed to add 50-60 grams of flour because the preparation is very sticky when I follow the instructions (even though I used a scale). I'd like to know if you've ever tried them without the egg. Do you think it would be as good? I've already switched honey for maple syrup and butter for vegan margarin and it worked just fine. Thank you so much.
★★★★★
Team Life As A Strawberry
We're so happy you're loving these buns! We have tested this recipe without the egg and it still works but does change the texture to be less soft and fluffy.
Jessie @ Life As A Strawberry
I'm so glad you like the recipe! When dough is sticky, it usually means it just needs a bit more gluten development! It might be slow to develop gluten because of the brand of flour used (we recommend King Arthur Flour or Bob's Red Mill for best results!) or because the dough just needs to be worked a little more. If you find the dough is on the sticky side even after rising, I'd recommend kneading it for a minute or two right when you mix the dough (I just use clean hands and knead it right in the mixing bowl, or let my stand mixer run for an extra minute or two if I'm using the dough hook attachment!) That will help develop more of the gluten in the dough for a smoother, more elastic, less sticky dough that's easier to work with. (We also go into much more detail and cover a ton of advanced techniques in our Everyday Artisan Bread course!)
Vera
I love this recipe. I make these buns often and they are so good. Thanks for the recipe.
Team Life As A Strawberry
WAHOO! We're so happy you're loving this recipe!
YF
Hi! Thanks for the awesome recipe. I made this today, with curry chicken filling, and the buns turned out very well.
★★★★★
Team Life As A Strawberry
YAY! We're so glad to hear you enjoyed the whole wheat buns!
kay
it was fantastic and easy to make
Team Life As A Strawberry
YAY! We're so happy you enjoyed them!
Anita
Using whole wheat is one of the perks in making my own bread. This is decidedly a healthier and more delicious alternative to store-bought hamburger buns.
★★★★★
Team Life As A Strawberry
YES! We love being able to customize bread recipes when baking at home!
Tayler Ross
This is our absolute favorite bun recipe! We use it for every cookout and they always get rave reviews!
★★★★★
Team Life As A Strawberry
YAY! Were SO happy to hear you love this recipe!
Angela
What a great recipe! I never would have thought to make homemade hamburger buns, but now I'll be making these all summer! Love that I actually know all of the ingredients in them. Thanks for the awesome recipe!
★★★★★
Team Life As A Strawberry
WAHOO! We hope you love making your own burger buns!
Amy
I am so inspired to make my own burger buns now. In the past, I've always thought yeast/dough was a pain, but you really broke it down nicely.
★★★★★
Team Life As A Strawberry
YIPPEE! We hope you love making your own burger buns!
Sandhya
Whole Wheat buns looks fantastic. I would love to stuff it with a Vegan Wings and some salad.
★★★★★
Team Life As A Strawberry
YUM! We always love a salad on the side!