Be the hit of your Christmas cookie exchange with these easy chocolate thumbprint cookies! Topped with crushed peppermint for a festive holiday touch.
These simple chocolate thumbprint cookies pack a serious holiday punch!
We'll start with a classic, fudge-y thumbprint chocolate cookie (rolled in a bit of powdered sugar for texture), then flood the center with a bit of melted chocolate and top it off with crushed candy cane. (And more chocolate. Obviously. Chocolate lovers unite!)
Two things to note
- These cookies really aren't terribly sweet. We're sticking with bittersweet (or semi-sweet) and dark chocolate toppings here, which give a nice balance to the sugar in the cookie dough. The peppermint flavors from some crushed candy cane also cut the chocolate a bit here, so the cookies don't feel too one-note.
- The texture of these cookies is rich and chewy - almost like a brownie in cookie form! (Side note: Have you tried our small batch brownies yet?)
Looking for cookie ideas? Try our peanut butter cookies with chocolate drizzle →
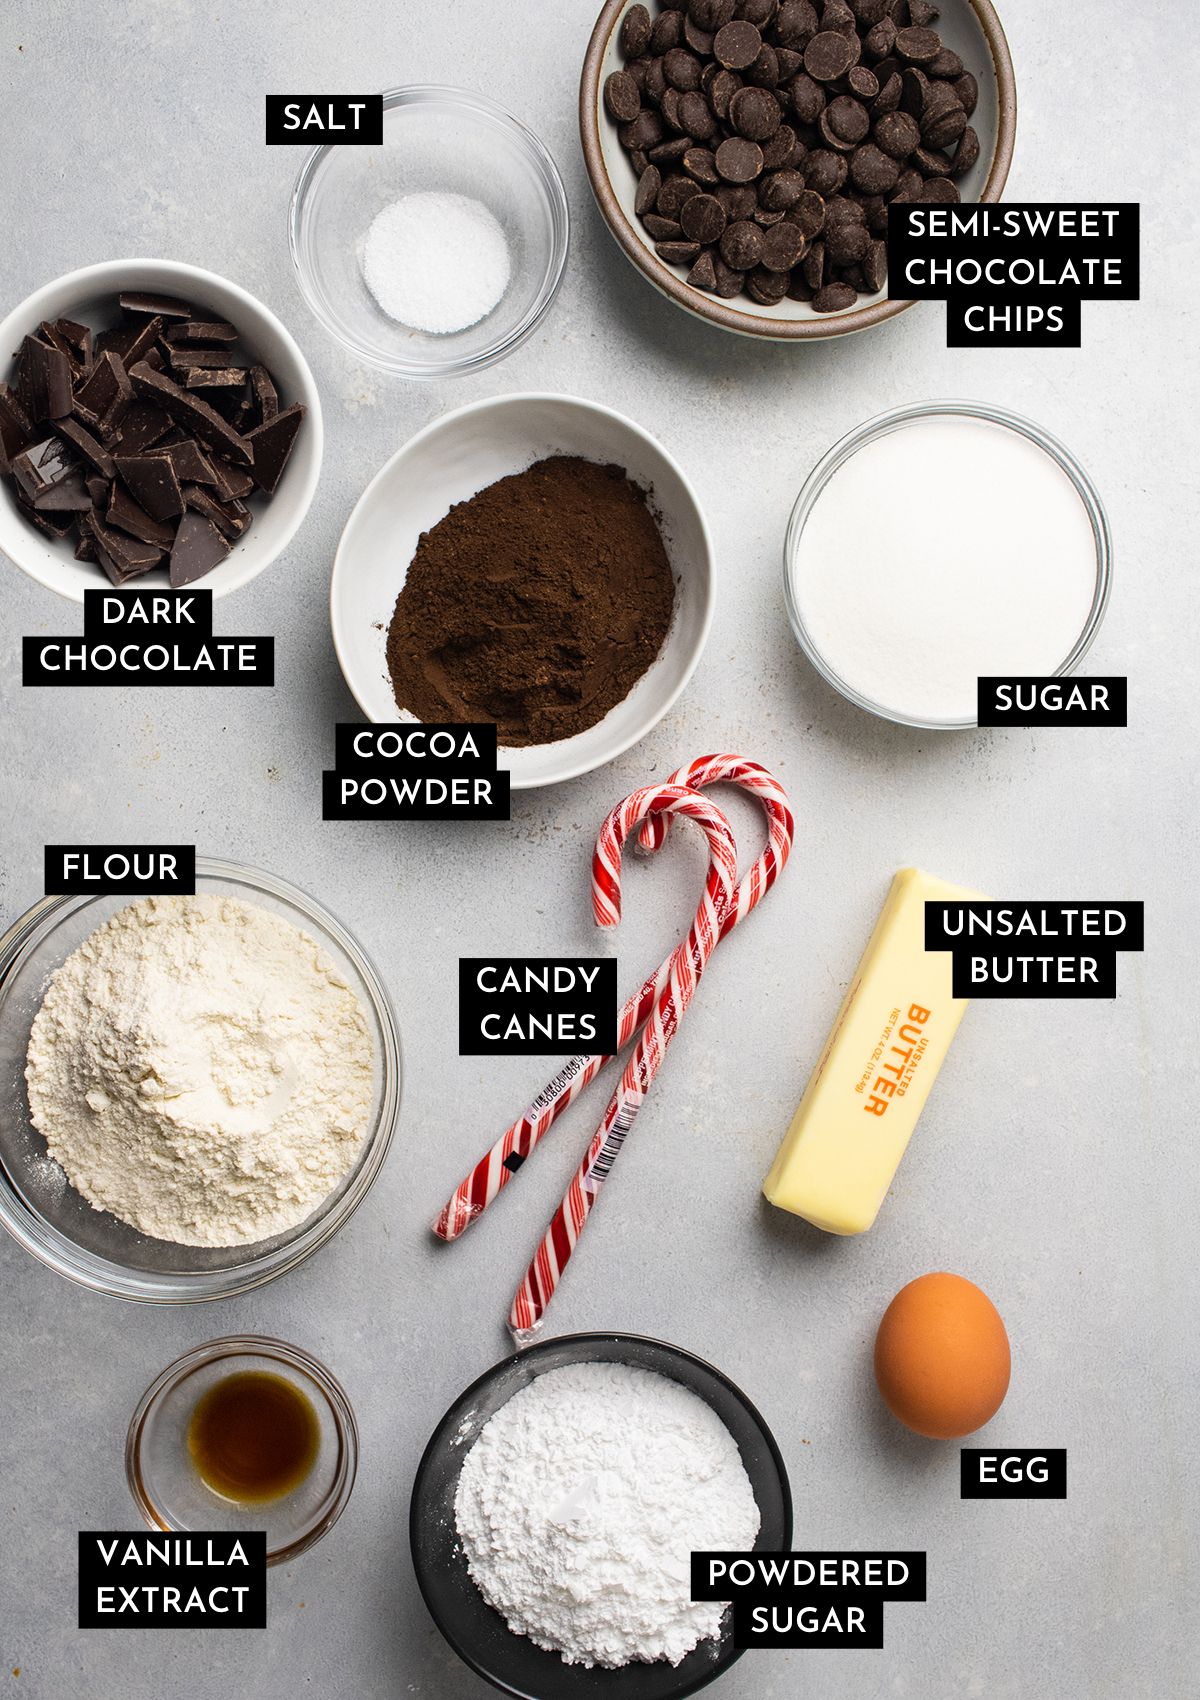
A few notes on ingredients
- Use a dark, bitter cocoa powder if you have it. Something like a Dutch process cocoa or a black cocoa powder balances out the sweetness of these cookies by giving them an ever-so-slightly bitter note (it also lends a dark, rich color to the dough!) We used this double dark cocoa powder blend for the cookies in these photos. Don't worry about running out and buying something special, though - any cocoa powder you have in the pantry will still taste great!
- Melt chocolate over a double boiler for best results. You don't need a specialty double boiler pot to do this - just a heat-safe bowl (we use a glass or metal mixing bowl) that fits comfortably over a small saucepan!
- Use high quality chocolate. We used Ghirardelli bittersweet chocolate chips and a dark chocolate baking bar for these photos. High quality chocolate will melt more smoothly, and will have a nicer finish once it sets. Learn more: A Basic Guide to Tempering Chocolate
Pro tip: Use a kitchen scale
Measuring ingredients by volume (with cups) is notoriously unreliable: For best results, use a kitchen scale to measure your ingredients by weight using the gram measurements in the recipe card below. (No kitchen scale? Measure your flour with the scoop and level method for best results!)
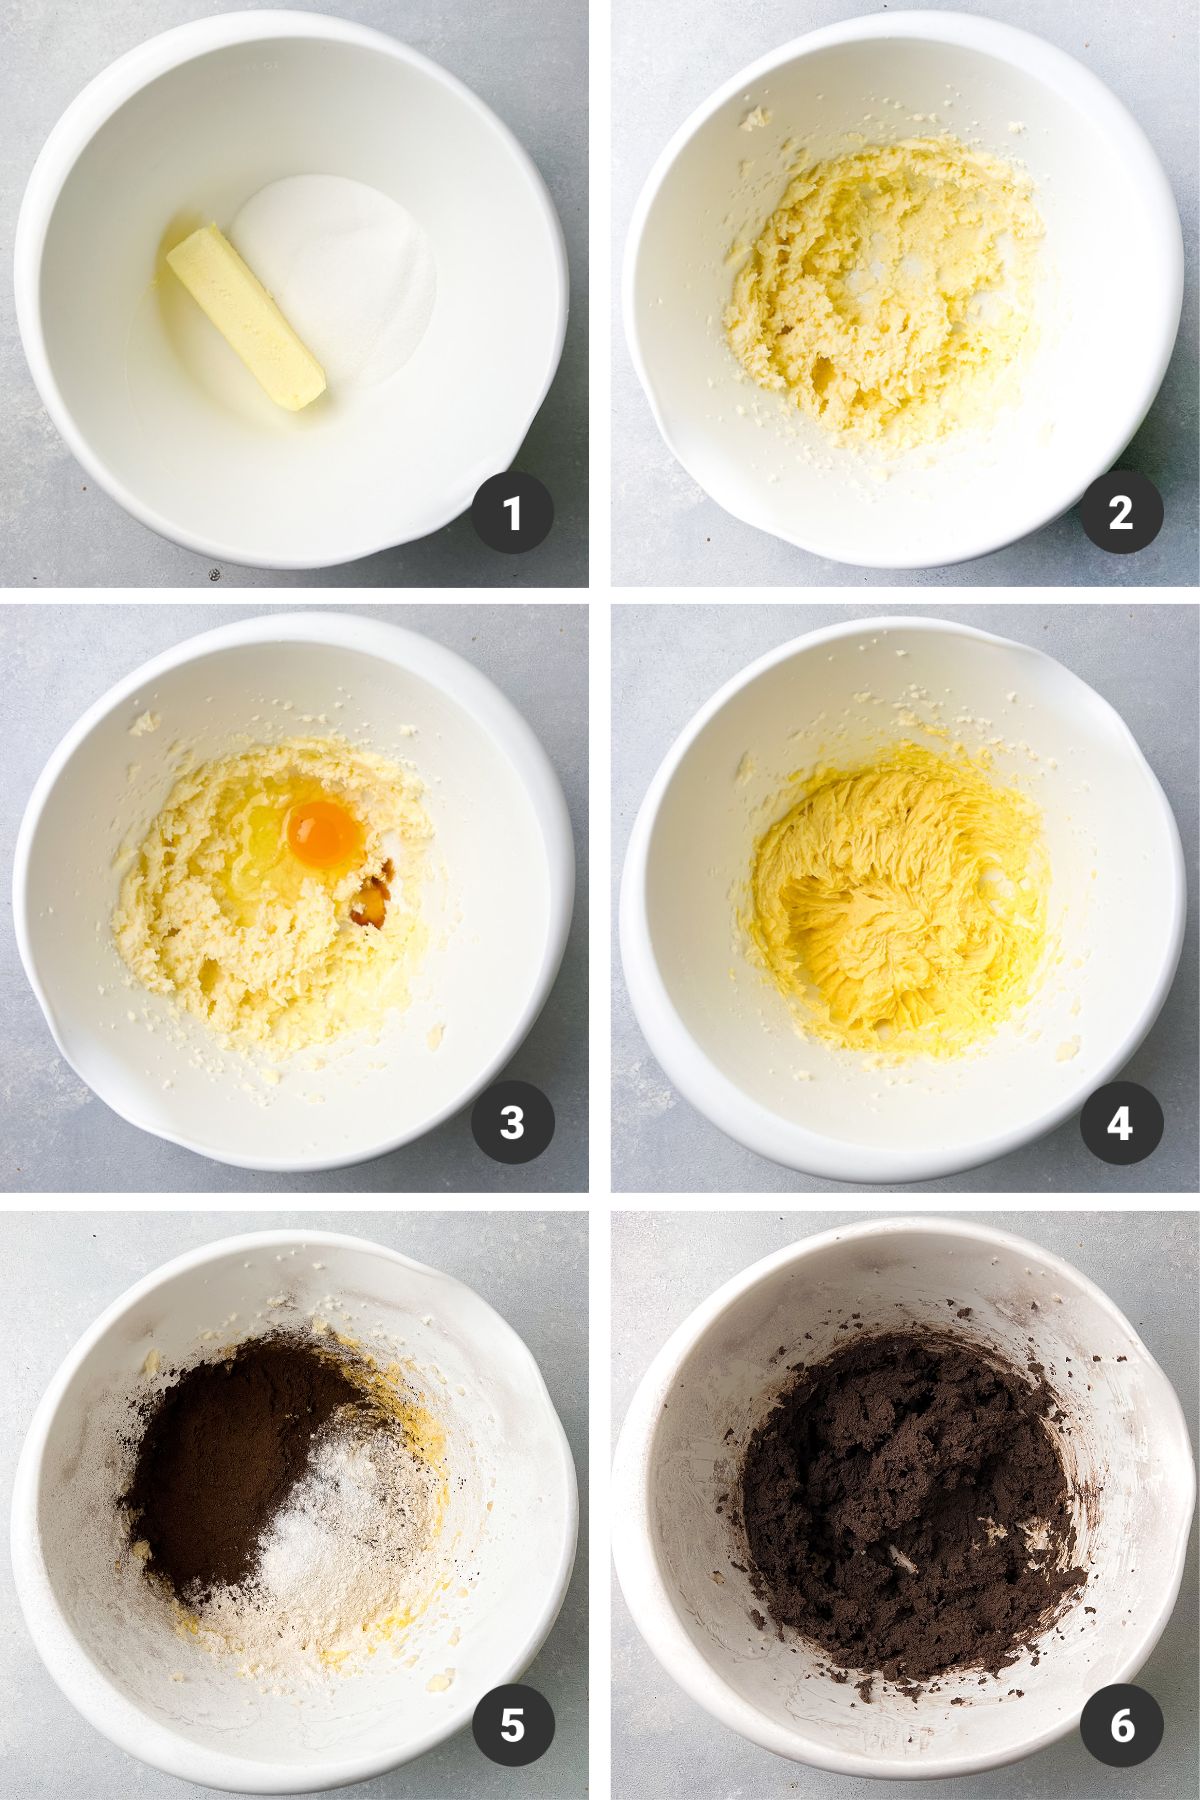
How to make these thumbprint cookies
These cookies have a few different steps, but they're fairly straightforward! Here's a quick overview of what's involved:
Mix and chill the cookie dough
First, make the dough! Start by creaming butter and sugar together in a large mixing bowl with an electric mixer (we used an electric hand mixer in these photos; you can also use a stand mixer fitted with the paddle attachment).
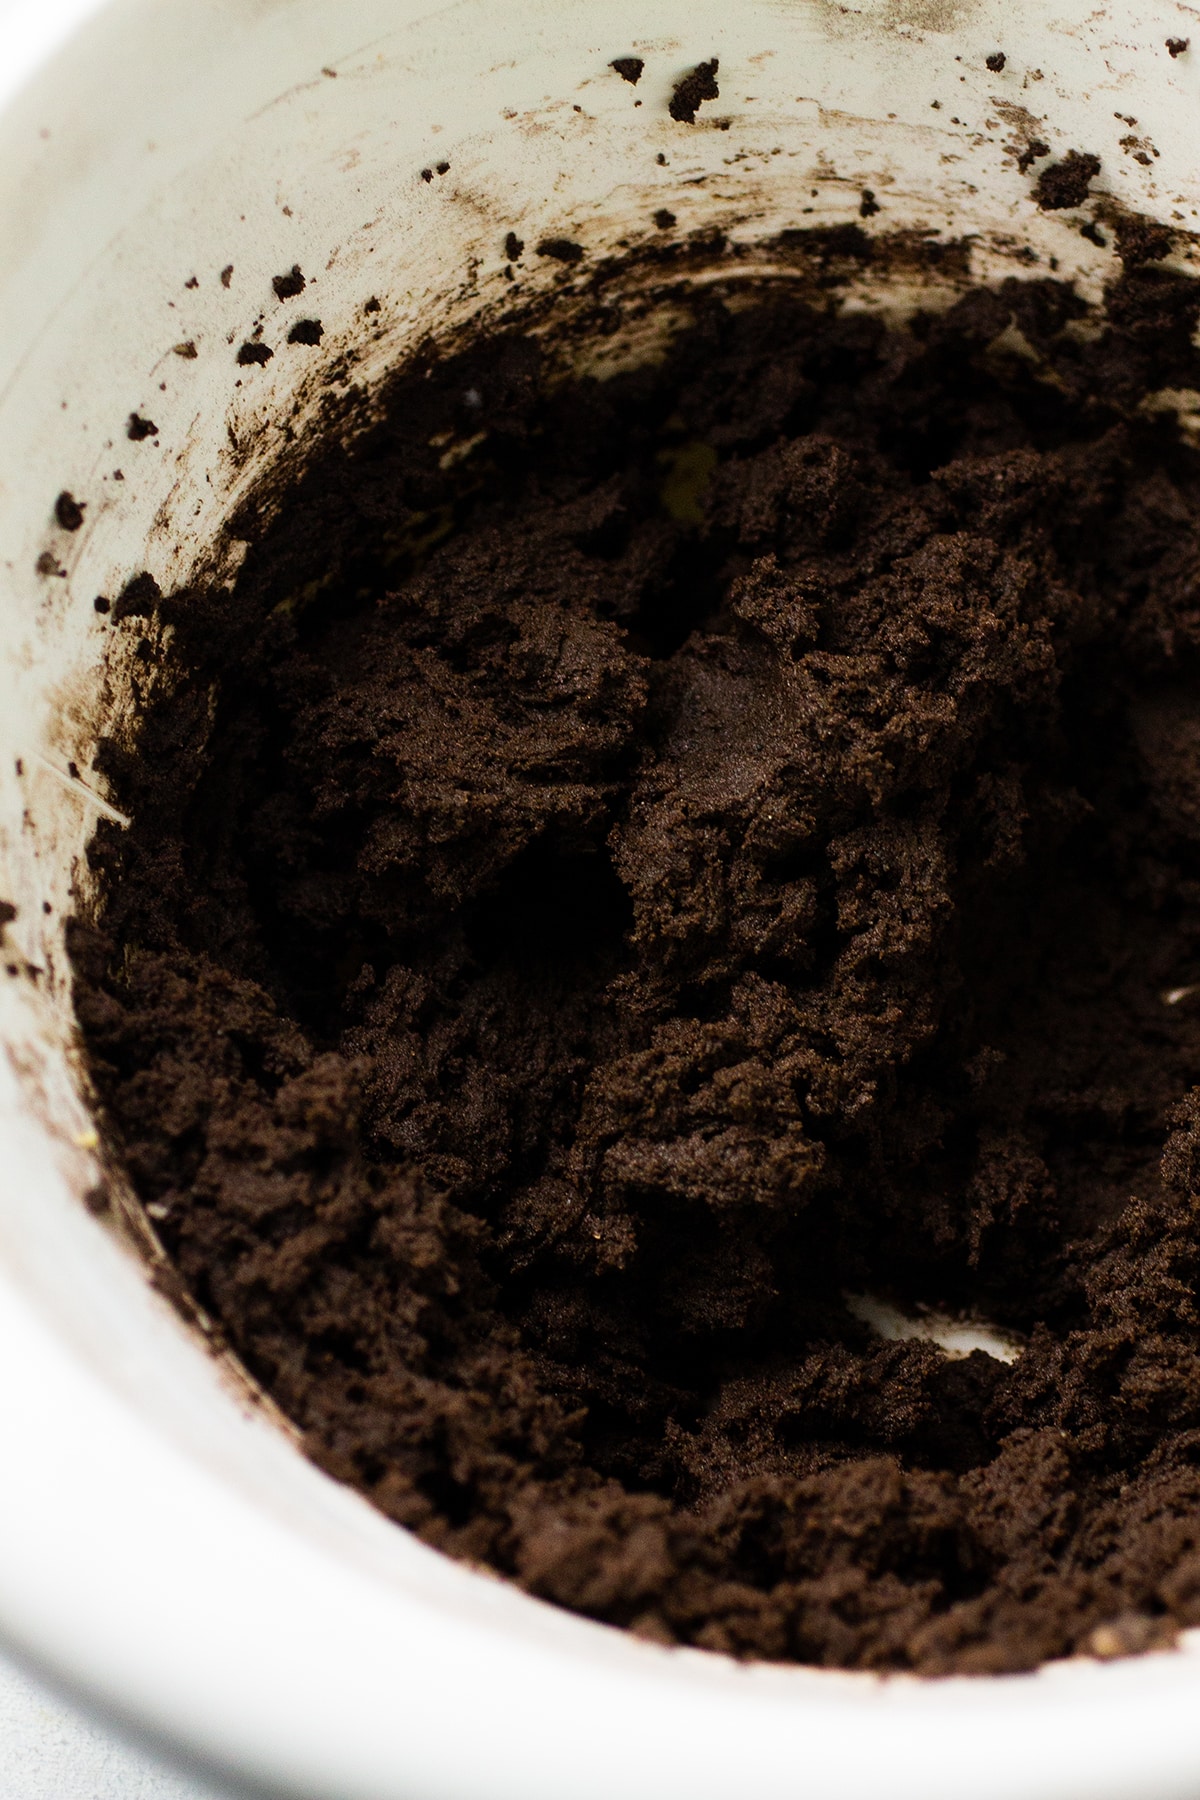
Beat in the egg and vanilla, then stir in your dry ingredients (flour, salt, cocoa) until you have a smooth, dark dough. Pop the dough into the fridge for half an hour to chill (this makes it easier to shape and roll, and stops it from spreading as much in the oven!)
Shape the cookies
Once the dough is chilled, scoop it into balls. We recommend using a 1 Tablespoon or 1 ½ Tablespoon cookie scoop to portion the cookie dough balls: it makes the process quick and easy (and keeps the cookies the same size so they bake evenly!)
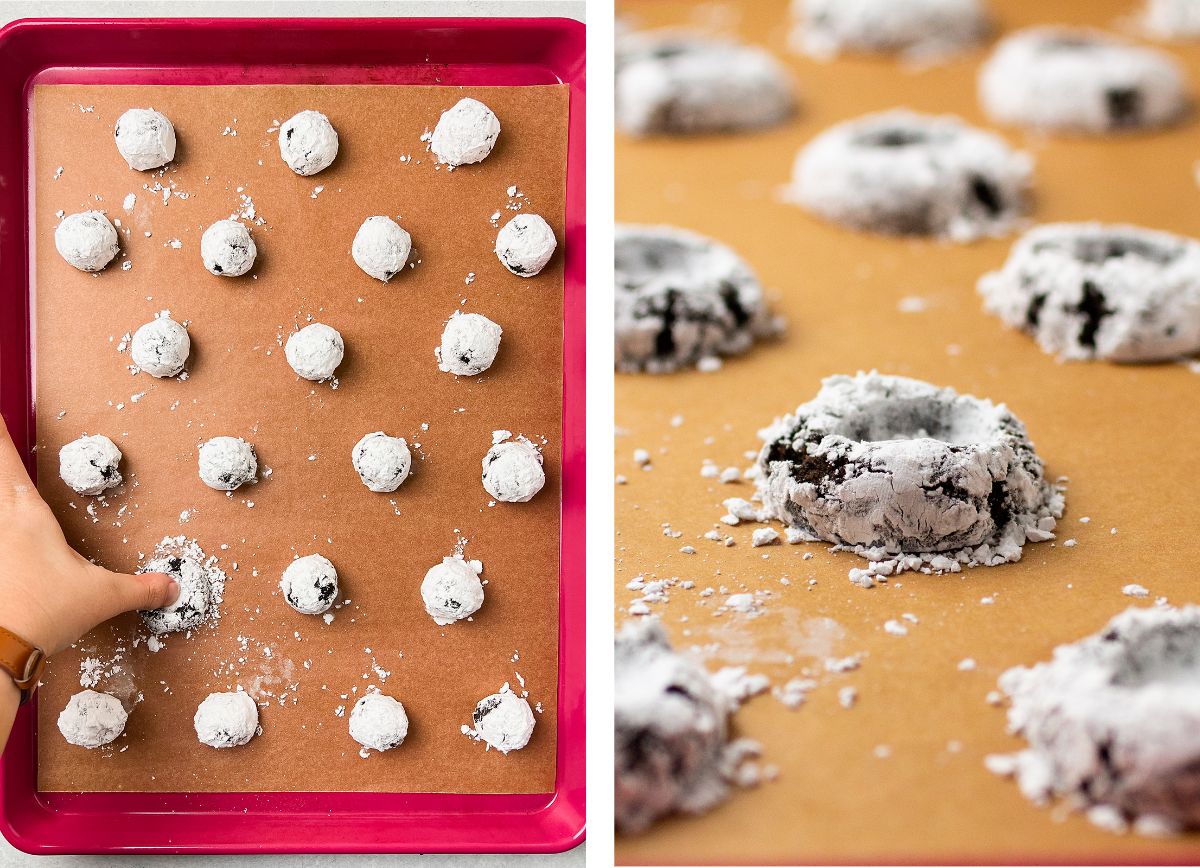
Roll each ball in a bit of powdered sugar, then pop them onto a sheet pan lined with parchment paper or a nonstick silicone baking mat. Leave at least an inch of space between each cookie so they have room to spread a little bit in the oven!
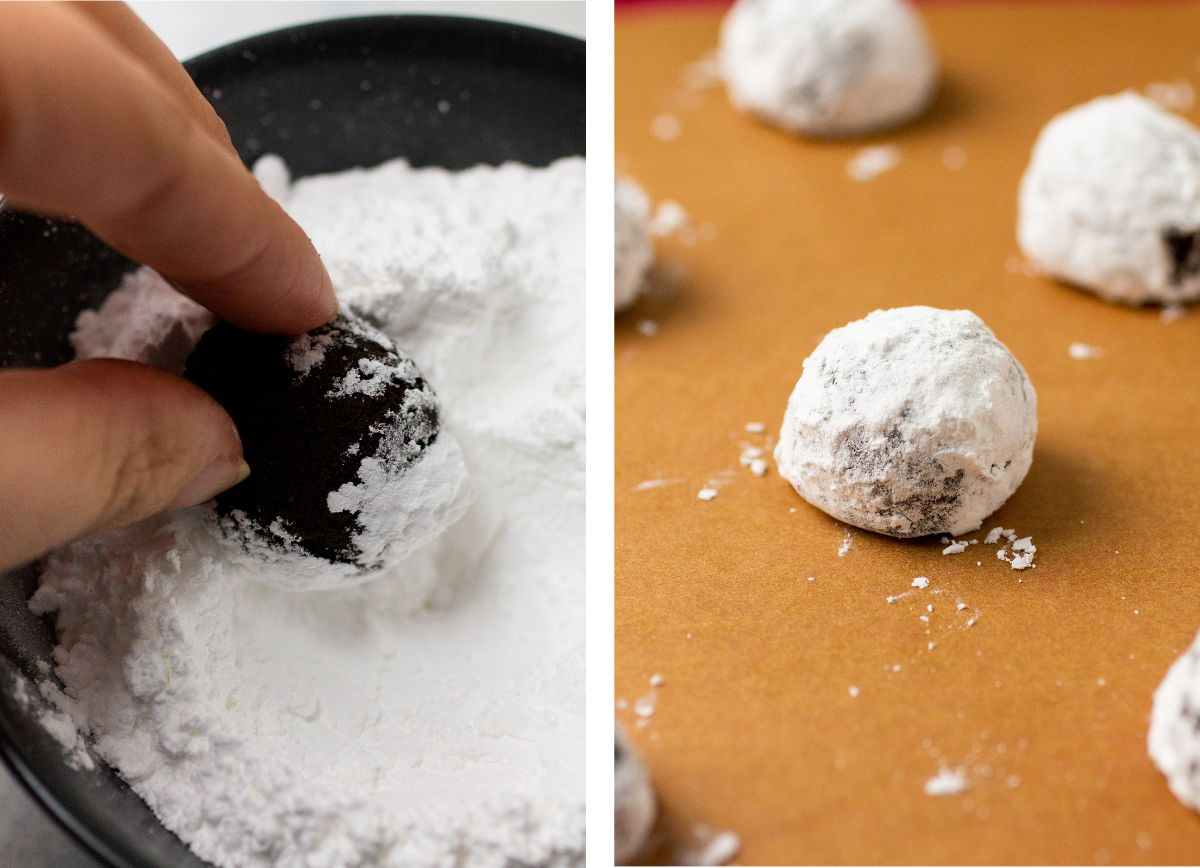
Use your thumb (or the back of a small spoon) to press a divot into each cookie. Try to press about ¾ of the way down into the dough: enough to make a significant indent without going all the way through to the baking sheet. This can take some practice - don't worry if it feels a little strange at first!
Time to bake!
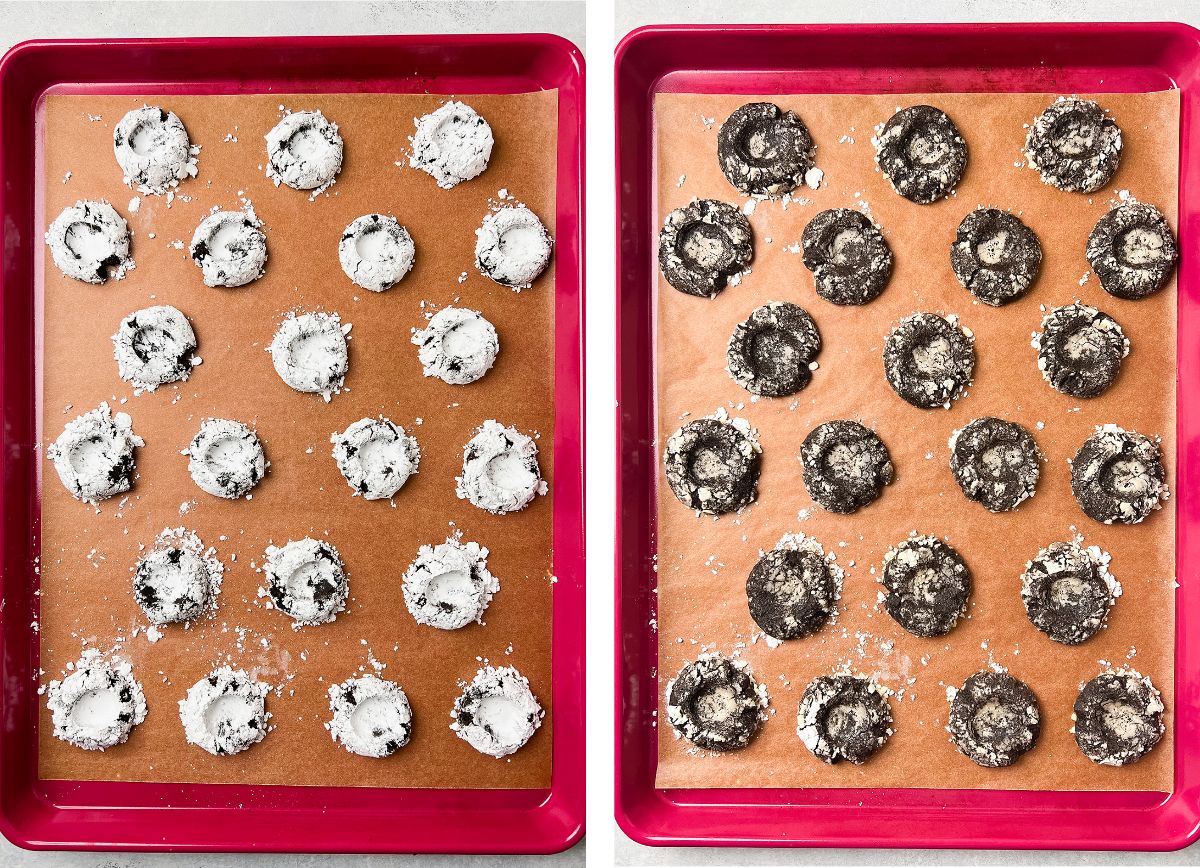
Then, it's time to bake! Pop the cookies in a 350° F oven for about 9 minutes. These cookies won't rise or spread very much in the oven: Look for them to puff up just a little, for the bright white of the powdered sugar to fade away, and for some small cracks to develop along the surface.
Once baked, let the cookies cool right on the baking sheet for half an hour or so, until they're cool to the touch. (Ordinarily, we transfer homemade cookies to a wire rack to cool. But because we're going to cover these cookies in chocolate, it's easiest to leave them right on the cookie sheet for easier cleanup later!)
Don't worry if some thumbprints disappear
Some of the cookies may puff up to the point where the center indent isn't really there anymore. If that happens, don't worry! Just use the back of a spoon to gently press the center of the cookies back down into shape while they're still a bit warm.
Fill the thumbprints with chocolate
When the cookies are cooled, it's chocolate time! We recommend using a double boiler over medium-low heat to melt your chocolate. You don't need a specialty double boiler pot to do this - just a heat-safe bowl (we use a glass or metal mixing bowl) that fits over a small saucepan!
We'll melt just half of the semi-sweet (or bittersweet) chocolate until it's smooth and glossy, then take it off the heat and stir in the rest of the chocolate until it's smooth and melted. (This is a very loose, very lazy chocolate tempering shortcut - but it's usually enough to help the chocolate set nicely and avoid any blooming or chalky texture once it's cooled).
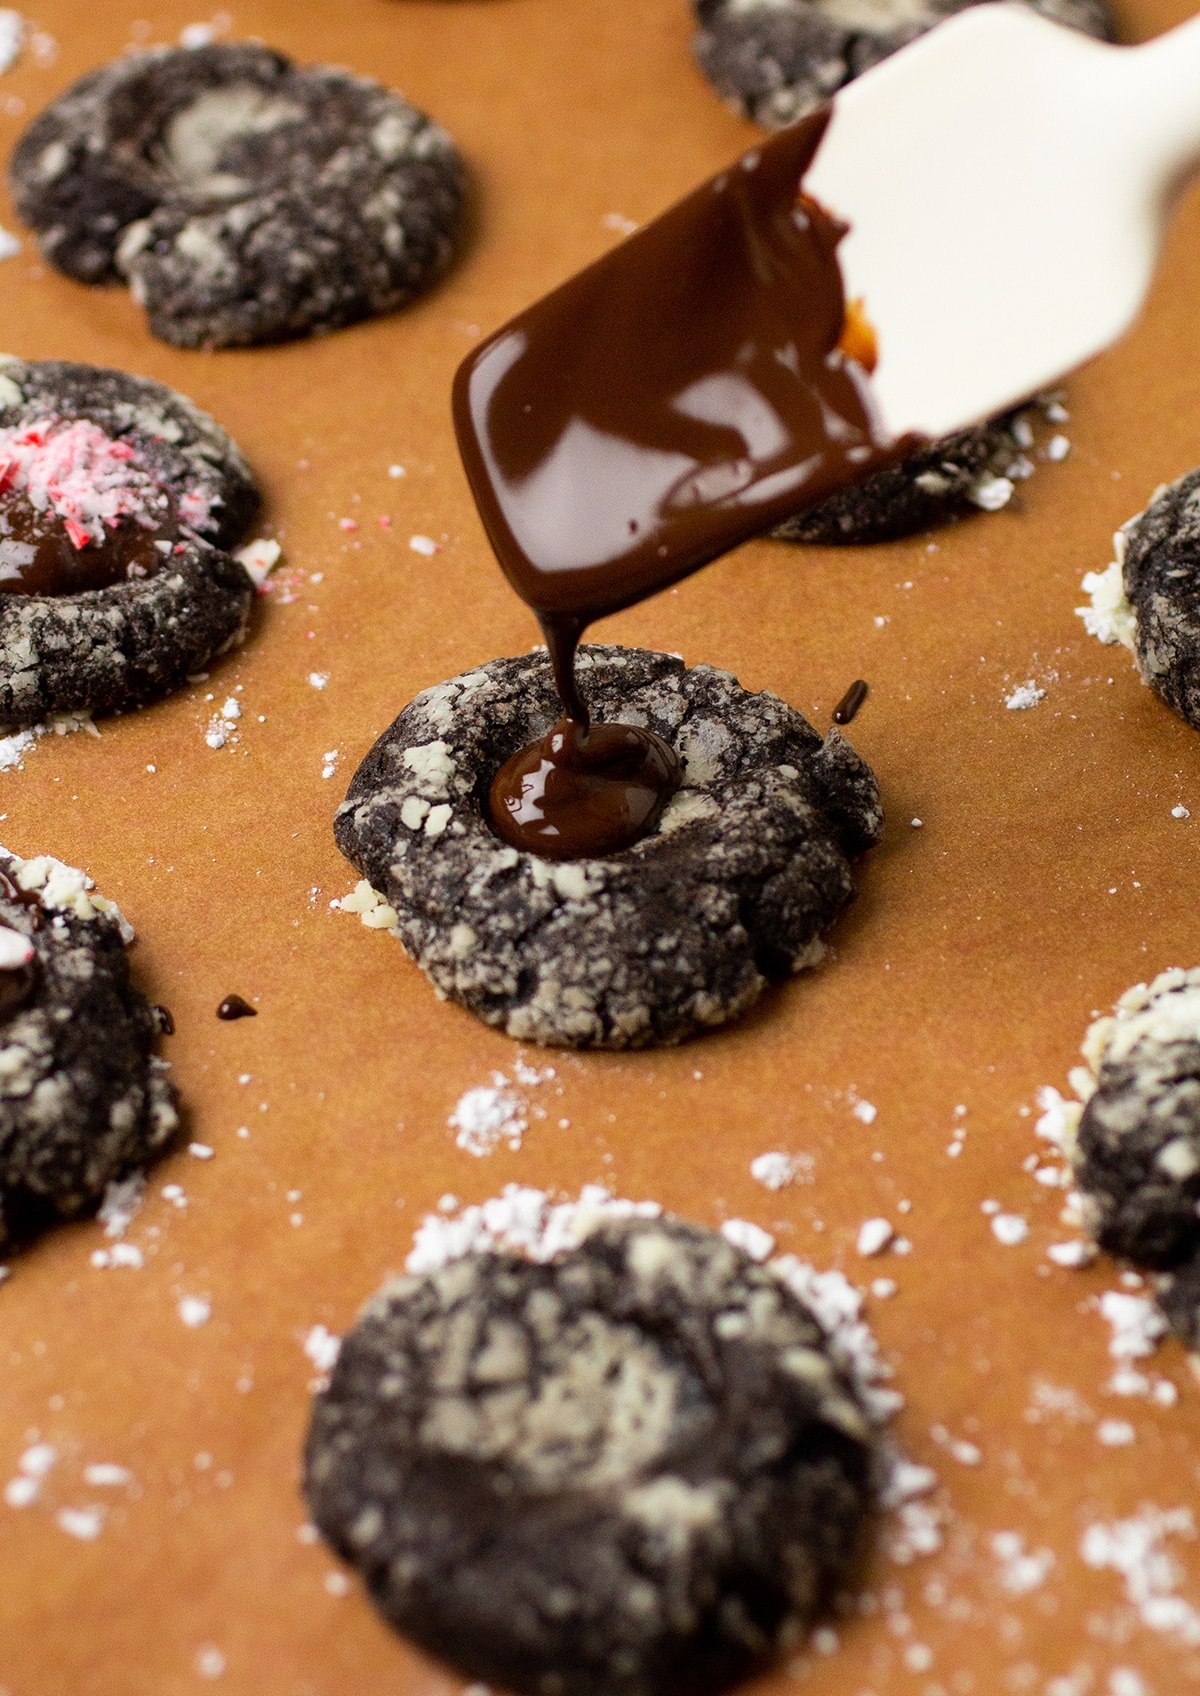
When the chocolate is melted, use a spoon or spatula to pour a teaspoon or so of the melted chocolate into each cookie's center indent.
Add peppermint and dark chocolate drizzle
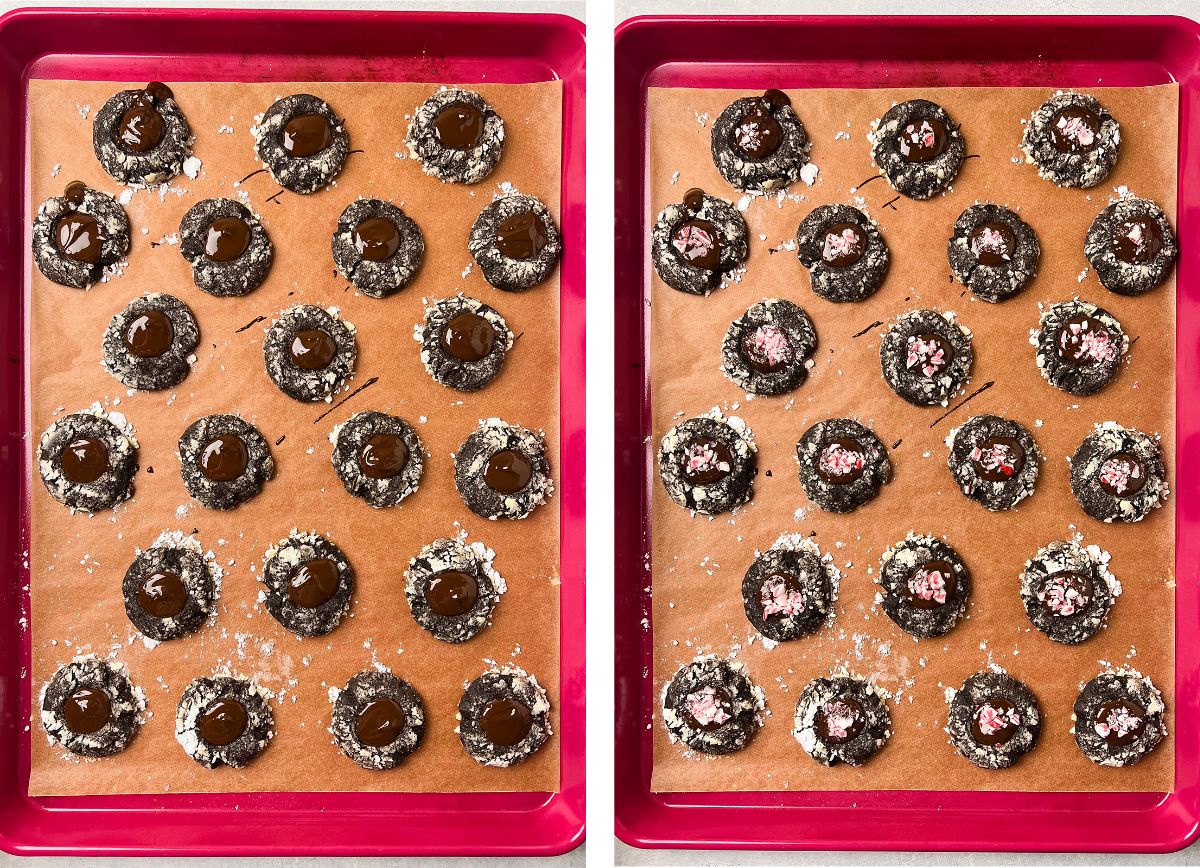
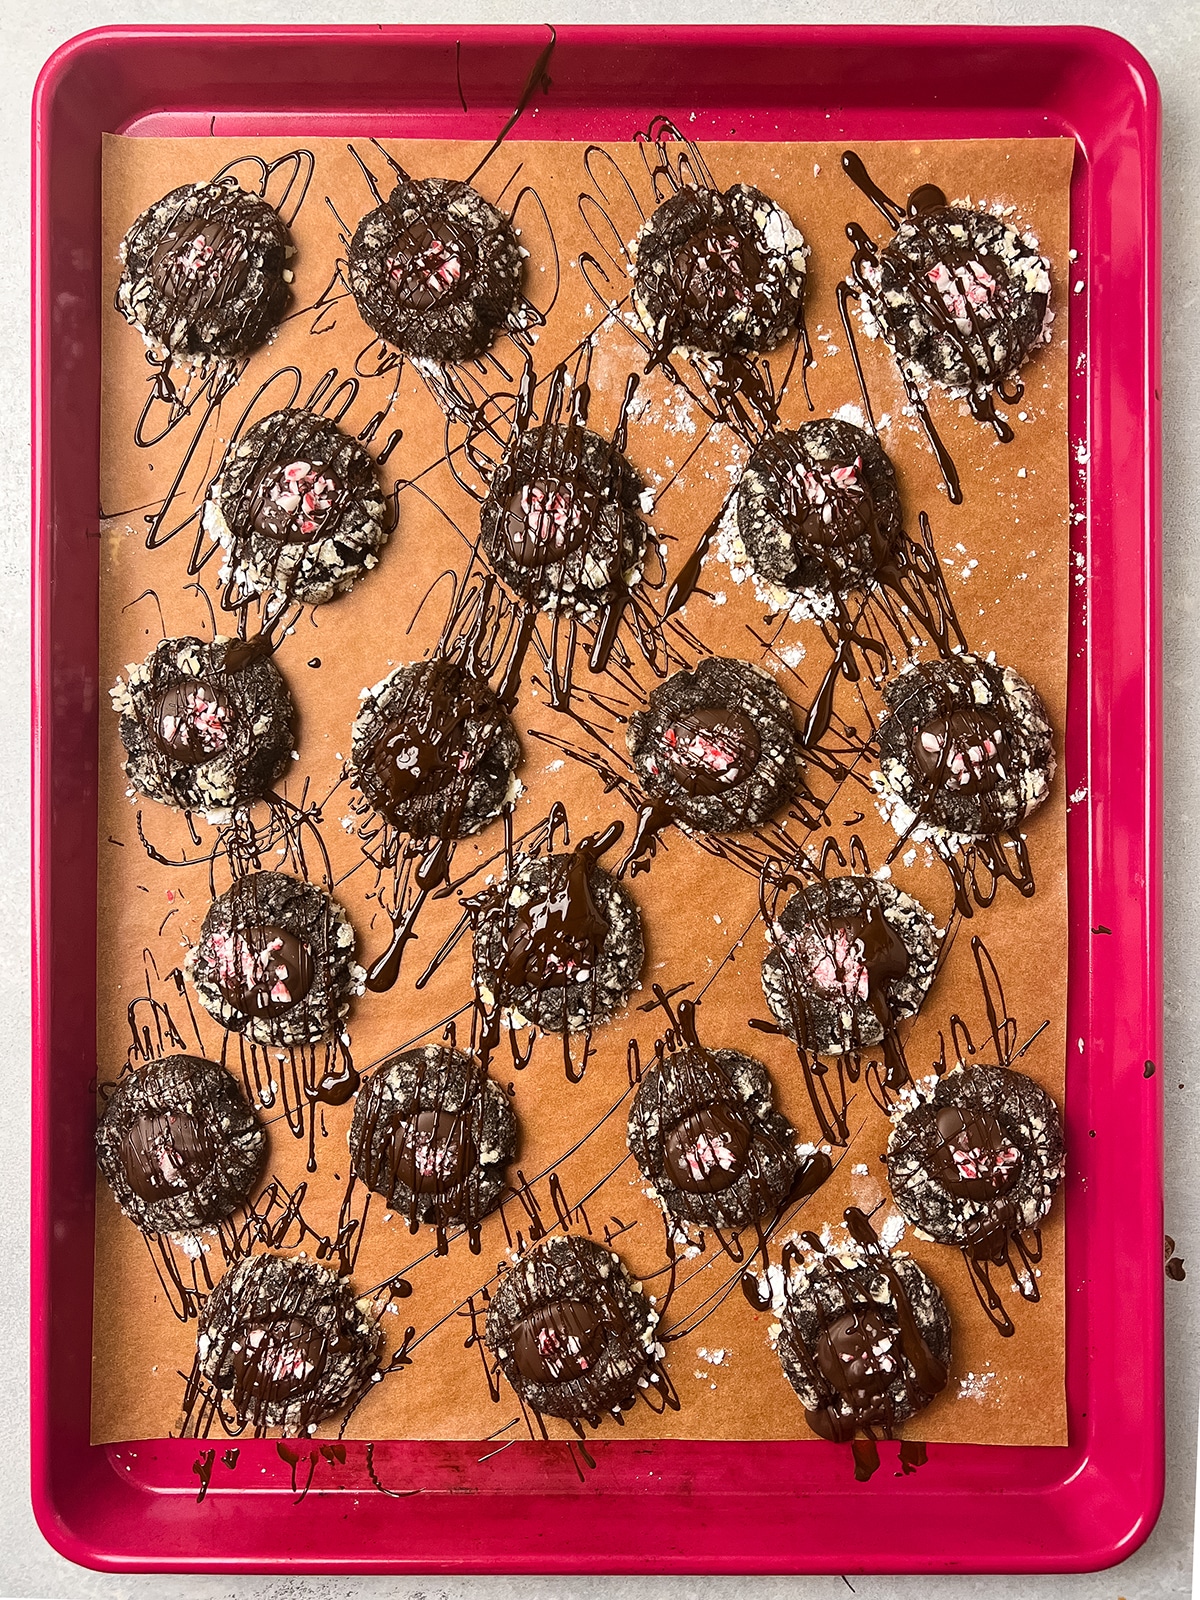
Sprinkle a bit of crushed peppermint onto each cookie while the chocolate is still warm - this will help the peppermint stick! Let the chocolate cool for 30 minutes to an hour (it doesn't have to be COMPLETELY set, but you don't want it to still be melty), then move on to the chocolate drizzle!
Melt the dark chocolate in a double boiler (you can use the same bowl you did before!) then use a spoon to drizzle it over the cookies in thin ribbons with a quick, back-and-forth, side-to-side motion. Let the chocolate set on the counter for a few hours until it's firm to the touch, then enjoy!
Riffs and Substitutions
- Use a different filling. Fill the thumbprints with peanut butter or jam (we love this slow cooker blueberry jam!) instead of chocolate. You can also make a chocolate ganache with a bit of heavy cream if you'd like a softer chocolate filling that doesn't set up quite as much.
- Swap the powdered sugar coating for plain granulated sugar, demerara or turbinado sugar, or your favorite sprinkles!
- Swap the crushed peppermint for mini chocolate chips, chopped nuts (walnuts, pistachios, or almonds are great here), a pinch of flakey sea salt, or your favorite sprinkles.
- Mix up the chocolate varieties! We like using bittersweet or semisweet chocolate chips to fill the center of these cookies, and dark chocolate for a final drizzle. But you can use white chocolate, milk chocolate, or any style of dark chocolate you like here!
- Make these cookies blossom-style by pressing chocolate kisses or candy cane kisses into the dough when the cookies are a little more than halfway through baking. Roll the cookie dough as directed, place the dough balls on the cookie sheet, then bake for 5-6 minutes until they're slightly puffed up. Remove the baking sheet from the oven, press a candy kiss into the center of each cookie, then bake another 2-3 minutes until the cookies are set.
Three steps to skip if you're in a hurry
These cookies are a little more involved than our typical cookie recipes, but you can still speed this process up if you're in a rush! Three shortcuts to take if you need to save a bit of time:
- Skip the powdered sugar. It's more decorative than anything - it adds a touch of sweetness and some visual interest, but you can get away without it.
- Simplify the chocolate filling. Don't worry about grabbing multiple kinds of chocolate if you're short on time - just melt one variety all together and use it for both the filling and the final drizzle. You can also skip the melted chocolate entirely and fill your thumbprint cookies with jam, peanut butter, or Hershey kisses.
- Swap the peppermint for chocolate chips, nuts, or sprinkles (or skip it entirely!) so you don't have to spend time crushing up some candy canes.

A few FAQs
We used a mortar and pestle to gently crush the candy canes for this recipe. You can also place candy canes in a zip-top bag and smack them with a rolling pin or frying pan to break them up.
Yes! If you don't want a thumbprint style cookie, you can scoop the dough directly onto a baking sheet and flatten it a bit with a fork (use the same criss-cross pattern you might use for traditional peanut butter cookies). Serve the chocolate cookies as-is or drizzle with a bit of melted chocolate.
Sort of. The baked cookies freeze very well on their own: Prepare and bake the dough as directed, but SKIP the powdered sugar coating (it doesn't hold up as well in the freezer). Let cookies cool completely and freeze in an airtight container for up to 3 months. We don't recommend filling or decorating the cookies before freezing, as the chocolate can sweat a bit upon defrosting and just won't look or taste as good. If you'd like to make these cookies in advance, freeze them unfilled, then defrost for a few hours on the counter and add the toppings once you're ready to eat them.
Let cookies cool completely (and let the chocolate set completely!) then store in an airtight container on the counter. They'll last up to 4 days, but are best eaten within a day or two (they may start to dry out after a couple of days).
Nope! The chocolate should set up just fine on its own within two hours on the counter. If you need it to harden more quickly, you can pop the cookies in the fridge to set, but this can cause the chocolate to sweat a bit and it may be a little sticky and/or show fingerprints more easily.
We don't recommend adding chocolate (either chopped chocolate or chocolate chips) to the center of these cookies before baking: The chocolate can burn quite easily in the oven, and it is also more likely to bloom (develop a powdery, chalky finish) when melted this way. For best results, bake the cookies and melt the chocolate in a double boiler as the recipe suggests!
Video: How to make chocolate thumbprint cookies
See us demo this recipe on Instagram!
Love this recipe? Try our Cinnamon Brown Sugar cookies →
Print📖 Recipe

Triple Chocolate Peppermint Thumbprint Cookies
- Prep Time: 20 minutes
- Inactive Time: 2 hours 30 minutes
- Cook Time: 10 minutes
- Total Time: 3 hours
- Yield: Makes about 30 cookies 1x
- Category: Dessert
- Cuisine: American
- Diet: Vegetarian
Description
These easy chocolate thumbprint cookies are topped with crushed peppermint and melted chocolate.
Ingredients
For the Cookie Dough:
- ½ cup (1 stick) unsalted butter, softened to room temperature
- 160 grams sugar (⅔ cup)
- 1 egg
- 5 grams vanilla extract (1 teaspoon)
- 150 grams all purpose flour (about 1 ¼ cups when measured correctly by scooping and leveling)
- 30 grams cocoa powder (⅓ cup)
- 2 grams kosher salt (½ teaspoon)
To Assemble:
- 35 grams powdered sugar (⅓ cup)
- 95 grams semi-sweet baking chocolate (½ cup)
- 1-2 candy canes, crushed into small pieces (about ¼ cup)
- 40 grams dark baking chocolate (¼ cup)
Instructions
Make and chill the dough
- Heat oven to 350° Fahrenheit.
- Cream butter and sugar together in a large mixing bowl with an electric hand mixer (or use a stand mixer fitted with the paddle attachment) until soft and fluffy.
- Add egg and vanilla and mix to combine.
- Add flour, cocoa, and salt and mix until just combined.
- Cover dough and chill in the fridge for 30 minutes.
Shape, bake, and cool
- When dough has chilled, shape it into 1 inch balls. I like to use a small cookie scoop to make sure they're all evenly sized.
- Roll each dough ball in powdered sugar until it's lightly coated. Place 1 inch apart on a lightly greased or parchment-lined cookie sheet (you can also use a Silpat or nonstick baking mat for this!)
- Lightly press down on each cookie with your thumb to make an indent.
- Bake cookies at 350° F for 8-10 minutes, until cookies have puffed up slightly and show small cracks along the surface.
- Remove cookies from oven. Let cool directly on the baking sheet until they're cool to the touch, about 30 minutes. If the indents in the cookies puff up in the oven, gently push them back down with the back of a spoon.
Melt the chocolate filling
- Melt half of the semi sweet chocolate over a double boiler until it's smooth and glossy. Remove chocolate from heat and stir in remaining semi-sweet chocolate until it's smooth and melted.
- Spoon a dollop of melted chocolate into the center of each cookie.
- Sprinkle a few pieces of crushed candy cane on top of the chocolate cookie centers while the chocolate is still warm. Let chocolate set for 30 minutes to an hour.
Drizzle with dark chocolate
- Melt half of the dark chocolate over a double boiler until smooth and glossy. Remove from heat and stir in remaining dark chocolate until it's smooth and melted.
- Use a spoon to drizzle dark chocolate over cookies in a zig-zag motion. Let set for at least one hour, until chocolate has set.
Notes
Use a kitchen scale. Measuring ingredients - especially flour - by volume (with cups) is notoriously unreliable; for best results, use a kitchen scale and follow the weight (gram) measurements in the recipe above.
You can chill the dough overnight if you want, but it will get pretty hard in the fridge. If you go this route, let the dough sit on the counter for 30 minutes to an hour until it is soft enough to scoop easily.
Use good quality chocolate to ensure it melts smoothly - we used Ghirardelli bittersweet baking chips and Ghirardelli dark baking chocolate here.
Love this recipe? Try my famous Gingersnaps next!
Loosely adapted from Better Homes and Gardens Magazine
Nutrition
- Serving Size: 1 cookie
- Calories: 128
- Sugar: 13.9 g
- Sodium: 43 mg
- Fat: 6.4 g
- Carbohydrates: 18.6 g
- Protein: 1.3 g
- Cholesterol: 14.3 mg
Keywords: cookies, dessert, christmas, holiday









Nicole
These are so pretty Jessie!!! So festive!
★★★★★
Team Life As A Strawberry
We're so happy you loved these holiday-ready cookies!
Jessie
Thanks, Nicole!
Happy Valley Chow
Wow those look spectacular! Fantastic recipe, perfect for the holidays 🙂
Happy Blogging!
Happy Valley Chow
Zainab
I wish I was one of your recipients!! These look amazing!!
Jessie
Thanks, Zainab!