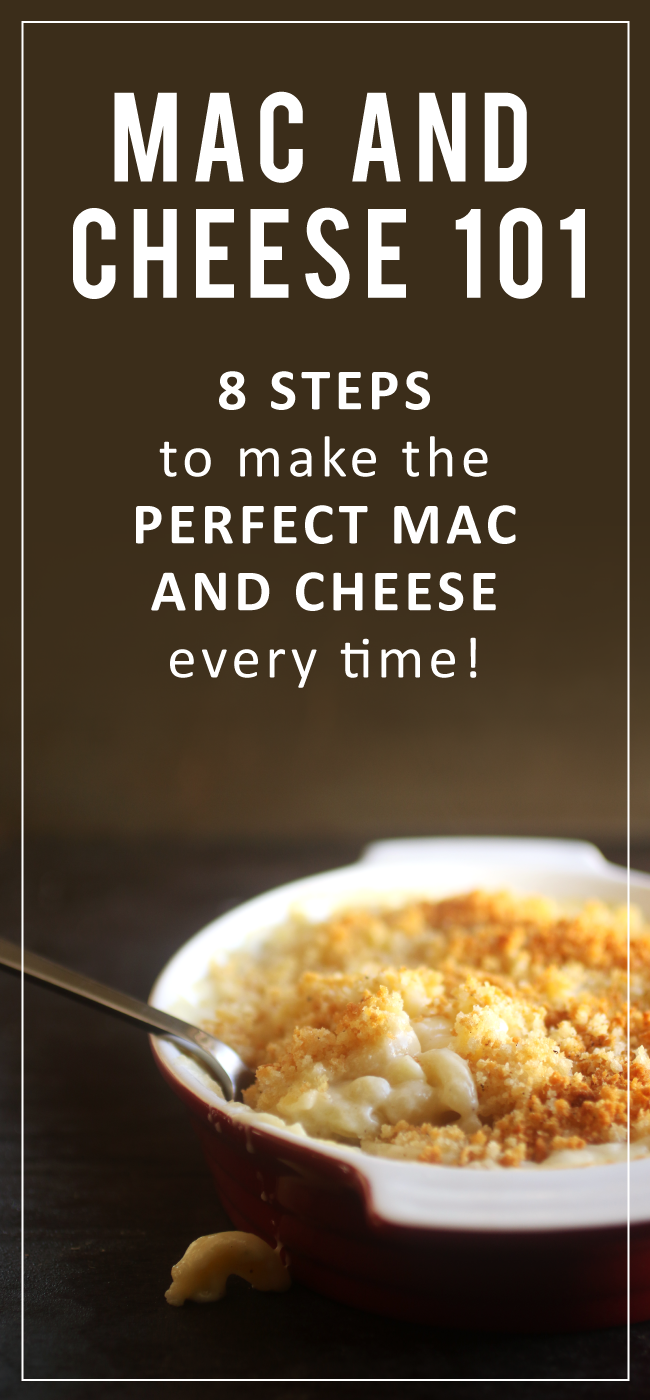
This Mac and Cheese Masterclass is the latest installment in my Cooking 101 Series!
If I was stranded on a desert island and could only eat one thing for the rest of my life, that thing would be macaroni and cheese.
Mac and cheese is pretty definitively one of the greatest foods of all time. It's also one of the foods I get the most questions about from friends and readers. For those who grew up on the ultra-Americanized boxed mac and cheese, the idea of whipping up a luscious cheese sauce from scratch can be a little intimidating.
But with the right techniques, homemade mac and cheese is totally, completely, 100% possible. And it's not just possible: it's also enjoyable, delightful, quick, easy, and, ummmm, way more delicious than that boxed stuff.
So in this post, I've put together a macaroni and cheese masterclass that takes you through the eight components of perfect mac and cheese - from pasta shapes to sauce technique to mix-ins and bread crumbs to the kitchen equipment I swear by.
Note: I've included my favorite pastas, cheeses, tips, and toppings here, but this is definitely not the end-all-be-all list of macaroni and cheese variations. Use this guide as a starting point and let your creativity run wild! Have a favorite combination or technique you don't see here? Let me know in the comments!
Ok, folks. LET'S GET CHEESY.
STEP 1: CHOOSE THE RIGHT PASTA FOR YOUR MAC AND CHEESE.
When discussing mac and cheese, it makes sense to start with the mac. While macaroni pasta is probably the most famous mac-to-the-cheese, it's definitely not the only noodle in the sea (noodle in the sauce?)
When selecting your pasta for macaroni and cheese, look for shapes with plenty of texture. The best pasta for mac and cheese has deep grooves, pockets, and ridges - these features help each noodle catch as much cheese sauce as possible. Avoid long noodles like spaghetti or fettuccine, whose smooth surfaces don't hold cheese sauce all that well, and opt instead for short, ridged shapes like radiatore or shells. My favorite pasta shapes for mac and cheese are in the graphic below!
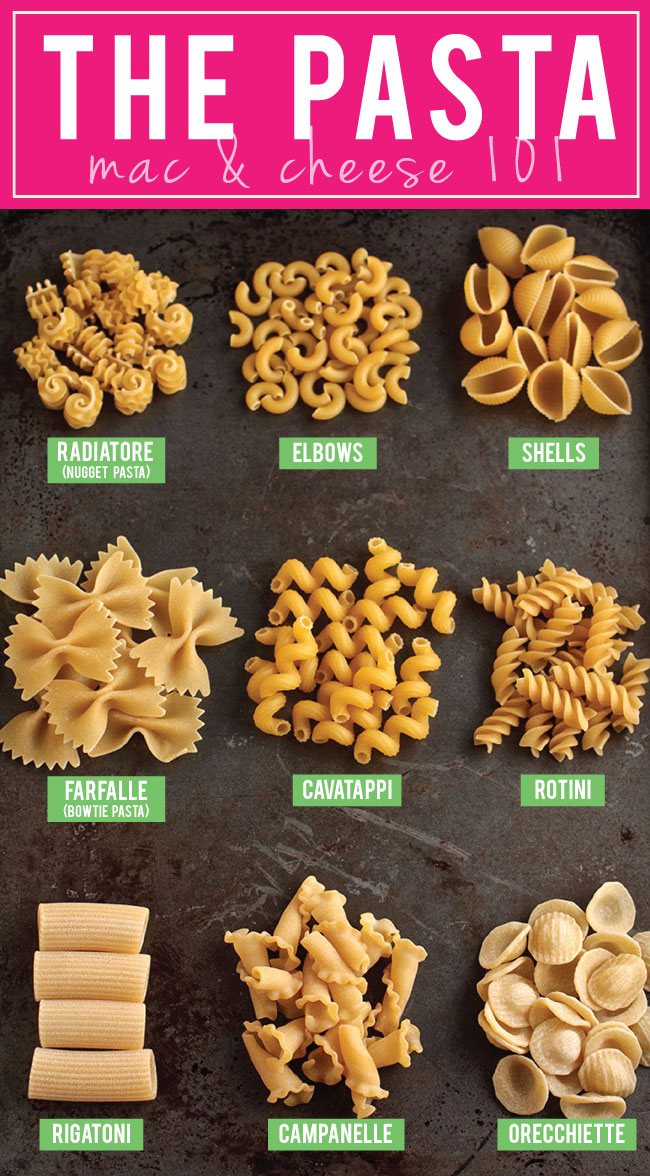
Keep in mind that different brands have different names and labels for similarly-shaped pastas. Don't worry too much about finding the right pasta name - instead, focus on looking for short, textured pasta with lots of grooves to hold that bomb-diggity cheese sauce you're about to make.
Always cook your pasta in very salty water - the salt makes a huge difference in flavoring the noodles! Boil pasta until it's al dente - Italian for to the tooth - and has a slight bite left to it.
If you plan on baking your mac and cheese, cook pasta 3 to 4 minutes LESS than al dente. The pasta will continue to cook in the oven, so by putting slightly undercooked pasta into the oven you ensure a perfectly al dente end result.
STEP 2: CHOOSE THE RIGHT CHEESE.
Cheese-ing up a macaroni and cheese sauce is an art form. While you can absolutely pick an old favorite and stick with it - helloooooo, all-cheddar-cheese-sauce! - the best macaroni and cheese often features a combination of cheeses. I've highlighted some of my favorites in the below graphic, but the possibilities are endless!
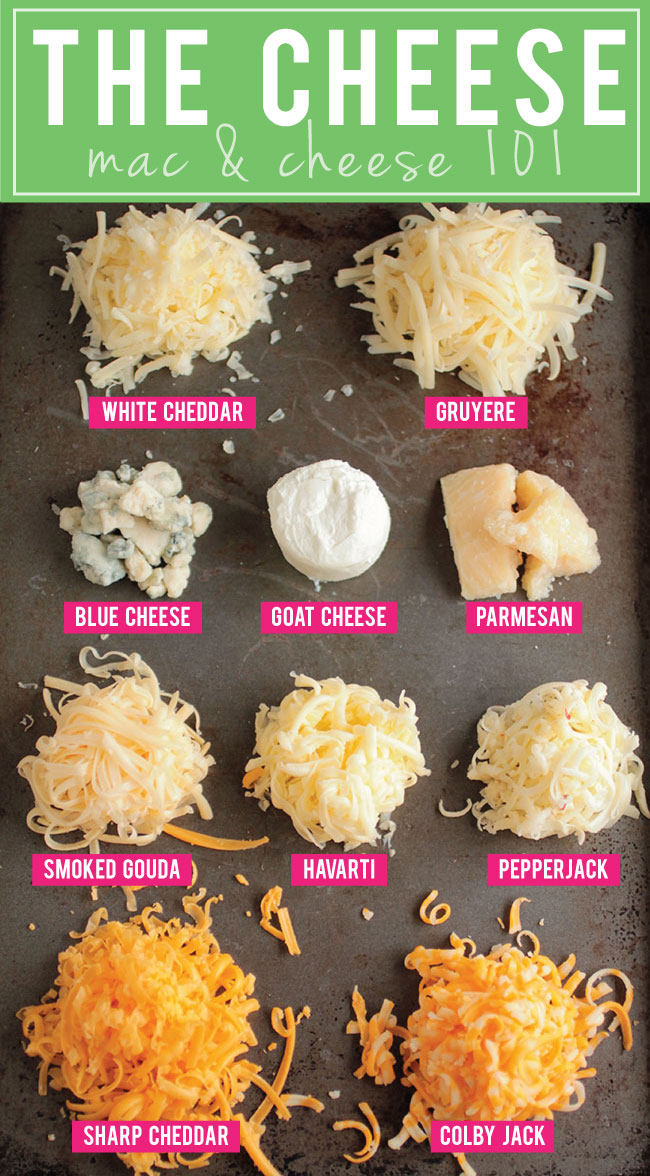
A few tips for choosing cheeses:
Expensive cheese does not equal delicious cheese sauce. Don't blow your budget on an extra-fancy cheese that's just going to get melted into oblivion and smeared all over a pile of carbs. Your favorite everyday cheeses are just fine! DO, however, look for aged cheddar and parmesan (you know how aged cheddar tastes a lot more like "BOOM! I'M CHEDDAR!" than run-of-the-mill sandwich cheese? That's what you're looking for in a cheese sauce).
Shred your own cheese. Ever look at the ingredients list on the back of pre-shredded cheese? It's usually "cheese," (of course) followed by a whooooole bunch of other stuff. This is bad for two reasons: (1) preservative chemicals are gross and I don't like it when they're all over my food and (2) the chemicals they put on pre-shredded cheese often prevent it from melting smoothly. Use a sturdy box grater to shred a block of cheese or go full cheese-ster with the shredding disc of a food processor (more details in the equipment section below!).
Taste as you go. The first time I added blue cheese to a mac and cheese sauce, I dumped in a verrrrrry generous handful of the stuff. And it tasted horrible. (Fortunately, I figured out the ratio and ended up with a pretty awesome blue cheese mac and cheese, PHEW). If you're experimenting with new cheese combinations, start small, especially if you're using a cheese like smoked gouda or pepper jack that has a strong flavor to it. Stir a little bit of cheese into the sauce, then taste it to see how the flavors are developing. You can always add more cheese!
Balance strong flavors with mild ones. I love the strong flavors of smoked gouda, pepper jack, blue cheese, and gruyere, but it's easy to go overboard and end up overpowering the distinct flavor you're going for. For the perfect flavor combination, choose a cheese you want to highlight and complement it with mild flavors that lend depth and creaminess to your sauce without obscuring the cheese on display. Cheeses like white cheddar, havarti, and fontina are great mild cheeses to use alongside those stronger flavors. Some of my favorite combinations include Gruyere + Fontina + White Cheddar (à la our lobster mac and cheese), Smoked Gouda + Sharp Cheddar, Goat Cheese + Havarti, and Pepper Jack + White Cheddar.
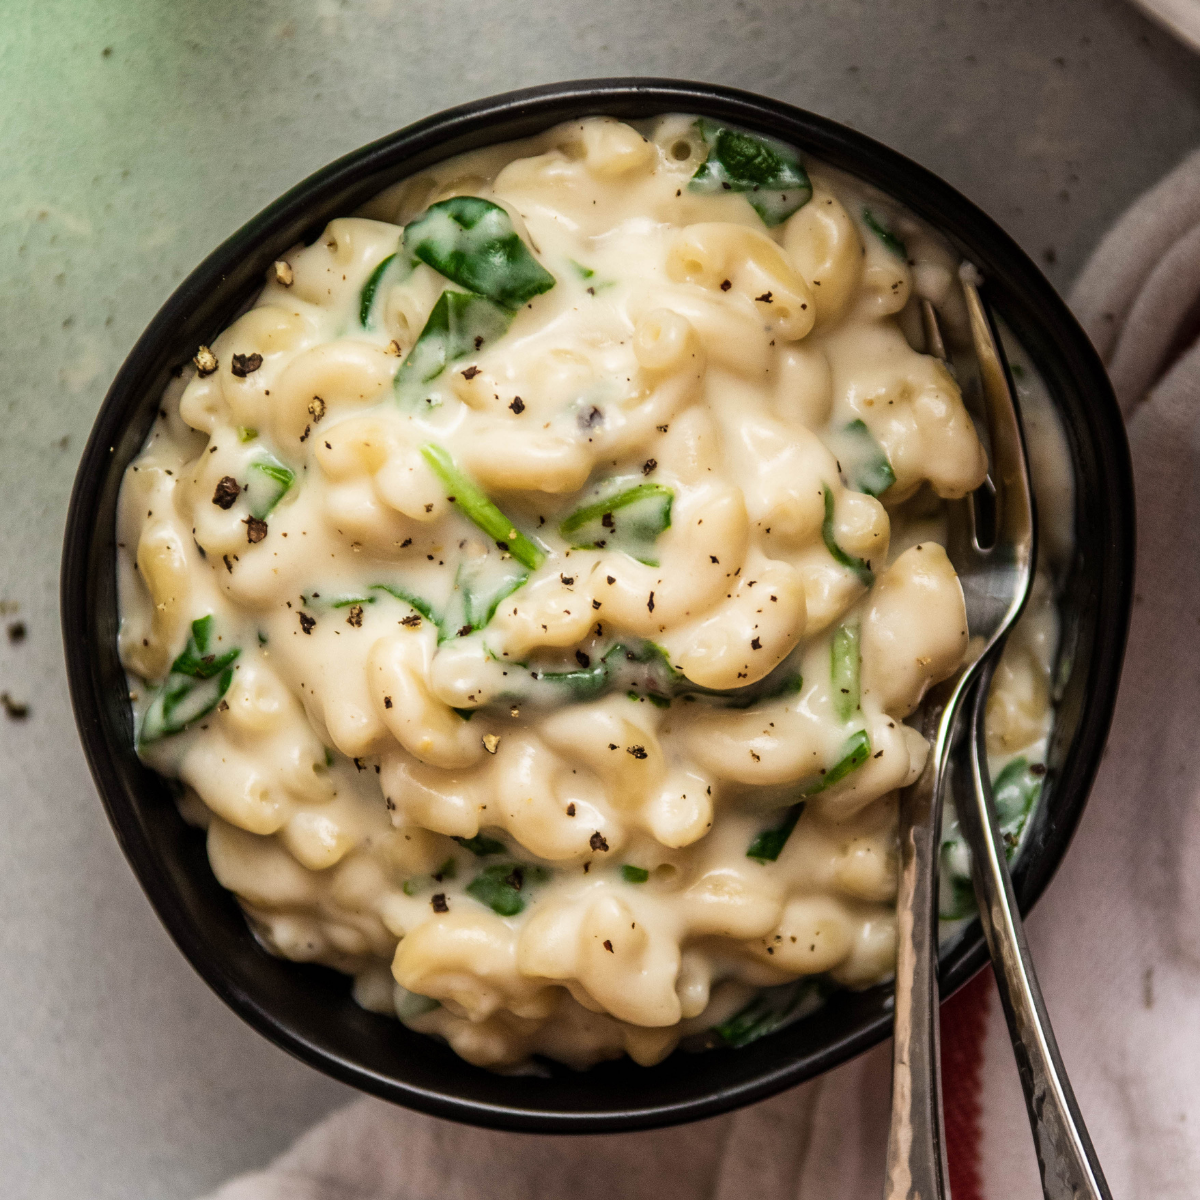
Don't be afraid to keep it simple. It's a lot of fun to mix up new cheese combinations, but sometimes a single-cheese sauce is just what the mac-doctor ordered. I tend to use a single cheese in my sauce when I'm adding layers of flavor in other ways - such as proteins, vegetables, or mix-ins like pesto and squash puree. Just like you don't want one cheese flavor to overwhelm another, you don't want too many cheeses to compete with the other components of your macaroni and cheese. In recipes like Havarti Spinach Mac and Cheese or Roasted Butternut Squash Mac and Cheese, for example, a single cheese addition means the other flavors can shine through.
STEP 3: MASTER THE CHEESE SAUCE.
When people ask me about macaroni and cheese, the sauce is often their biggest concern. But fear not! We're about to demystify this whole mac sauce situation.

Macaroni and Cheese sauce is really just a cheesed-up version of béchamel, one of the five French Mother Sauces. Béchamel is made by first making a roux - a paste made of melted butter and flour, whisked together and cooked until you've "cooked out" the taste of raw flour - and adding milk. (Totally Rad Roux Tip: You can tell the roux is done when it smells like toasted almonds).
The cooked roux then acts as a thickening agent when whisked into milk - it's what helps the béchamel achieve a thick, creamy consistency. Basic béchamel is used as a base for all kinds of sauces (but personally, I think a rich macaroni and cheese sauce is the best of all béchamel spinoffs).
To make a great cheese sauce: Melt butter over medium heat, then whisk in some flour. I like to use a 1:1 ratio of butter to flour (so, if you use 3 tablespoons of butter, you would also use 3 tablespoons of flour). Cook for a minute or two until roux has thickened and is fragrant, then whisk constantly as you slowly add in the liquid. (See the video at the end of this post for a demo!)
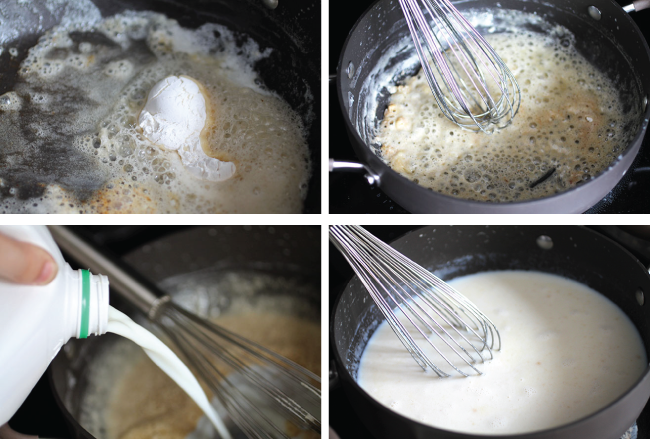
Don't let the roux cook too long - as it cooks, it will darken considerably, and a too-dark roux can mean you end up with dark brown flecks in your sauce.
Customize the flavor of your sauce by substituting ⅔ cup or so of beer (my personal favorite ??), chicken stock, or even coconut milk for part of the milk in your béchamel recipe.
Season the sauce with a pinch of salt and pepper, then simmer over medium heat, whisking occasionally, until milk has thickened to just about the consistency you want for your cheese sauce. This generally takes 5-10 minutes. Turn off the heat, then add your shredded cheese and stir until cheese has melted and you have a smooth sauce.
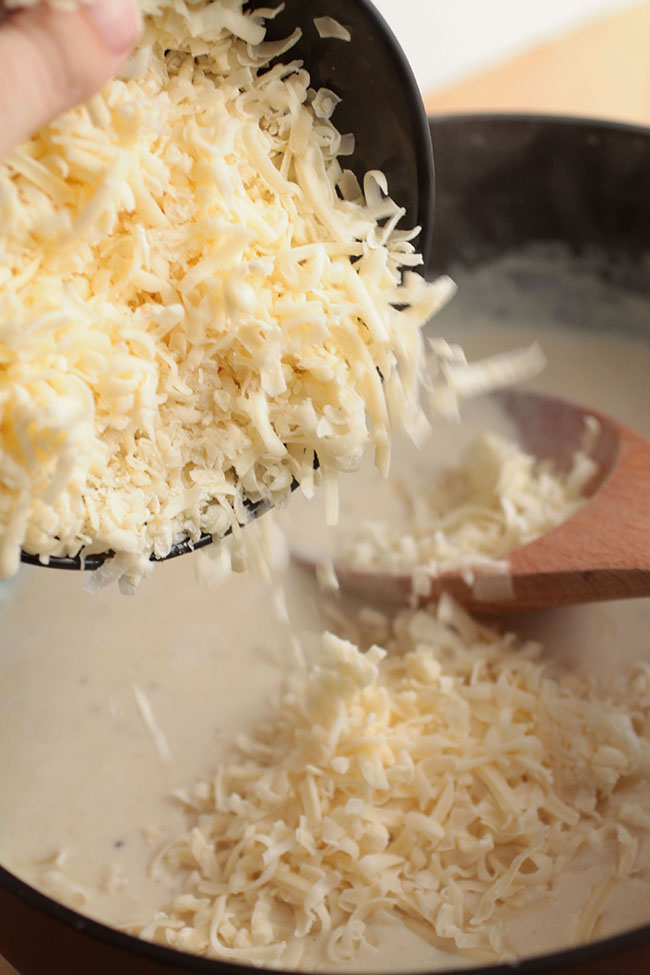
Before you add the pasta or any mix-ins, take stock of your sauce and make sure it's behaving itself. If something looks off, never fear! Here are some easy fixes to the most common problems:
Sauce too thick? Stir in a splash of milk and mix until the sauce has loosened up. (This is also a great trick for reheating mac and cheese - if you're microwaving leftovers and the sauce seems to have dried up, stir a splash of milk or half-and-half into the pasta to bring the sauce back to life!)
Sauce too thin? Add another handful of cheese! You can also return the sauce to the heat and let it simmer until it thickens, but this can cause the cheese to separate. Fortunately, there's a trick to fix that, too! ⬇
Grainy or separated sauce? It happens to the best of us. Sometimes the cheese and the milk just don't want to be friends, and your sauce turns out a little...gloopy. Remove the sauce from the heat and give it a zap with an immersion blender (or blend it in batches with a regular blender) to smooth it out and bring it back to the proper creamy consistency.
When you're happy with your sauce, stir in the cooked pasta along with any veggies or protein you like.
BOOM! You = MAC AND CHEESE CHAMPION.
STEP 4: VEGETABLE ADD-INS.
I guess we'll talk about vegetables (plus the ever-annoying fruit-tomato, which yes I still included in the veggie graphic) for a second here, because "health food" or whatever.
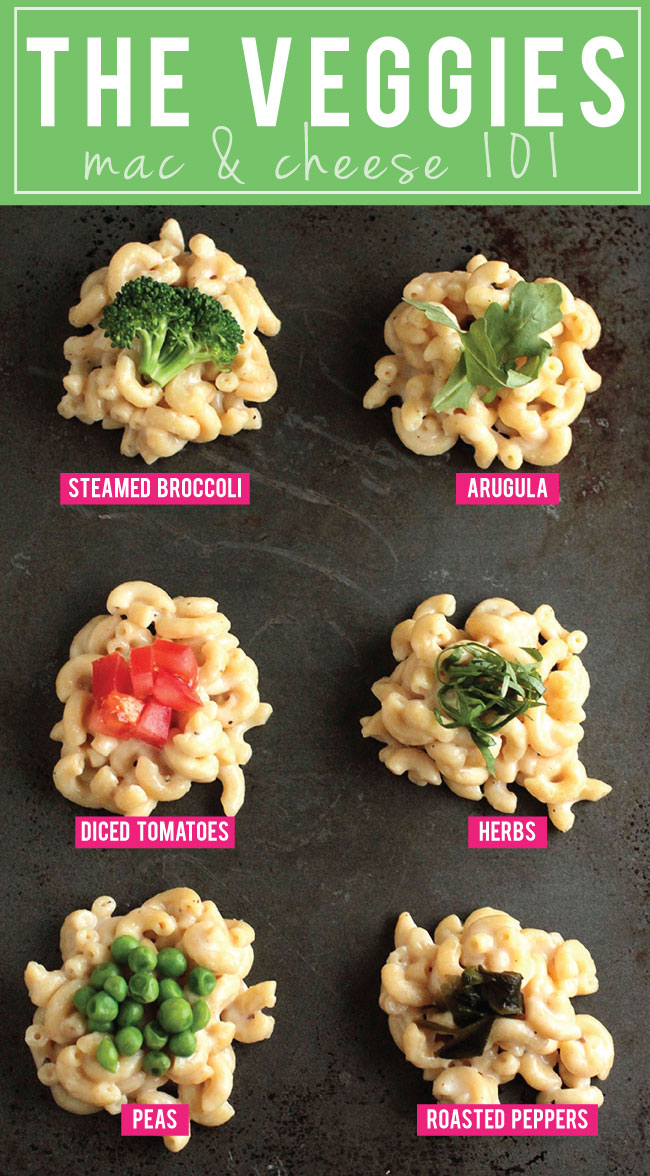
I actually really love mixing vegetables (and fruit-tomatoes) into macaroni and cheese. It's a simple, easy way to elevate a quick dinner. Also, nutrients (if you're into that sort of thing), which means you can eat more of the cheese-covered-carbs. Yes?
Stir these mix-ins right into the sauce at the same time you add the pasta, top each serving with a spoonful of your chosen accoutrement, or build a DIY-mac-and-cheese-bar with veggies (and protein, below) to let guests customize their own mac and cheeseperiences.
Some of my favorite veggie-tastic additions:
Blanched veggies. Blanch some broccoli florets, peas, cauliflower, or corn in boiling water for a minute or two (I actually like to add these veggies in with the pasta when it has about 2 minutes of cook time left!)
Roasted peppers. Roast a poblano, jalapeno, or bell pepper at 400 degrees F until the skin has charred. Put hot pepper (carefully! With tongs!) into a bowl and cover it with plastic wrap until it's cool enough to handle. Peel the skin off, remove the seeds, and dice it up.
Chopped things. Roughly chop some arugula, spinach (like in our havarti mac and cheese or parmesan spinach mac and cheese!), basil, parsley, or cilantro and stir it into your cheese sauce. Other favorites: diced tomato, diced red bell pepper (non-roasted).
Caramelized mushrooms and onions. A lil' bit of butter. Some sliced onions. A few sliced mushrooms (mushroom garlic mac and cheese = amazing). Maybe a garlic clove. Salt and pepper. Sauté it all in a hot skillet until onions have caramelized and put a big scoop on top of your mac and cheese.
STEP 5: ADDING PROTEIN.
Meatzzzz!
Adding a bit of protein to your regular ol' macaroni and cheese can round out your mac and give it the hearty bump it needs to move to "main dish" status.
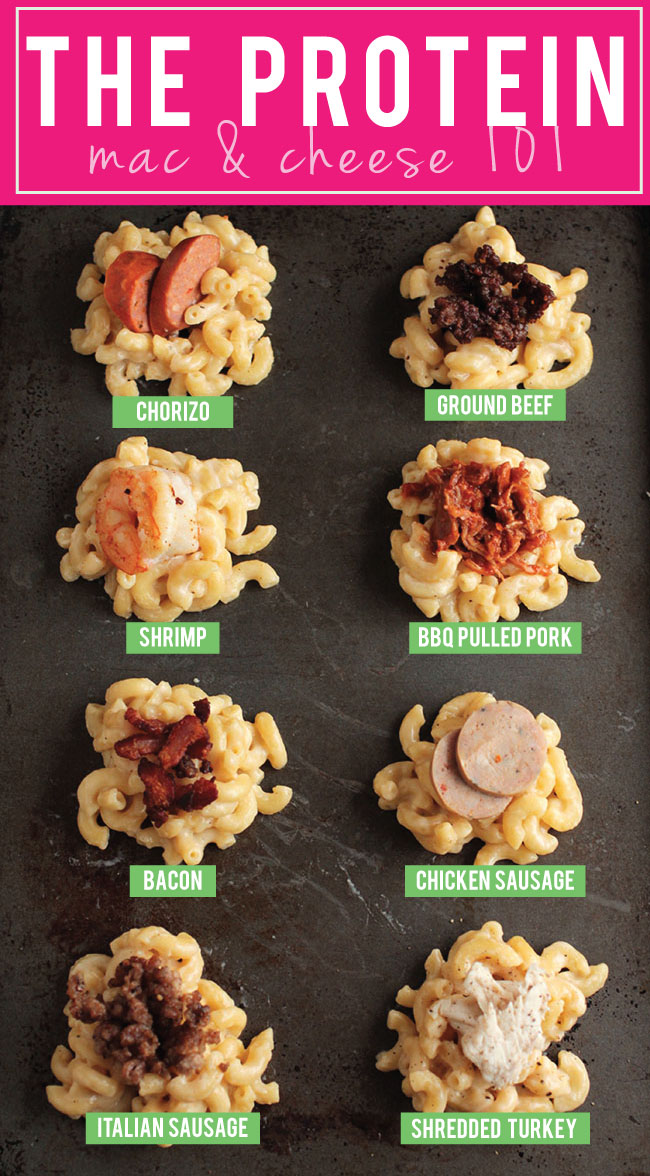
My favorite ways to add a bit of protein:
Slice up a few chorizo or chicken sausages for a no-muss-no-fuss addition.
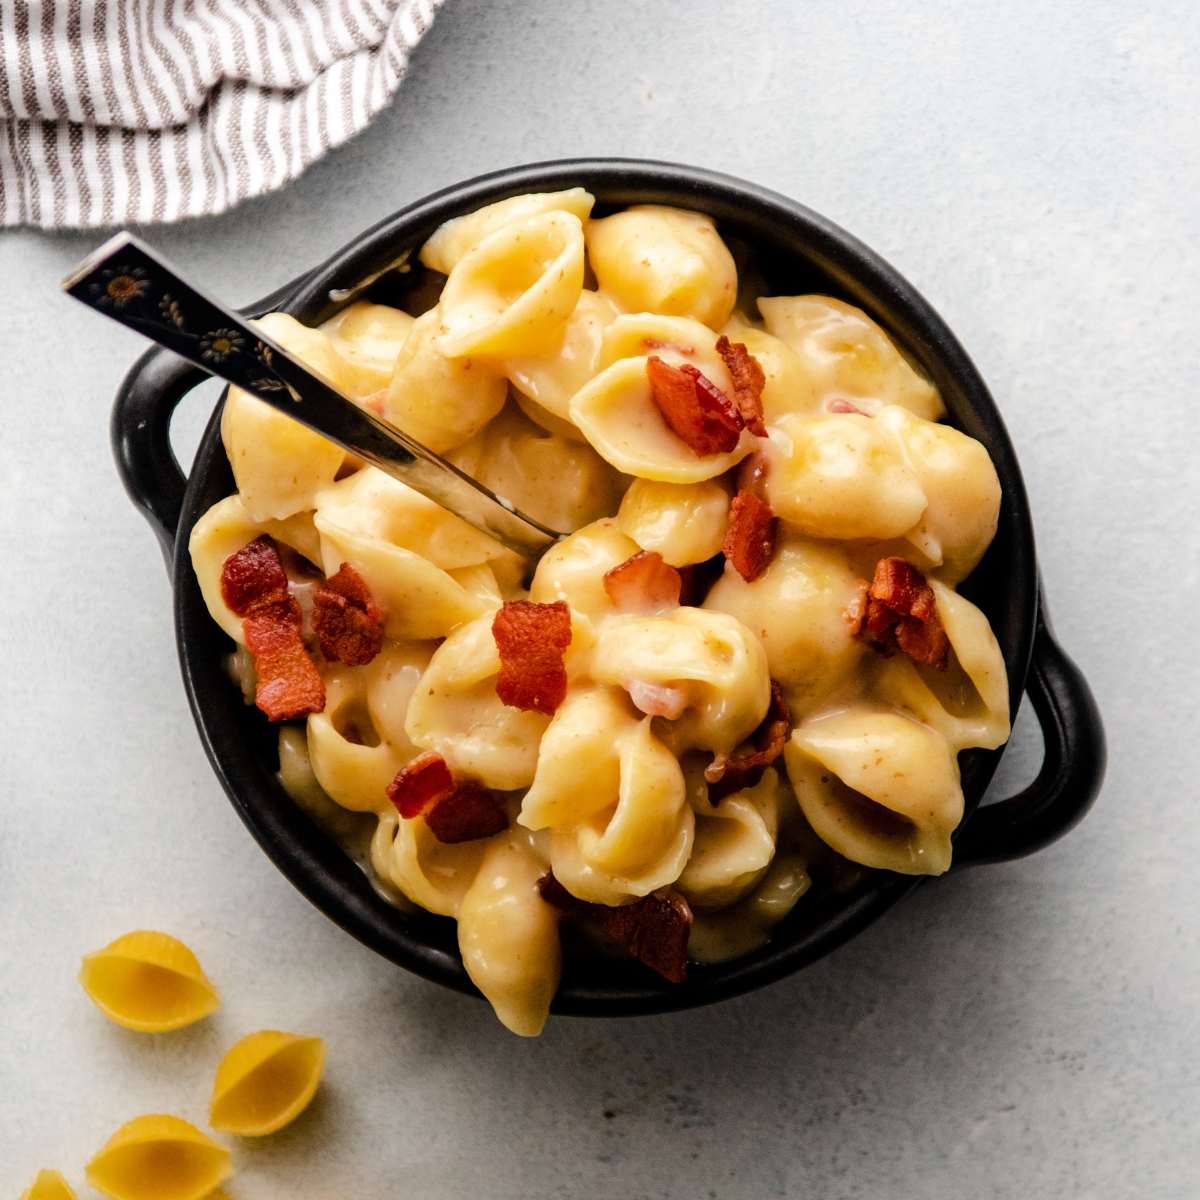
Fry up a few bacon slices until crispy, let them cool, then crumble the bacon into your mac. (See this in action with our rosemary bacon mac and cheese, jalapeño mac and cheese, or hard cider mac and cheese!)
Stir in some leftover turkey or chicken.
Sauté shrimp (or lobster!) in a bit of butter, garlic, and red pepper flakes for a seafood twist. Lump crab with a bit of lemon juice is also a tasty topping for your everyday mac and cheese. (If you use seafood, be sure to source it sustainably!)
Cook some spicy Italian sausage or ground beef in a skillet, drain the fat, and stir it into your pasta.
STEP 6: UPGRADING YOUR MAC AND CHEESE SAUCE.
I love mixing various vegetables and proteins into mac and cheese, but there are times that I want all the flavor of another component without changing the texture of the dish. Blending new flavors into a cheese sauce can elevate the flavor and bring new depth to an old classic.
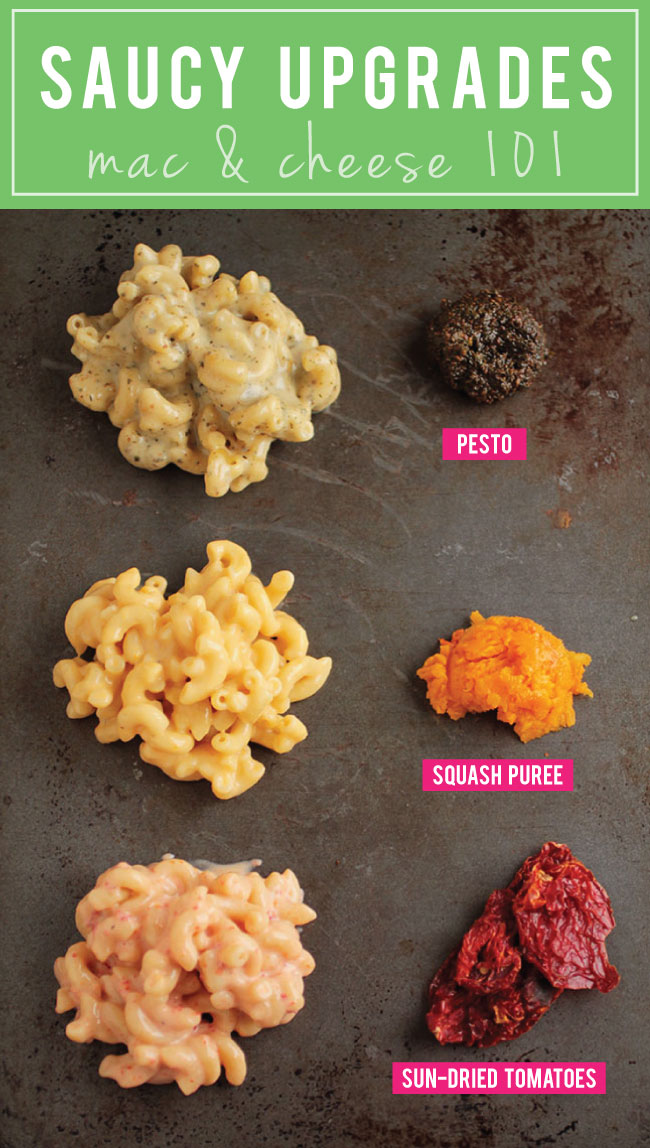
Some of my favorite blend-able saucy upgrades:
Whisk basil, kale, or arugula pesto into a white cheddar sauce to brighten up classic mac and cheese.
Add roasted butternut squash or pumpkin to your cheese sauce à la our butternut squash mac and cheese (I love using white cheddar or goat cheese here!) and puree with an immersion blender to work the squash smoothly into the sauce.
Blend sun-dried tomatoes into a sauce with an immersion blender (or blend in batches with a regular blender). I love adding goat cheese and fresh chopped basil to this version!
Avocado adds an amazing depth and creaminess to sauces. Blend half an avocado into a white cheddar sauce with an immersion blender for a silky smooth avocado mac and cheese sauce.
STEP 7: THE PERFECT BREAD CRUMB TOPPING.
One thing I've learned in my mac and cheese travels is that people have very strong opinions about whether mac and cheese should or should not be baked. For my part, I tend to fall in the stovetop mac and cheese camp, but I still occasionally crave the crispy, buttery, bread-crumb-y goodness of baked mac and cheese.

The trick to a perfectly golden brown baked mac and cheese is to toast the bread crumbs before you actually put it all in the oven. Melt a tablespoon or so of butter in a skillet over medium heat and add ½ cup of panko bread crumbs (panko bread crumbs > regular bread crumbs. By a LOT).
Toast bread crumbs, stirring frequently, until they've turned a light golden brown. Fill an oven safe dish (I ❤ enamel-coated bakeware like this Le Creuset dish - more info. in the equipment section below!) with your mac and cheese and top with your toasted breadcrumbs. Bake at 375 degrees F for 20-30 minutes until bread crumbs are a deep golden brown and pasta has crisped up around the edges.
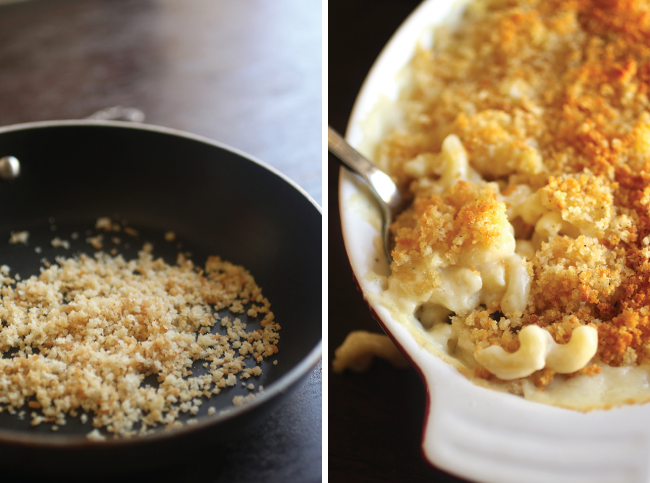
If you want to speed the bread crumb process along, you can turn on the broiler to crisp up the top of the macaroni and cheese - just watch it very carefully to make sure it doesn't burn.
STEP 8: USE THE RIGHT TOOLS.
Congratulations - you're ready to make the world's greatest macaroni and cheese! ? The best thing about homemade mac and cheese - aside from the mac & cheese itself - is how easy and uncomplicated it is to throw together. And while you definitely don't need any fancy equipment, I've found a couple (awesome! affordable!) products that I swear by when making mac and cheese at home.

Anolon Hard Anodized Nonstick Quart Pot // I have no idea how I lived without this pot for so long. You guys - it is the PERFECT macaroni and cheese vessel. It's nonstick but still safe for metal utensils, which means you can use your favorite whisk without damaging the pot AND have an easy, breezy cleanup no matter how thick and cheesy your sauce is. See the pot in action in the mac and cheese how-to video below! PS - it's got an average 4.8/5 stars from Amazon reviewers!
Cuisinart 14-Cup Food Processor // The slicing disc on this food processor has revolutionized the way I make mac and cheese. I love to buy cheese in bulk and shred it myself (see our cheese section above!) but shredding a ton of cheese by hand gets tedious and annoying. With the food processor attachment, I can shred a huge block of cheese in less than a minute. I like to buy a few big cheese blocks, shred them all with the food processor when I get home from the store, and store shredded cheese in the freezer until I'm ready to use it. If you don't need a food-processor-level of bulk-cheese-shredding capabilities, a good ol' box grater will also do the trick. Average Amazon rating: 4.⅘ stars from 1,000 reviewers!
Le Creuset Stoneware Dish // Cheese sauce is the best, but it can be hard to clean, especially after you've baked your mac and cheese to crispy, toasty perfection. I love to use baking dishes with an enamel finish - the smooth coating makes it RIDICULOUSLY EASY to clean, even if you're dealing with a baked-on cheese sauce situation. This Le Creuset dish is one of my favorites - it comes in a few different sizes and colors, has handles to help pull it in and out of the oven, and it's dishwasher safe! There are a bunch of great enameled or ceramic casserole dishes out there - when I'm not using a Le Creuset, I love my Denby dish and a few Crate and Barrel pieces. Average Amazon rating: ⅘ stars.

I made you a video!




Ashley
I can’t find any info or guide on what ratio of milk/liquids to use in the base bechamel sauce and also for the amount of cheese. I can only see what others use in their recipes. I know you use a 1:1 ratio for butter and flour to make the roux but can you give me any pointers on amount of milk and cheese?
Team Life As A Strawberry
Our downloadable mac and cheese formula has our favorite breakdown of how much liquid and cheese to use for the perfect mac and cheese!
Logan Roberts
I have a foood truck. Any suggestions as how to keep noodles from becoming dry or mushy? We pre cook to aldente & have tried everything from oiling to pre mixing. Where we are at now is cold cooked noodles, microwaved for a minute amd then mixed in with our preheated cheese sauce. It works but takes a bit of time. Any other suggestions?
Team Life As A Strawberry
Hi Logan! It depends on your space and equipment, but our recommendation would be to undercook the pasta by 1-2 minutes (this keeps it from becoming mushy when reheated), strain, and place the strainer immediately into an ice bath to stop the cooking. Then toss in olive oil to lightly coat and keep from sticking and refrigerate, covered, until ready to use.
Since you're likely cooking in small batches, have a pot of boiling water going at all times with a small basket/colander that fits inside. Pull the serving size needed out of the fridge and place it in the basket and boil for 1-2 minutes until warm and cooked al dente (this rehydrating will keep it from getting dry or gummy). Then toss with the warm sauce and serve!
Michael
I just wanted to know your cheese to pasta ratio
Team Life As A Strawberry
Our Mac and Cheese Formula includes 3/4 pound of uncooked pasta to 2 1/2 cups cheese!
Savannah Price
Im making mac and cheese for my class at a summer camp. What do you think of Monterrey Jack, Sharp Cheddar, and Smoked Gouda going together in a sauce. Thank you in advance.
Deb
Great post!! I’d like to try this with Couscous. Do you have an thoughts or recommendations, cheese options or added proteins. Thanks.
Jessie @ Life As A Strawberry
You could certainly use a cheese sauce with couscous if you like! Any of the cheese or protein options we go through here would work for couscous as well - you may just need a little less sauce (or to add an extra splash of liquid to your sauce) since couscous is so delicate and you don't want to overwhelm it. You could try a thinner cheese sauce with parmesan cheese and add some grilled chicken and zucchini with fresh basil and tomatoes for a summery twist!
Angie
Hi! Thanks for the awesome tips. Quick question, can I use tagliatelle pasta instead?
Jessie @ Life As A Strawberry
Definitely! I personally prefer using smaller pasta shapes with tight twists and turns (cavatappi is my favorite lately!) because they hold onto cheese sauce so well, but you can use any type of pasta you like!
Maryanne
Hi Jessie,
Thanks for all the tips. Quick question, can I freeze the Mac and cheese?
Maryanne
Jessie @ Life As A Strawberry
Hi Maryanne! Definitely - you can let the mac cool completely and then pack it into a baking dish with an airtight lid.
If you're baking your mac and cheese, you can toast the breadcrumbs and add them to the top of the pasta when you freeze it, or you can toast them whenever you're ready to bake.
I find the pasta freezes best when it hasn't been previously baked, and I also recommend adding some extra liquid to your sauce (the noodles will soak a lot of it up!) and undercooking the noodles by an extra minute or two so they hold together better and reheat without losing their bite. If you're baking mac and cheese straight from frozen, put the cold baking dish into a COLD oven and let the oven preheat while the mac is already in there so it warms up slowly (cold dishes in hot ovens can break otherwise!) If you're reheating without baking, toss the mac (frozen or defrosted is fine) into a large saucepan with a splash of milk or cream and heat it over medium-low heat (stirring frequently) until it's warmed through.
Hope that helps - thank you so much for reading!
ALLISON HOLT
Great info, Jessie. Thanks for putting it all together!
Jackie @ Life As A Strawberry
Hello Allison, you are welcome!