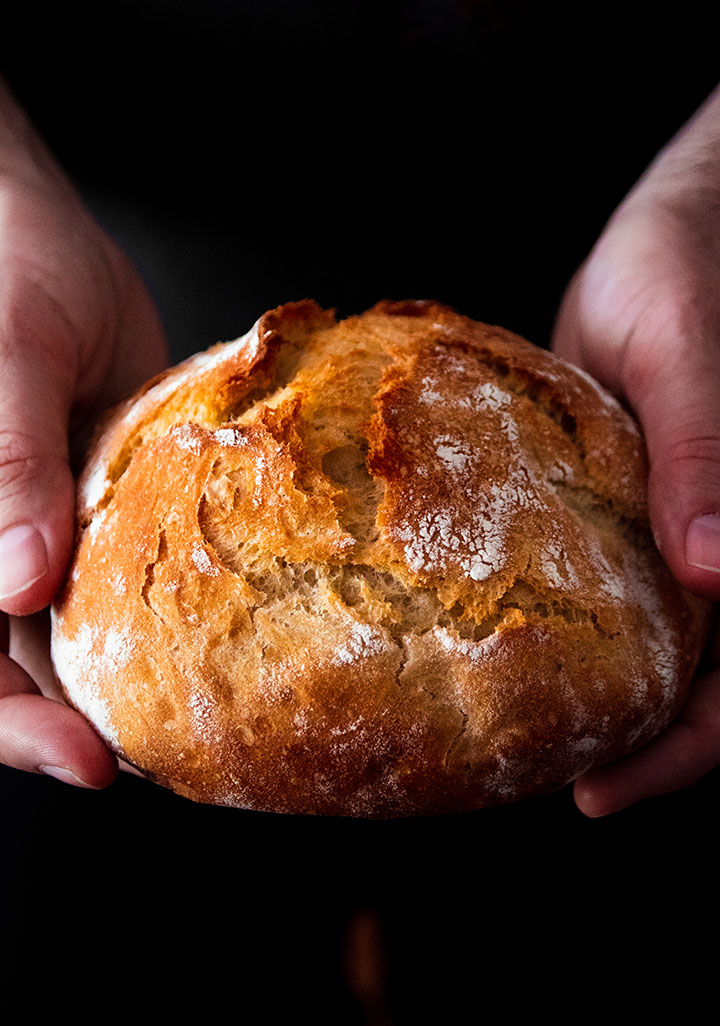
This small batch crusty bread recipe has a thin, crispy crust and a soft interior. Ready in just 3 hours (with no kneading required). The perfect size for two or three people!
We've taught thousands of people to bake their first loaf of bread with our best Easy Crusty French Bread recipe. And while we love digging into that giant loaf, we know that sometimes you just don't need that much bread!
Enter: This small batch crusty bread recipe.
(Also: How FREAKING CUTE is this lil' mini baby loaf?! I'm in love).
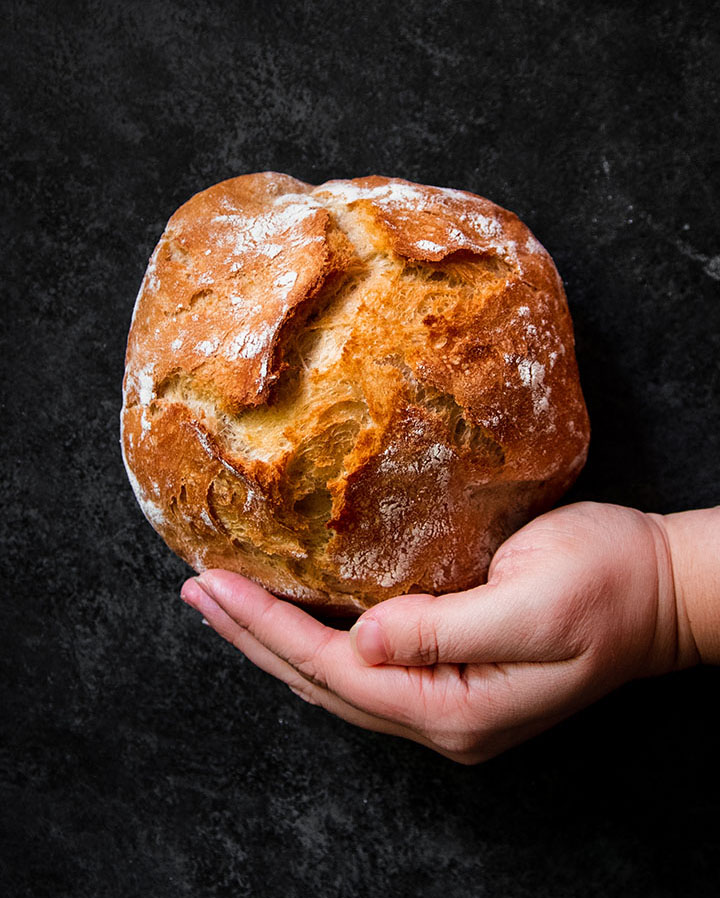
This is a scaled-down version of our classic no knead artisan bread, and it's perfect for just a few people! It makes a small loaf that fits easily in the palm of your hand - typically about 6 inches in diameter.
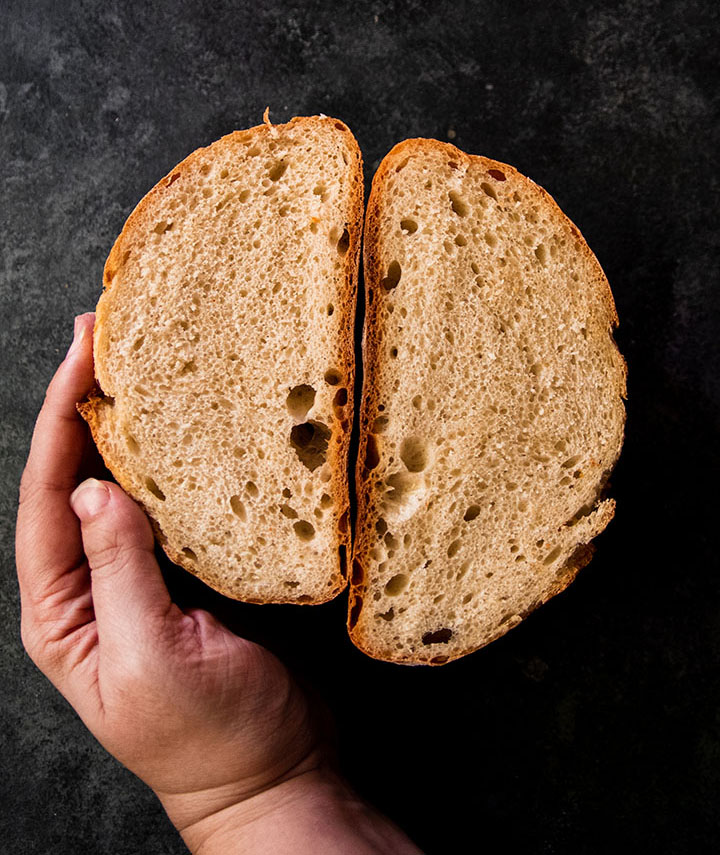
I make this small batch loaf with soup or stew for two people; if we're making sandwiches or crostini, it will serve 4. I usually get about 10 half-inch slices of bread with this recipe.
PS - If you've made our original recipe before, you'll notice a few small differences here: we tweaked some things to keep this loaf of bread extra simple, and we adjusted the cook time to account for a smaller size.
How to make this small batch no knead bread
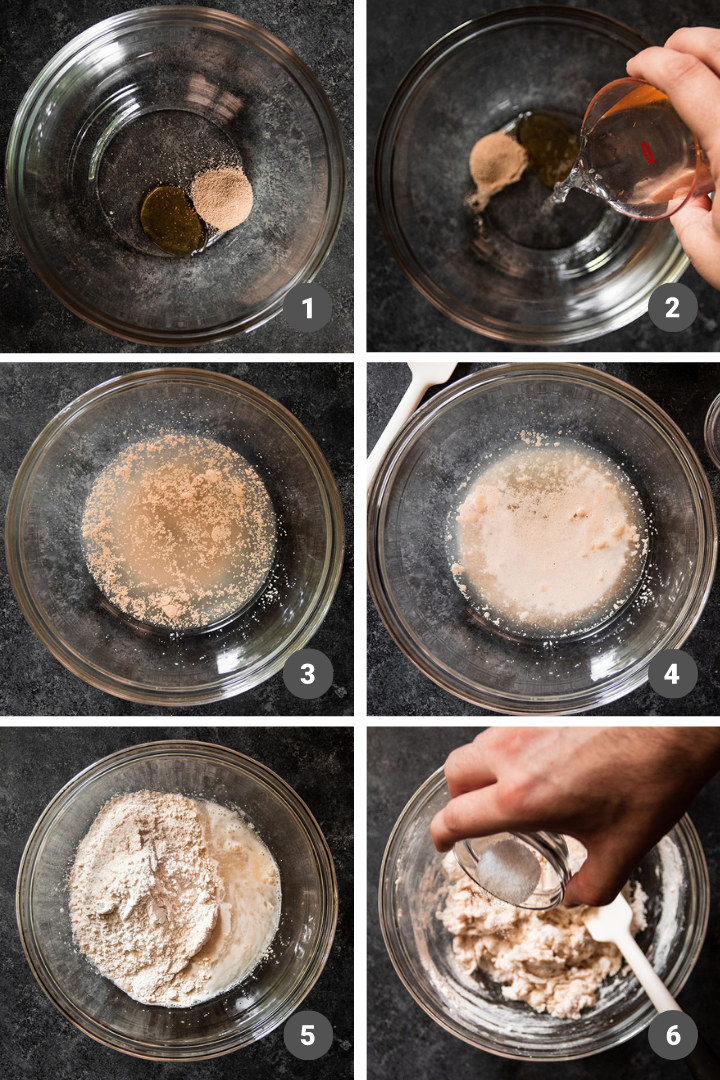
Mix the dough (10 minutes)
Mix active dry yeast and a bit of honey with warm water, then let that mixture sit for a few minutes until the yeast activates and foams. Next, mix in the flour and salt. Stir everything together until no dry flour remains and you have a nice, shaggy dough.
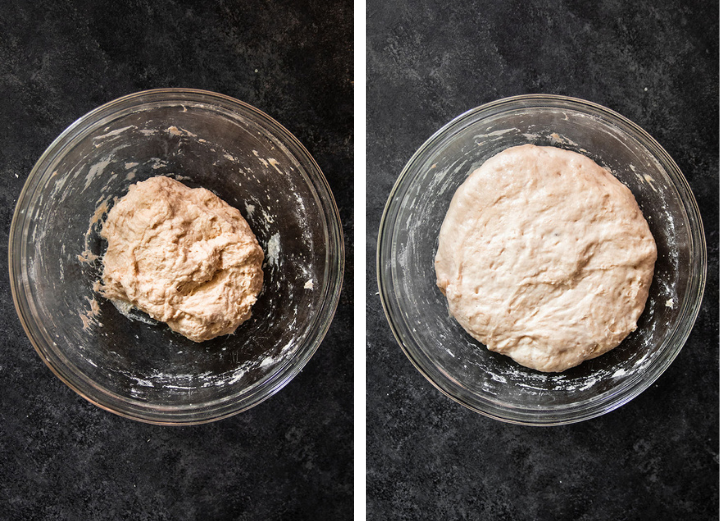
Let it rise (1 hour)
Cover the dough with a clean towel and let it rise for about an hour until it's doubled in size.
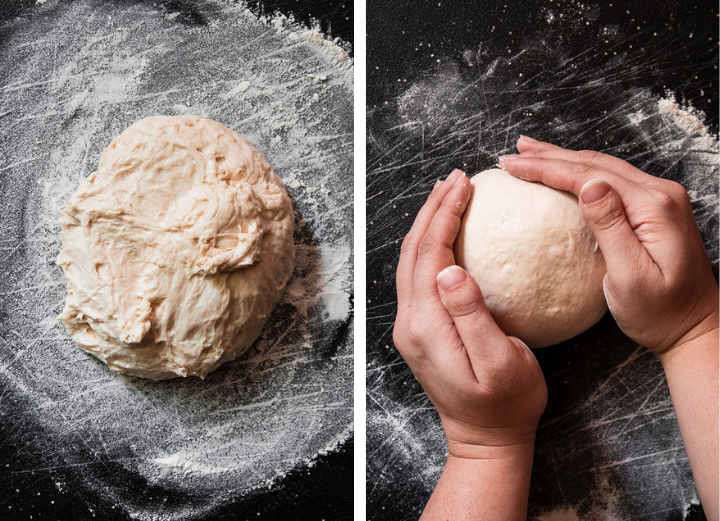
Shape your loaf & final rise (30 minutes)
Shape the dough into a boule (see the video below for how to do this!) and let it rise another 30 minutes or so in a small mixing bowl or proofing basket while you heat the oven.
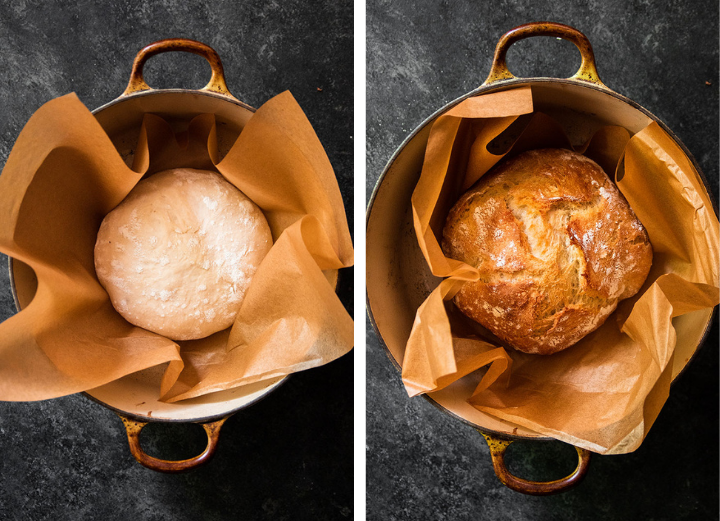
Bake! (30 minutes)
Bake your loaf in a hot Dutch oven (or use one of our other methods!) for 22 minutes with the lid on, then remove the lid and bake another 5-10 minutes to give the crust some more color.
A few tips for successful loaves
- Use a kitchen scale if you have one! Measuring by weight (with a scale) is much more accurate than measuring by volume (with cups). If you have a kitchen scale, please use it! (No kitchen scale? Measure your flour with the scoop and level method for best results!)
- Great bread takes patience and persistence. When you're first learning how to make crusty French bread at home, it might not look exactly like these pictures. THAT'S OKAY! The more you practice, the better your bread will get. Stick with it!
- Use high-quality flour. Trust us: The type of flour you use matters. A LOT. We recommend baking with King Arthur Flour or Bob's Red Mill flour for best results - these flours are the most consistent, and they both have a high protein content (which gives you a stronger, more elastic, less sticky dough!)
- Read through our baking tips in this post or join our Everyday Artisan Bread course for extra help and support!
Small Batch Bread FAQs
Yes! We love using a Dutch oven to create a crispy, crackly crust on our bread, but it's definitely not the only way to bake great bread at home. Check out our post about how to bake bread without a Dutch oven.
Yes! We call for All Purpose Flour in this recipe because most people tend to have it on hand, but you can swap bread flour for some or all of the AP flour here. Bread flour will make your dough a little bit smoother and more elastic, and may give you a slightly taller loaf.
You can replace up to 50% of the All Purpose flour in this recipe with whole wheat flour if you like. We don't recommend using more than 50% whole wheat flour here as it can change the texture of the loaf and result in a denser crumb.
Use water that is "warm to the touch" - you should be able to comfortably hold your hand in it! We typically aim for water between 95° and 110° F.
We recommend mixing this dough by hand in a mixing bowl! Because it's such a small amount of dough, we've found that a stand mixer doesn't work quite as well here. You spend so much time scraping down the sides of the mixer bowl and repositioning the dough that you might as well just mix by hand!
See even more detailed FAQs about bread baking in our Easy Crusty French Bread post, or enroll in our Everyday Artisan Bread course for step-by-step training lessons that take you through every technique, buzzword, and more!
VIDEO: HOW TO SHAPE A LOAF OF BREAD
This video is an excerpt from our Everyday Artisan Bread online course. It demonstrates how to shape a loaf of bread into a round boule. The dough in this video makes a large loaf, but the technique is the same for this small batch recipe!
📖 Recipe

Small Batch Crusty Bread
- Prep Time: 15 minutes
- Inactive Time: 1 hour 30 minutes
- Cook Time: 30 minutes
- Total Time: 2 hours 15 minutes
- Yield: 1 small loaf (2-4 servings) 1x
- Category: Bread
- Cuisine: American
- Diet: Vegetarian
Description
This easy small batch crusty bread is perfect as a quick side dish for two or three people!
Ingredients
- 1 teaspoon active dry yeast (4 grams)
- 1 teaspoon honey (6 grams)
- ⅔ cups warm water (150 grams)
- 1 teaspoon kosher salt (4 grams)
- 1 to 1 ⅔ cups All-Purpose Flour (200 grams), plus extra for dusting (see recipe notes)
Instructions
MIX THE DOUGH AND FIRST RISE (1 HOUR)
- Combine yeast, honey, and warm water in a large mixing bowl.
- Let the yeast proof for about 5 minutes, until the mixture looks nice and foamy.
- Add flour to bowl. Mix with a sturdy spatula until the dough starts to come together, then add salt and mix well, until no dry flour remains. Dough should be slightly loose, shaggy, and a bit sticky!
- Cover bowl with a clean towel. Let rise 1 hour or until doubled in size.
SHAPE THE DOUGH & FINAL RISE (30 MINUTES)
- When dough has risen, lightly flour a large cutting board.
- Tip dough out onto the board. Don’t punch the dough down - handle it gently to preserve all those air bubbles! If the dough is sticking to the bowl, run your hand under cold water (to prevent sticking) and gently pull the dough onto the cutting board.
- Shape your dough into a round loaf by gently pulling each edge into the center like you’re folding an envelope. Fold the dough in towards the center several times, until the dough stiffens and begins to resist your folds. When that happens, flip the dough over and gently pull it towards you, across the cutting board, so that the loaf tightens a bit.
- Dust a small mixing bowl with flour (I like to line my bowl with a linen napkin to help distribute the flour more evenly) and place your loaf into the bowl seam-side down. Cover with a clean towel and let rise for another 30 minutes while you heat the oven.
HEAT THE OVEN
- While bread proofs, place an empty dutch oven (with the lid on) in your oven and heat to 460° F.
BAKE! (30 MINUTES)
- When the oven is hot, tip your loaf - seam side UP this time - onto a piece of parchment paper.
- Use oven mitts to pull out the hot Dutch oven and remove the lid. Use the parchment paper to carefully lift your loaf into the pot, then use your oven mitts to return the Dutch oven lid and then slide the pot back into your hot oven.
- Cook bread for 22 minutes.
- After 22 minutes, carefully remove the lid from your dutch oven. The bread should be crusty and lightly browned. Continue baking, uncovered, for another 5-10 minutes to deepen the color.
- Transfer bread to a cooling rack and let cool at least 30 minutes (and ideally a few hours) before slicing. Enjoy!
Notes
Equipment. We have tested this recipe in Le Creuset, Staub, Marquette Castings, and Challenger Breadware Dutch ovens. Be sure your Dutch oven is safe at high temperatures, and as always, please check the care instructions on your own equipment before baking.
Ingredients. For best results, use a high-quality flour for this recipe: We recommend King Arthur Flour and Bob's Red Mill flour. This recipe was developed with Diamond Crystal Kosher Salt, which is colloquially known as the "least salty salt." If you need to use table salt or another fine salt and you are measuring by volume with a teaspoon, reduce the amount of salt by ¼ teaspoon (if you're measuring by weight, don't worry about what brand of salt you're using - just follow the gram measurements!) If you don't have honey, use sugar in its place.
Please use a kitchen scale! Measuring flour with cups is notoriously unreliable, so please use a kitchen scale and follow our gram measurements if you can! If you don't have a scale, measure your flour with the scoop-and-level method to be as accurate as possible. (We have a whole write-up about this flour measuring conundrum in our online course!)
This is a slightly sticky dough - it won't pull into a smooth ball as you mix it, and it will be a bit sticky and shaggy. Don't worry - it will smooth out as it rises! If the dough is sticking too much while you're shaping it, add another dusting of flour.
Do I need a proofing basket? If you've made our Easy Crusty French Bread before, you know that we love using a proofing basket to help the bread hold its shape during its final rise! With this small loaf, a 9-inch proofing basket is often too big, so we prefer using a small mixing bowl (about 6 inches across) to help this loaf hold its shape more effectively.
Love this recipe? Check out our Roasted Garlic and Rosemary Bread or our Easy Asiago Bread next! And if you're ready to level up your bread game (and get our best recipes without the ads!) check out our Everyday Artisan Bread course.
Nutrition
- Serving Size:
- Calories: 191
- Sugar: 1.6 g
- Sodium: 313.2 mg
- Fat: 0.6 g
- Carbohydrates: 40 g
- Protein: 5.6 g
- Cholesterol: 0 mg
Keywords: baking, fall, winter





Tia
Hello! Question... can you let it rise longer than 30 minutes? Like for 2 or 3 hours ?? Thanks!
Mia
So impressed with this recipe! Thank you so much!
I don’t have a Dutch oven so I used the alternative skillet method recommended by you and the bread turned out perfect!
I made a double batch, one plain and to the other batch, I rolled the dough in some sugar, cinnamon and tossed in some raisins. Both turned out gorgeous and delicious! Going to try a savory version on the next round.
★★★★★
Team Life As A Strawberry
We're SO happy to hear how much you enjoyed this recipe!
Cori
Phenomenal! Why type of bread is this considered?
Cori
Just getting into bread making, and this was phenomenal! Wondering what type of bread this is considered?
TIA! 🙂
Team Life As A Strawberry
We're SO happy you enjoyed it! This is a smaller version of our favorite no-knead yeast loaf, Easy Crusty French Bread.
Sean Dettbarn
Are you able to use a reg oven?
Team Life As A Strawberry
Yes! A standard home oven is all that is needed to bake this bread!
Barb
This is an excellent bread recipe! It turned out perfectly and tasted great. I do not have a Dutch oven so I put a pan of water into the oven to add a little steam then baked on a parchment lined cookie sheet. It was crusty on the outside and perfect inside. Because I changed how to bake, I used a temp probe to decide when to remove. Google said between 190-200 degrees, and that seemed to be the perfect temp. I look forward to making this recipe again!
★★★★★
Team Life As A Strawberry
YIPPEE! We're so happy to hear you loved this small batch recipe!
Theresa Selover
This recipe is so easy and the bread is fantastic! The first time I made it I put a bit more flour than should have and it was a bit heavy. I was determined to get it right and on the second try it came out perfect! Don't put too much flour (my first print out of the recipe said 3 3/4 cup and 3 was perfect), you want that sticky texture. I love that I didn't have to knead the dough by hand; the mixer did it all for me. Basically little to not work. The crust was crunchy and the inside was soft but not too delicate. Holds up to a nice sandwich.
★★★★★
Team Life As A Strawberry
We're so happy you stuck with it and loved your second loaf!!
Eileen
I love the sound of this recipe. I'd like to try it with some pesto running through it - at which point in the process would you suggest I try that?
Team Life As A Strawberry
This isn't something we have tested (but does sound delicious!) We expect that a smooth add-in like pesto would likely disperse throughout the bread rather than leave a nice pesto line running through it. If you want to give it a shot, we recommend making your own pesto without much oil so it's a bit thicker, then adding it during the shaping process by stretching the dough out semi-flat, spreading a layer of pesto over the surface, then roll it up and shape normally. If you do try it we would love to know how it goes!
PS we have lots of recipes and techniques for using add-ins in our Everyday Artisan Bread online course!
Angela
Hi! If I wanted to proof this in the fridge for a more sourdough taste at which stage should I place in the fridge?
Team Life As A Strawberry
We're so happy to hear that you love this bread recipe! This loaf can be made with an overnight proof by mixing the dough (step 4), covering with plastic wrap or a reusable bowl cover, and letting it rise in the fridge overnight. The next day, bring the dough to room temperature on the counter, shape, and bake as directed! The loaf will be a bit taller with larger air pockets after more time for the gluten to develop. To achieve a deeper flavor in yeast loaves, you may want to explore advanced techniques like an autolyse or poolish and integrate whole wheat flours. We go over all of these techniques, baking timelines, and teach how to build and maintain a sourdough starter in our Everyday Artisan Bread online course!
Dee
This was super easy and very delicious. Before I put it in the oven I added some olive oils, salt, and rosemary on top.
★★★★★
Team Life As A Strawberry
Sounds delicious! We love the savory spin on this loaf! You may also love our roasted garlic and rosemary crusty bread recipe.
Ida
Just made this loaf today and it turned out great! I like the use of honey, it adds a bit of gentle sweetness. I appreciated your instructions on folding and forming the dough ball, it worked great. After I formed the ball, I pinched the seam together before placing it in the floured towel for the final 30 minute rise. I followed instructions and baked it seam side up. The loaf did not split during baking as I am used to with other crusty breads I have made (and always sliced the top)...do you think my pinching the seam made it too tight of a "seal"?
I love the small batch recipes. This one is easy and turned out great, with very little work!
★★★★★
Team Life As A Strawberry
We're so happy you're loving the small batch recipes! Pinching the seam was probably enough to keep the loaf from splitting open - for future loaves you can shape without pinching or bake seam side down and slice the top!
Leonard
This is a great recipe. A success every time thanks to the great instructions.
I have adapted it using the standing mixer. I mix the ingredient with a paddle and then knead for 10-12 minutes.
I have substituted the honey with maple sugar (1 1/2 tbsp) which gives the bread with a hint of sweet.
★★★★★
Team Life As A Strawberry
We're thrilled to hear you're loving this recipe with the fun swap of maple sugar!