These soft and fluffy salted dinner rolls have a simple yeast dough with honey (no refined sugar!), eggs, and butter. Perfect for Thanksgiving, Christmas, or Easter! No stand mixer necessary. Vegetarian.
This has quickly become our favorite homemade dinner roll recipe, and I'm sharing a few make-ahead tricks in this post that make it ESPECIALLY easy for busy holidays (does Thanksgiving even really count if there isn't a basket of tasty dinner rolls on the table??)
The instructions might look a little long, but I promise that these rolls are deceptively easy. Made from scratch and ready in just over 2 hours (most of which is inactive - you're just waiting for the dough to rise!)
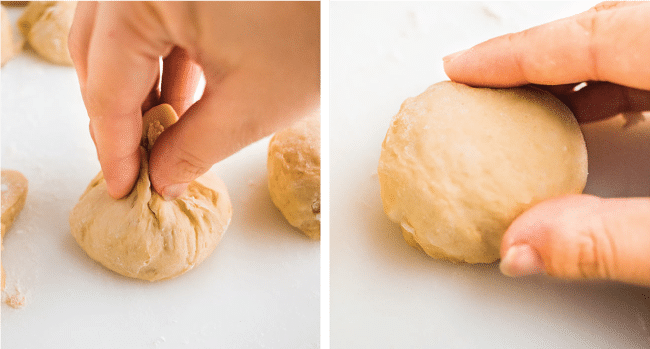
How to shape dinner rolls:
After your dough has risen, turn it out onto a lightly floured cutting board and fold it over on itself 3-4 times to push most of the air out.
Next, use a knife or a bench scraper to cut the dough into 12 equal-sized pieces, each about the size of the palm of your hand.
To shape a piece of dough, pinch the corners into the center, then flip it over and tick any loose ends underneath to form a smooth ball. Put the ball seam-side down in your baking dish for a perfectly round roll!
How to make these rolls ahead of time:
Great homemade bread takes a bit of time and attention to get right. Fortunately, it's easy to knock out a few steps ahead of time!
- Measure your ingredients in advance. Put any cold ingredients (like eggs or butter) together in the fridge, and measure dry ingredients like flour and salt a day or two before you plan to bake (keep pre-measured ingredients in their own airtight containers so they're ready when you are!)
- Let the dough rise in the fridge overnight. Mix your dough as instructed, but let it do its first rise overnight in the fridge instead of spending an hour on the counter. When you're ready to bake, let the dough come back to room temperature on the counter, then proceed normally!
- Bake the rolls early in the day and reheat just before serving. On holidays like Thanksgiving or Christmas, I bake rolls first thing in the morning so they're out of the way. Pull the rolls out of the oven a few minutes early, when they're cooked through but not quite browned on top. Let them cool in the casserole dish for 10-15 minutes, then use a large spatula to lift the rolls out of the pan and onto a wire cooling rack so they don't get soggy as they cool (I can almost always lift the rolls out all together in one big clump - you don't even need to separate them!) When you're ready to serve, pop the rolls right back into the casserole dish and reheat in the oven for 5-10 minutes or until warmed through.
Can I freeze this recipe?
Definitely! Our friends at The Kitchn have a great tutorial here that walks you through different techniques for freezing and reheating dinner rolls, including how to freeze raw dough and how to freeze and reheat already-baked rolls.
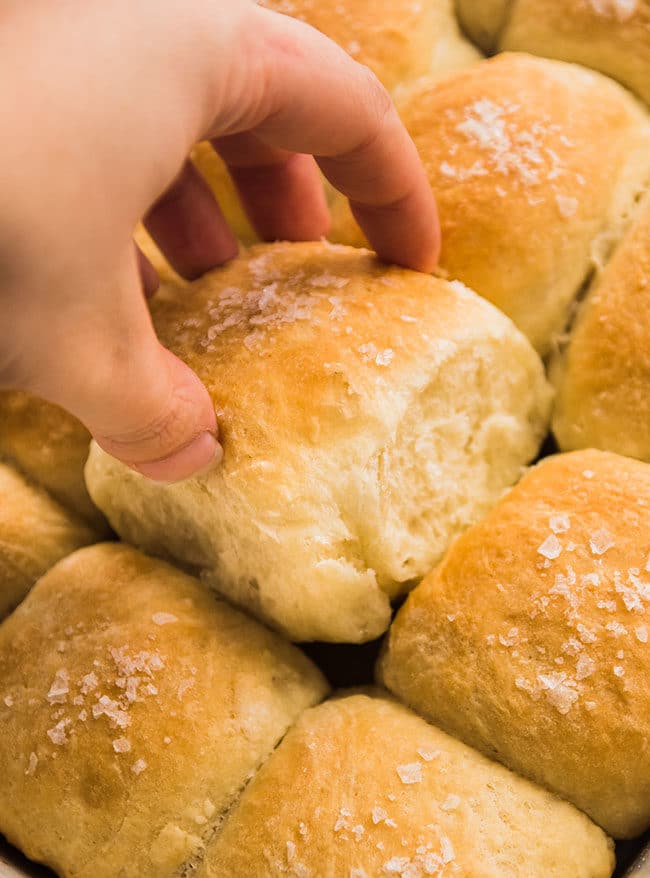
A few final tips for these dinner rolls:
- Please measure your flour by weight! Cup measurements can vary wildly and are notoriously unreliable (we even tested it with more than 20 people for our Everyday Artisan Bread course!) So if you have a kitchen scale, please use it! No scale? Measure your flour with the scoop-and-level method and reserve ½ cup or so just in case you don't need it. See the video below for a guideline on what your dough should look and feel like!
- No casserole dish? No worries! Bake these rolls in muffin tins, a cake pan, or a cast iron skillet. Just keep in mind you may need to adjust cooking time with a different pan! (If you're using a muffin tin or large sheet pan, start checking for doneness around 15 minutes)
- Use leftover rolls for sliders, sandwiches, or as a side dish for soups, pastas, and more! If you're using leftover rolls after Thanksgiving, we recommend a turkey sandwich with our favorite cranberry sauce or cranberry mayonnaise.
- To reheat dinner rolls, microwave in 8-10 second intervals on a microwave-safe plate until warmed through, or heat in a 300 degree oven for 5-10 minutes until warmed through.
- Store rolls in an airtight container on the counter for 2-3 days or tightly wrapped in the freezer for 2-3 months. We don't recommend storing your rolls in the fridge - it can dry them out!
- If you plan to make rolls more than a day in advance, we recommend leaving off the salt.
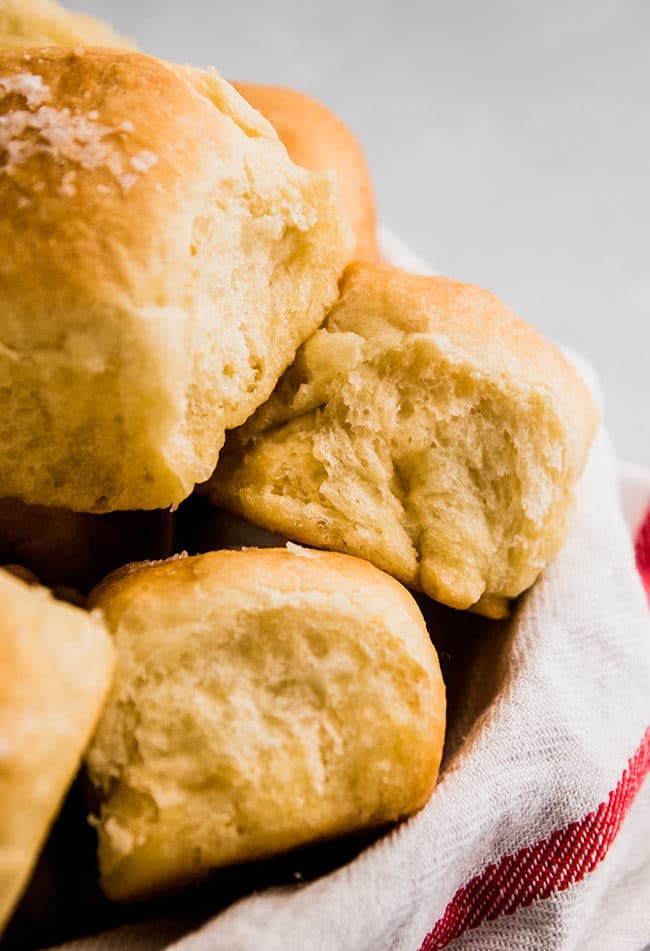

VIDEO: HOW TO MAKE SALTED DINNER ROLLS
📖 Recipe
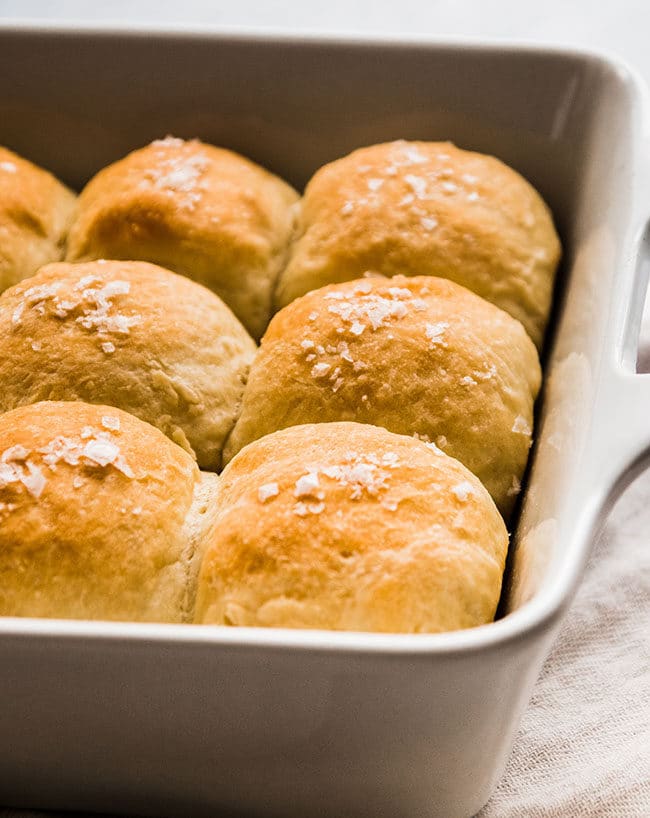
Salted Dinner Rolls
- Prep Time: 20 minutes
- Cook Time: 35 minutes
- Total Time: 55 minutes
- Yield: 12 rolls 1x
- Category: Bread
- Cuisine: American
Description
This simple recipe for dinner rolls gets a fun twist with some flakey sea salt.
Ingredients
- 2 ¼ teaspoons active dry yeast
- 1 Tablespoon honey
- ¾ cup warm milk (about a hundred degrees F)
- ½ cup unsalted butter (1 stick), cut in half
- 1 large egg, lightly beaten
- 2 teaspoons kosher salt (use 1.5 teaspoons if using table salt)
- 360 grams all purpose flour (about 3 cups - see recipe notes)
- 2 Tablespoons flakey sea salt, for topping (we love Maldon salt here!)
Instructions
MAKE THE DOUGH & FIRST RISE (1 HOUR)
- Add yeast, honey, and warm milk to a large bowl. Let stand 5-10 minutes until yeast has bloomed and mixture is foamy.
- While the yeast proofs, melt half of your butter. Set aside.
- Add melted butter, egg, salt, and flour to bowl. Use your hands or a stiff spatula (you could also use the dough hook of a stand mixer) to stir until dough all ingredients have combined and dough pulls away from the sides of the bowl. PRO TIP: The most important thing here is to make sure the flour is completely incorporated - if you see any dry spots or small pockets of flour, keep mixing until they disappear! It’s ok if the dough doesn’t look smooth and elastic (it should be a little bit shaggy and tacky - it will smooth as it rises and as we shape it!)
- Drizzle dough with a splash of olive oil and turn the dough over inside the bowl to lightly coat it with oil.
- Cover dough with a clean tea towel and let rise in a warm place for one hour or until doubled in size.
PREP THE BAKING DISH (5 MINUTES)
- When your dough is just about doubled in size, it’s time to prep your baking dish.
- Melt the remaining half of your butter.
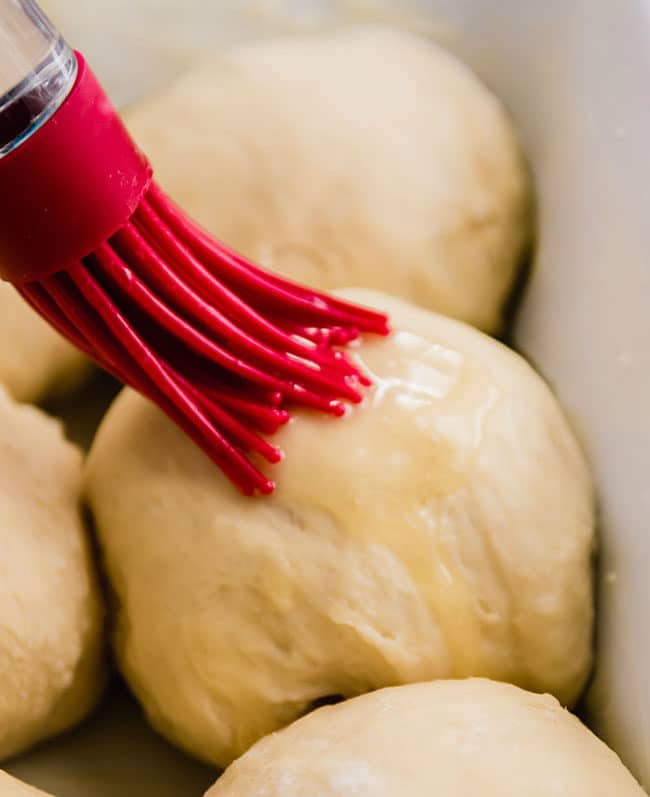
- Use a pastry brush to brush a light layer of melted butter (no more than half of your melted butter!) over the interior of a large casserole dish (we use this 3 qt. Baking dish - it’s about 8x10 inches). Set remaining melted butter aside.
CUT & SHAPE THE DOUGH + FINAL RISE (30 MINUTES)
- When dough has doubled in size, turn it out onto a lightly floured surface.
- Fold dough over on itself 3-4 times to push the air out, adding a sprinkle of flour if it’s too sticky.
- Use a knife or a bench scraper to cut dough into 12 equal-sized pieces.
- Grab a piece of dough and pull the corners into its center, then flip it over and tuck any loose ends underneath to form a small ball.
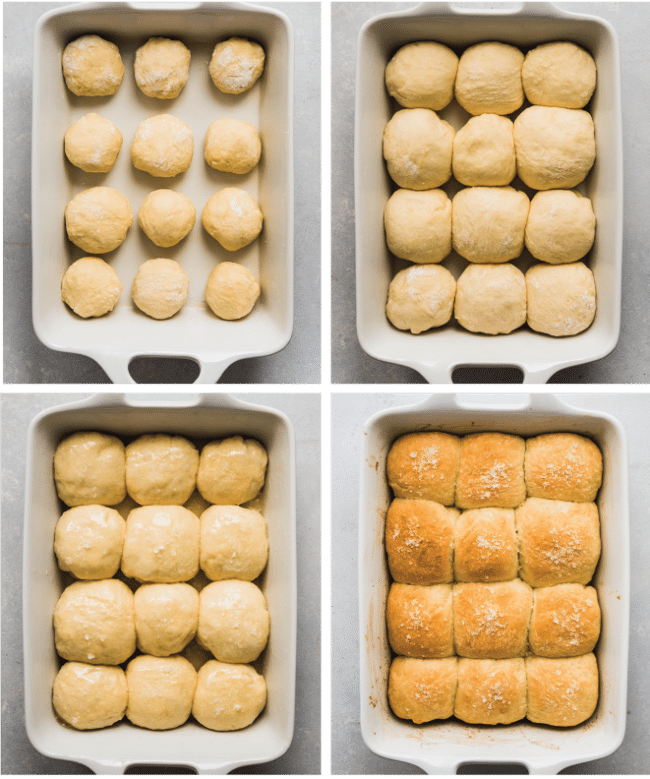
- Place the dough ball into your baking dish and repeat with remaining dough. Make sure to leave ¼ inch or so between each roll so they have space to rise.
- When all rolls have been placed in the baking dish, cover the dish with a clean tea towel and let rise for 20-30 minutes while you preheat the oven.
- Heat oven to 375° Fahrenheit.
BUTTER, SALT, & BAKE (30 MINUTES)
- Brush remaining melted butter over the tops of your rolls, then sprinkle each roll with a pinch of flakey sea salt (we love Maldon salt here!)
- Bake rolls at 375° Fahrenheit for 30-35 minutes until tops turn a toasty medium brown.
- Remove rolls from oven. Let cool for at least 15 minutes right in the baking dish for easy serving or use a spatula to lift them out of the dish and let cool on a wire rack. Serve within 2-3 hours of baking for best results.
Notes
These rolls are relatively light and have a fairly crispy exterior. For richer rolls, use warm milk in place of the warm water. For a softer outer layer, wait to brush rolls with butter and sprinkle with salt until after baking. For a softer, glossy exterior, brush rolls with an egg wash instead of melted butter.
Measuring flour. For best results, measure flour by weight with a kitchen scale. If you don't have a scale, just make sure to scoop and level your flour for best results.
Additions and Substitutions. Substitute 1 cup (120 grams) of whole wheat flour for 1 cup of the all purpose flour if you like. We don't recommend using additional whole wheat flour as it can change the texture of the rolls. Omit the flakey sea salt if you like. Use warm water in place of warm milk. Use granulated sugar or agave syrup in place of honey if you like. We have not tested this recipe with self-rising flour, gluten-free flour, bread flour, or instant yeast.
Mix-Ins. This dough is very forgiving! Mix a few tablespoons of fresh chopped herbs, dried rosemary, roasted garlic, fresh cracked pepper or shredded cheese (we love parmesan, asiago, or cheddar) into the dough for extra flavor. Add 2-3 extra tablespoons of honey if you'd like a sweeter roll.
Make-Ahead Tips. Measure ingredients a day or two in advance and keep them in individual airtight containers (keep cold ingredients like eggs in the fridge!) until you're ready to use them. Alternatively, mix dough a day in advance and let it do its first rise overnight in the fridge (instead of on the counter). When you're ready to bake, let dough come back to room temperature and proceed as instructed.
Storing and freezing. Store rolls in an airtight container on the counter for 2-3 days. For tips on how to freeze these dinner rolls, click here. If you're planning to store rolls for more than a day or two, we recommend leaving off the salt as it can draw out moisture and make the top of your rolls a bit soggy over time. We don't recommend storing rolls in the fridge - it can dry them out!
To reheat dinner rolls, microwave in 8-10 second intervals on a microwave-safe plate until warmed through, or heat in a 300 degree oven for 5-10 minutes until warm.
Ingredients and Equipment. We like Fleischmann's or Red Star Active Dry Yeast. Maldon salt or Jacobsen Sea Salt are perfect for topping these rolls. Use a stand mixer fitted with a dough hook, or mix by hand in a large bowl with a sturdy spoon or spatula. Use a basic kitchen scale to easily measure flour and a good bench scraper to cut through bread dough. A silicone pastry brush is great to spread melted butter. We used a 3qt., 8x10 casserole dish for this recipe, but you can also use a large cast iron skillet, a cake pan, or a muffin tin. Keep in mind that you may need to adjust the cooking time with a different pan style (rolls baked in muffin tins or on flat cookie sheets will bake more quickly - start checking for doneness around 10-15 minutes!)
This post contains affiliate links: if you buy something we'll earn a small commission at no cost to you.
Nutrition
- Serving Size: 1 roll
- Calories: 194
- Sugar: 1.5 g
- Sodium: 1558.7 mg
- Fat: 8.4 g
- Carbohydrates: 25.5 g
- Protein: 4 g
- Cholesterol: 35.8 mg
Keywords: baked, bread, thanksgiving, holiday






Trevor
Do you know what will happen if too much butter is used? I noticed my dough was super wet so I added a little more flour and it seemed good. Then I realized than instead of cutting the butter in half for the dough I put the full half cup in the dough. It’s rising and looks good but I’m wondering they will get too wet in the oven because of all the extra butter.
Team Life As A Strawberry
We'd love to hear how your rolls turned out with the extra butter!
Mikayla
A quick and easy rolls so fluffy inside!
★★★★★
Team Life As A Strawberry
We're so happy you enjoyed these rolls!
Kathryn
I read on your crusty french bread recipe (fabulous, BTW) that if I want to double it, I would double everything BUT the yeast - is that true for this recipe also? I want to make them for Christmas dinner but I need 24! Add on that same note (for my future reference) if I wanted to just do half, would I halve the yeast as well? Thanks!
★★★★★
Team Life As A Strawberry
We're SO happy to hear you love the Easy Crusty French Bread! When doubling these salted dinner rolls, doubling the yeast is not necessary (just like when doubling the bread.) If you do end up doubling the yeast it won't hurt the recipe or flavor, the dough will just rise quicker! When making half the recipe you can reduce the yeast to 1 teaspoon to keep the measuring simple! As always with bread, pay attention more to visual cues like "doubled in size" rather than time instructions, since the behavior of the dough can change based on temperature, humidity, and other environmental factors.
Michael
I followed the recipe exactly. However after just two cups of flower the dough was pretty dry and after the third it was very dry. Nothing like a "little bit shaggy and tacky". Any comments on that". (It seems as if the proportions in the recipe is not quite right.)
Jessie @ Life As A Strawberry
Hi Michael! How did you measure your flour? We recommend measuring flour by weight (in grams) with your kitchen scale for best results as volume measurements (measured with cups) can vary wildly from person to person. If you don't have a kitchen scale, we recommend measuring flour with the scoop-and-level method as mentioned in the recipe notes!
Dave Ray
Please look at your ingredients again, you say 6 cups of flour(360 gs) but on another bread recipe you say 3 cups (360 gs) you try to make these rolls with 360 gm flour and the total amount of liquid it don’t work sorry
Jessie @ Life As A Strawberry
Hi Dave! This recipe calls for 3 cups (360g) of flour. If you double the recipe, you'll need 6 cups (720g) of flour. Hope that helps!