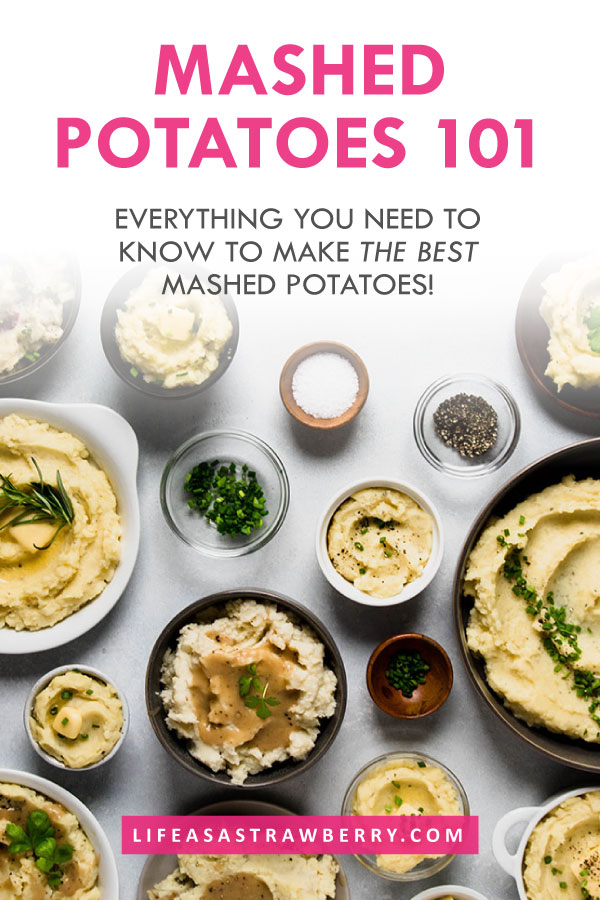
Let's talk about everything you need to make perfect homemade mashed potatoes! From which type of potato makes the best mashed potatoes, to whether you need a ricer or a potato masher or a hand mixer, to how to boil potatoes for mashed potatoes! For more mashed potato goodness, check out my Ultimate Mashed Potatoes Recipe.
Jump to:
ALRIGHT. We're officially heading into holiday season, which means it's time we had a chat about something very, VERY important:
MASHED. POTATOES.
It's been a minute since we did a Cooking 101 Post (remember that time I made 700 cupcakes for our post on how to bake the perfect cupcake or that other time I ate my body weight in pasta to bring you tips to make the best mac and cheese??) but my team and I have been working hard behind the scenes to amp this series WAYYYYYYYY up over the next few months and make sure you're ready for some Holiday Entertaining World Domination.
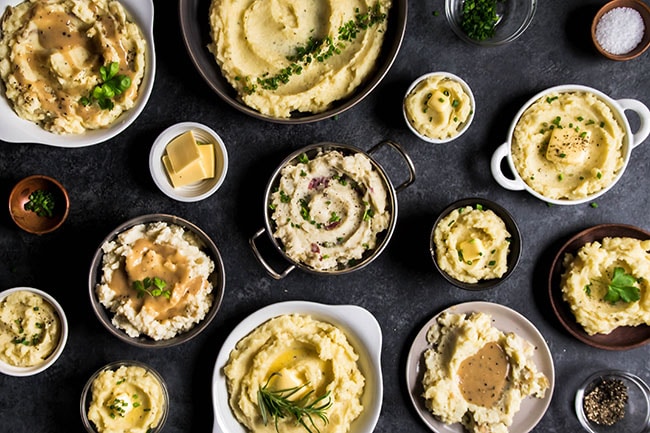
For Mashed Potatoes 101, we wanted to answer four of the most common questions we get about how to make mashed potatoes:
- What's the best kind of potato for mashed potatoes?
- How should we cook potatoes for mashed potatoes?
- What's the best way to mash potatoes?
- What ingredients and tools do we need for the best mashed potatoes? (spoiler alert: you totally don't need to go buy a bunch of fancy stuff).
These, we've decided, are the basics. But don't worry: I also have a whole post dedicated to my classic fluffy mashed potato recipe AND a recipe to help you make homemade gnocchi with leftover mashed potatoes - be sure to check those out when you're done here!
For now, let's get crackin' on the basics so you can start making the best mashed potatoes ever!
(I mean it, friends. THE BEST EVER).
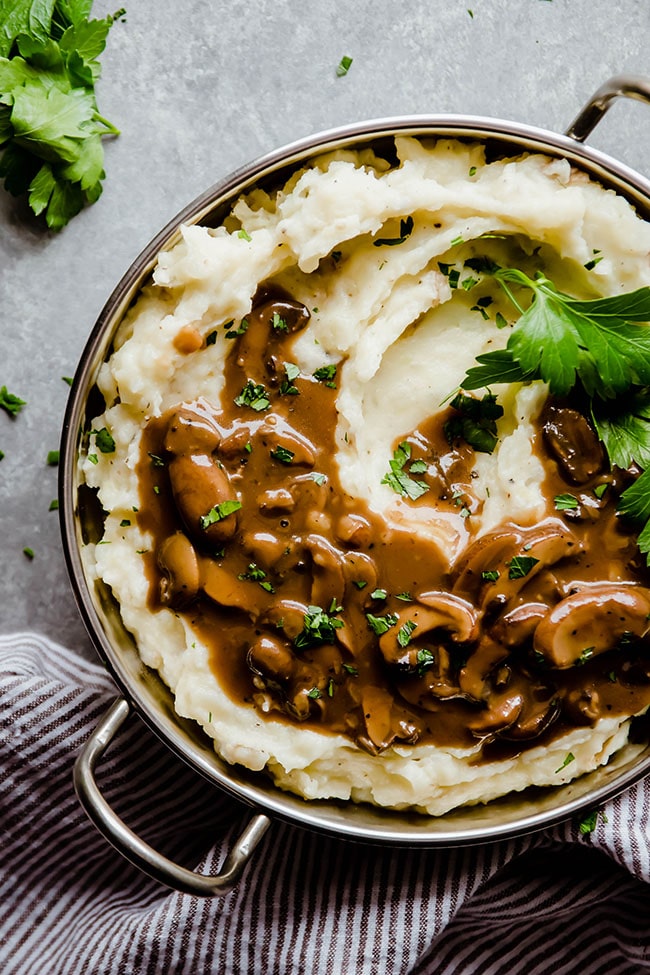
Before we get started
- New toys are fun! But don't forget that the best tools are often the ones you already have with you. Don't worry if you don't have a traditional potato masher or ricer - I'm showing you a BUNCH of equipment options so you don't have to rush out and buy something new (unless you want to!)
- Speaking of equipment! The most important tool you have is your taste buds. There are SO many variables in cooking, so don't panic if something doesn't look or taste right right away. YOU CAN FIX IT. I PROMISE. Taste often, and don't be afraid to add salt, pepper, butter, or cream! (When in doubt, add butter. Like, ALWAYS. This will take you far in life).
- My favorite mashed potatoes might not be YOUR favorite mashed potatoes. And that's ok! Personally, I'm partial to a thicker, fluffier, slightly lumpy mashed potato, so if you like smooth and creamy mashed potato recipes that roll across your plate on Thanksgiving, you won't see those here. BUT - if smooth and creamy IS your jam, know that these same principles still apply. Don't be afraid to tweak and iterate. Our goal here is to give you all the info. and tools you need to find YOUR perfect mashed potatoes, so you can be a 'tater-mashin, side-dishin' genius. For the HEWD we talked about! But, like, pretend we have a better acronym.
Ok. Ready? MASHED POTATO TIME.
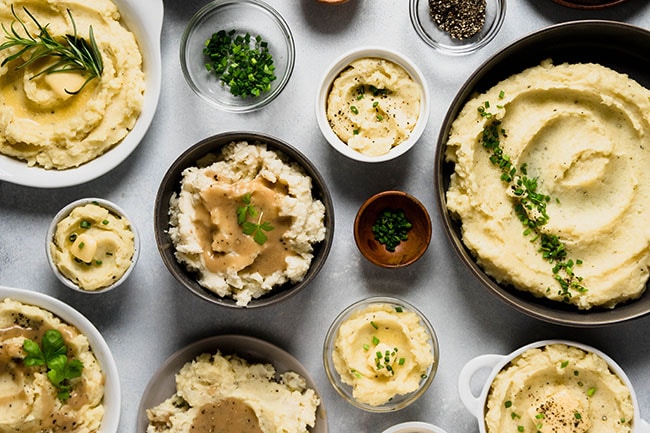
The primary mashed potato recipe
I tested 30-ish mashed potato recipes for Mashed Potatoes 101, and to make sure I was testing the right variables - and ONLY those variables - I kept the recipe consistent across the board.
I'll talk more about my favorite mashed potato recipe tomorrow (so don't worry about saving this - it'll be wrapped up in a nice neat package for you later!), but here's the master recipe I used to test each variety and technique:
- 2 pounds mashed potatoes, quartered (about 2.5" pieces - smaller potatoes were just cut in half)
- 6 cups COLD water
- 1 Tablespoon Maldon kosher salt
The above ingredients were covered and brought to a boil over medium heat until potatoes were easily pierced with a fork. Potatoes were transferred to a colander and the pot was returned to the stove, where I brought the following ingredients to a simmer:
- 2 ounces Unsalted Kerrygold Irish Butter
- ½ cup half and half
- ½ teaspoon Maldon kosher salt
- ½ teaspoon fresh ground black pepper
Cooked potatoes were returned to the pot and mashed. And then taste-tested! Which leads us to our next section: INGREDIENTS.
Ingredients matter.
If you use great ingredients, YOU WILL TASTE THE DIFFERENCE. I can say this now, because I have literally side-by-side tasted the difference. And after plenty of testing, here are the ingredients that matter:
UNSALTED BUTTER // I personally taste the biggest difference in mashed potatoes when it comes to which butter I use. If you can spring for high-quality butter, it will taste richer and more, well butter-y. I always use unsalted butter, because it gives me total control over the seasoning. All of the 30+ recipes for #MashedPotatoWeek were tested with this Kerrygold Unsalted Butter, and I also love this Unsalted Cultured Butter from Vermont Creamery. Both are available at most supermarkets and have a higher butterfat content than typical American butters, making them ultra-rich and flavorful.
HALF AND HALF // I've heard a lot of debate on milk vs. heavy cream vs. half-and-half in mashed potatoes (on the internet and at IRL dinner tables). We tested three versions of our master recipe, each with yellow potatoes: one with heavy cream, one with half and half, and one with 2% milk.
The verdict? Potatoes made with 2% milk were good, but definitely less rich than potatoes made with cream or half and half. I honestly can't tell THAT much of a difference in taste between cream vs. half and half (and honestly, the heavy cream sometimes even make it a little TOO rich for me), so I opt for half and half to save a few calories. If you like that extra bit of richness, by all means use cream! And if you want to keep things a little lighter, you can absolutely stick with milk.
PS - As you'll see later, potato type also plays a role here: for example, a recipe test made with yellow potatoes and 2% milk tasted just as rich and buttery as a recipe test made with white potatoes and cream. I don't have any particular brand allegiances here - use whatever brand your store has on hand!
KOSHER SALT . // I recommend using Kosher Salt in all of your cooking (not just for mashed potatoes!) Its large flakes make it easier to grab a pinch out of your salt jar than fine table salt, which means you have much more control over your seasoning. (Here's a good breakdown of all things salty if you're interested!) When it comes to Kosher Salt, there are two main brands: Morton (pictured here) and Diamond. Despite sharing a name, they're actually quite different: Morton has larger, denser crystals, so a cup of Morton salt will taste saltier than a cup of Diamond. (This is why it's so important to taste as you go and add salt as needed!) I use Morton Kosher Salt because it's almost always in stock at my grocery store (Diamond can be harder to find where I live, though most kitchens I've worked in and with prefer Diamond over Morton). Whichever brand you use, just be consistent with it: after cooking with it for awhile, you'll get used to the feel and effect of a pinch of salt and will be able to assess and season food quickly and properly.
FRESH GROUND BLACK PEPPER // Fresh ground pepper makes a HUGE difference in mashed potatoes (and, honestly, in everything) - it pops SO much more than pre-ground, bottled black pepper. I use a pepper mill (similar to this one) on a relatively coarse setting, filled with these Black Tellicherry Peppercorns. I tend to eyeball it when I grind pepper into a dish, but if you'd like to measure more accurately (like we did during the recipe testing for this post), just grind some pepper from your pepper mill into a small mixing bowl and measure it from there.
The other important ingredient you'll need? POTATOES! We'll get to that in a minute, but first, let's talk through some equipment.
Tools and equipment
You'll see me refer to a few pieces of equipment throughout this grand mashed potato recipe experiment - here's what we're using in the LAAS kitchen:
KITCHENAID HAND MIXER // I bought this 5-speed hand mixer for recipe testing and it's been great. I've honestly only used it a few times, but it's worked as expected and is easy to clean (just pop the beaters out and throw them in the dishwasher!) I use my stand mixer for most heavy-duty baking, so this simple hand mixer was perfect for me. If you need more power or extra attachments, they also have 7-speed and 9-speed versions.
Click here to see it on Amazon!
OXO GOOD GRIPS SMOOTH POTATO MASHER // I use this potato masher - here's a similar one on Amazon! If you follow me on Instagram, you know that I BROKE my old masher while working on this post (*facepalm*) so I grabbed this one. I actually LOVE it (SO much better than my old one!) The small holes break up the potato without just squashing it, which makes a lighter, smoother mash. Comfortable handle, quick to use, dishwasher safe.
Click here to see my current potato masher!
Click here for a similar one (also OXO) on Amazon!
OXO GOOD GRIPS FOOD MILL // I use this food mill for my tomato canning every summer, and you'll see it make an appearance in our mashed potato testing as well! It has three different discs for a variety of foods and textures. I love the little feet on this food mill - it makes it easy to set it on top of a bowl or pot without worrying about making a mess (and they fold under for easy storage!) The handles are comfortable to hold, and it snaps apart oh-so-easily so you can throw it in the dishwasher for easy cleaning.
Click here to see it on Amazon!
Potato Ricers
Potato ricers are popular recommendations for perfect mashed potato making - so we tested two to see what we thought!
NORPRO COMMERCIAL RICER // PROS: Holes along two sides made processing potatoes much faster - you can fit more at once. A metal pin holds the two pieces together - just pull the pin out to separate the pieces for easy cleaning! Doesn't explicitly say "dishwasher-safe," but I've washed it several times in the dishwasher (#lazy) with no problems. CONS: Slightly more expensive. Not as pretty, and a little bulky if you're trying to fit it in a small kitchen with limited space.
Click here to see it on Amazon!
OXO GOOD GRIPS POTATO RICER // PROS: No-slip knob lets you rest it on the edge of a pot or bowl. More comfortable to hold. Slightly less expensive. A little smaller and easier to store. Dishwasher safe. CONS: Smaller size means fewer potatoes will fit at a time - you may need to work in smaller batches or even cut them down to fit, so takes a little longer. Doesn't come apart, so takes some finagling to get it into the dishwasher comfortably.
Click here to see it on Amazon!
THE VERDICT: Both of these ricers are great - I recommend either of them if you like the texture of riced potatoes and are ready to invest in one. I honestly couldn't tell a difference in flavor or texture in the potatoes riced with the OXO vs. the Norpro. They're both relatively inexpensive and pretty comfortable to hold - you don't need a lot of force to push the potatoes through. Both are easy to clean.
Over the course of 20-ish mashed potato recipes, I found myself preferring the Norpro Commercial Potato Ricer. It just got through the potatoes a little faster, and I loved how quick the process was thanks to holes on both sides of the potato ricer.
If you plan to make small quantities (for 4-6 people) of mashed potatoes every so often, the OXO Potato Ricer is a great choice, and it's a little easier to store (especially if you're in a tight kitchen where cabinet space is at a premium). The little knob it has to let you rest it on top of a pot or bowl is also awesome - if you anticipate needing to set your ricer down mid-cooking (if you do a lot of things at once or have family who might interrupt) it's great to be able to set it down right where it is instead of finding a place for it like you'd have to do with the Norpro.
If you make big batches of mashed potatoes - and you make them frequently without many distractions - you might like the ease and speed of the Norpro a little better. If I was back in a professional kitchen making mass quantities of potatoes (oof, I'm having flashbacks to Thanksgiving dinners at community food program kitchens) I would for sure grab the Norpro (which makes sense, since it's marketed as a commercial potato ricer!)
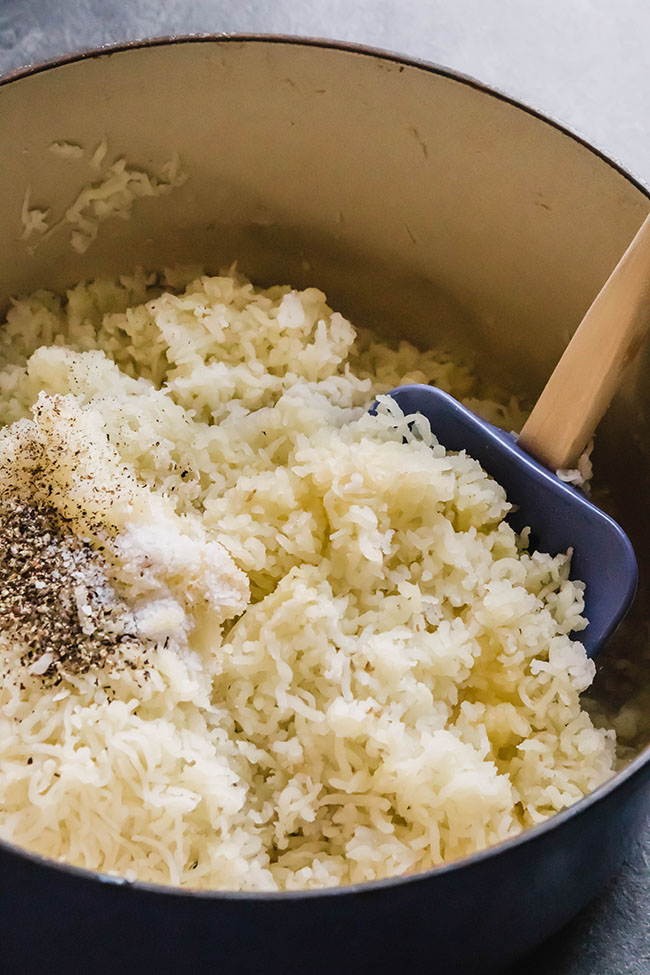
A few notes about potato ricers
- With any ricer, you'll notice that some potato creeps up over the plunger and doesn't make it through the ricer - just knock those pieces back into the ricer and keep going!
- I recommend placing the ricer and the bowl or pot you're using to collect the riced potato right next to your colander of cooked potatoes - if you carry your ricer across the kitchen (or even across the counter) in between loads of potatoes, you'll make a huge mess. Just keep everything in a nice, neat little assembly line. (Is this probably common sense? Yes. Did I still learn it the hard way? Also yes).
- Don't forget to scrape any extra potato off the bottom of the ricer when you're done!
- I prefer to use ricers with already-peeled potatoes. You can certainly put skin-on potato pieces through the ricer, but you'll have to periodically pull the peels out since they tend to block the ricer holes. I find it's less annoying to just peel the potatoes before boiling.
What to use if you don't have a potato ricer
Potato ricers aren't known for being, erm..."multifunctional" kitchen appliances. If you love the texture of riced potatoes, there are a few hacks you can use to achieve the same texture without investing in a new piece of equipment.
The key is that you want to replicate the fine, barely-processed texture of riced potatoes, which we can do a few different ways (you can see the difference in texture below!) Just make sure you give your cooked potatoes a few minutes to cool so you can handle them comfortably, and peel your potatoes before cooking for best results.
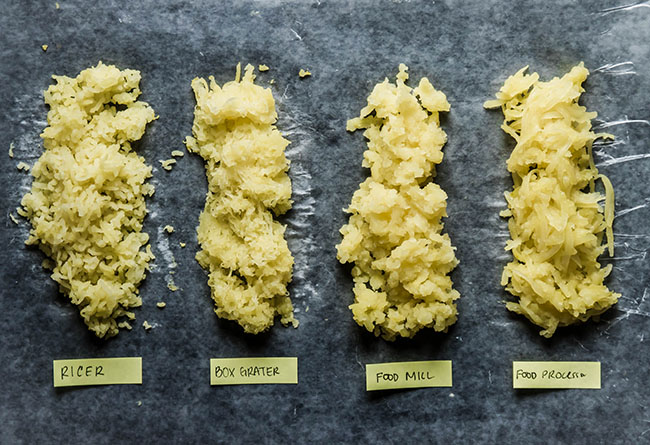
1. POTATO RICER. A traditional potato ricer (far left in the photo above) makes short, fine potato pieces.
2. BOX GRATER. A box grater (second from left in the photo above) is my FAVORITE way to mimic the texture of riced potatoes. Use the small shredding side of a box grater to grate your potatoes into fine pieces (for a fun experiment, grate a little bit of potato on each side of your box grater to see the difference - I prefer the texture of the small shredding side, usually the second-smallest set of holes). TIPS: The potatoes may stick together, so give your box grater a few taps during shredding to help shake the pieces loose. You may even want to tip the box grater on its side so you're shredding side-to-side rather than up and down, then tip the grated potatoes out. I find the box grater method works best with large pieces or even whole boiled potatoes since they're easier to hold.
3. FOOD MILL. Use a food mill (third from the left in the photo above) to process cooked potatoes if you don't have a potato ricer. TIPS: I have this food mill with three different plates. Potatoes work best on the middle- or large-holed plates - the smallest size gets jammed pretty easily. This method works best with small pieces of cooked potato while they're still relatively hot.
4. FOOD PROCESSOR SHREDDING DISC. Unless you like to eat glue, I don't recommend mashing your potatoes in a food processor - it gets wayyyyyy too sticky and gluey for me (which is why we didn't even include food processor mashed potatoes in this post). HOWEVER. If you have a food processor with a shredding disc attachment, you can use it to shred cooked, peeled potatoes. This was honestly my least favorite substitute for a potato ricer - the texture was a little stringy for me and I found I still had to give the potatoes a few mashes with my potato masher to get a texture I liked. If you're especially lump-averse and don't have any of the above options, though, you can certainly give it a try - just be mindful that it may take some doctoring to achieve the same texture, so start with a test batch just in case.
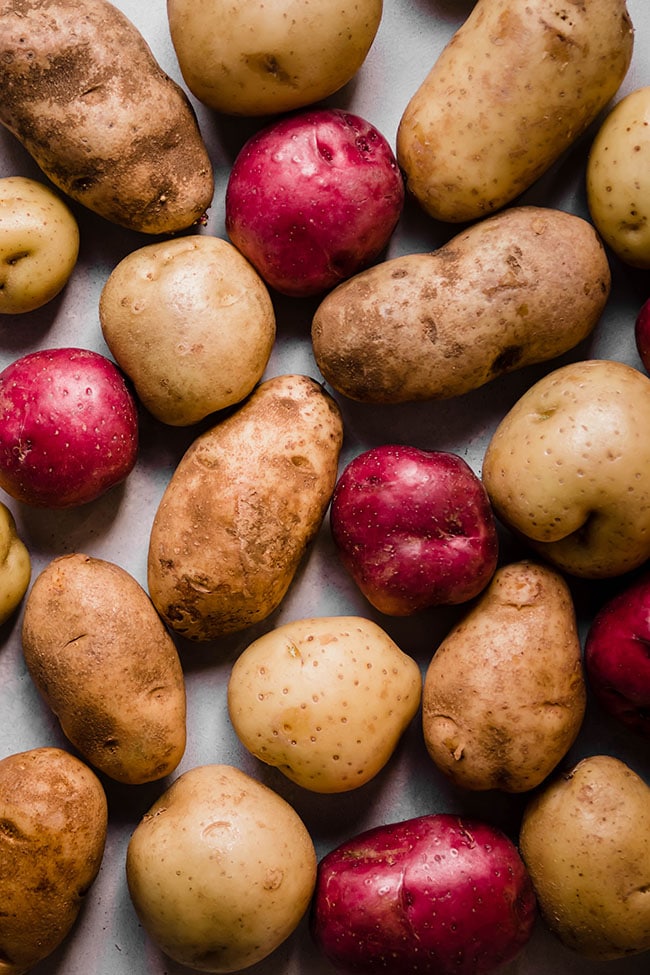
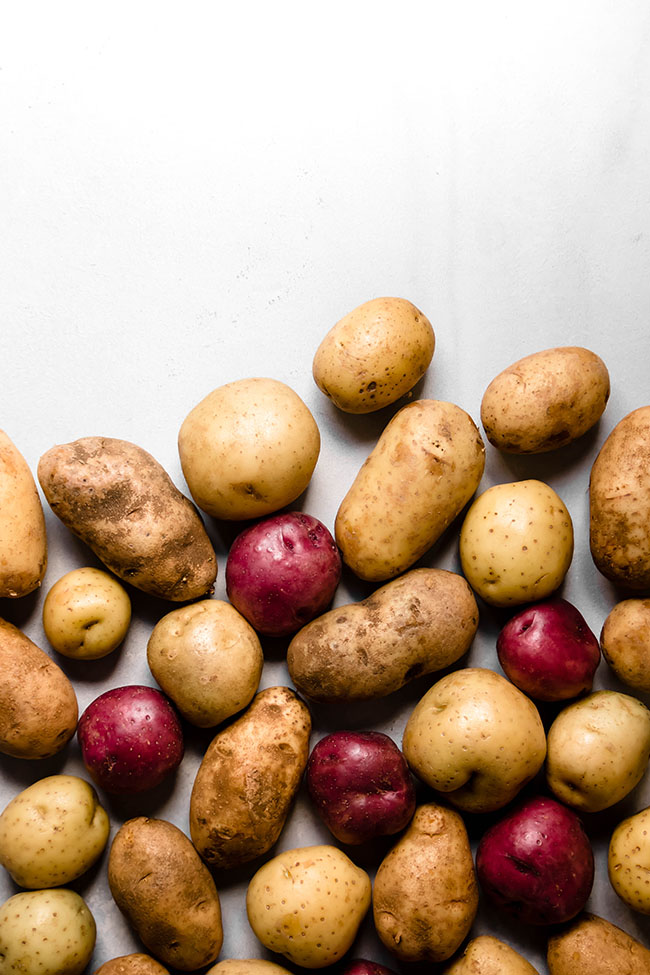
Which potatoes make the best mashed potatoes?
Ahhhhhh, the million-dollar question. Well, or at least the SIXTY dollar question, because that's how much I spent to procure the 40 lbs. of potatoes and entire bag-full of butter to get to the bottom of this very, VERY important issue.
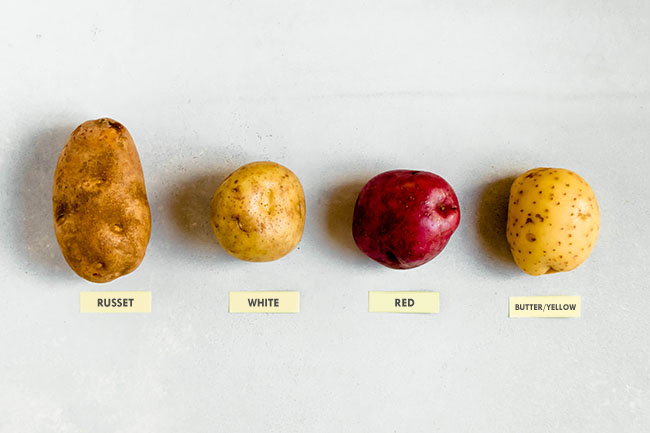
HOW WE TESTED IT: I made one batch of mashed potatoes for each type of potato: Russet, Red, White, and Yellow (sometimes labeled as Butter or Yukon Gold potatoes) using the master recipe at the beginning of this post. We left all of the skins ON for this group, and all potatoes were mashed with a potato masher.
Here's what we ended up with:
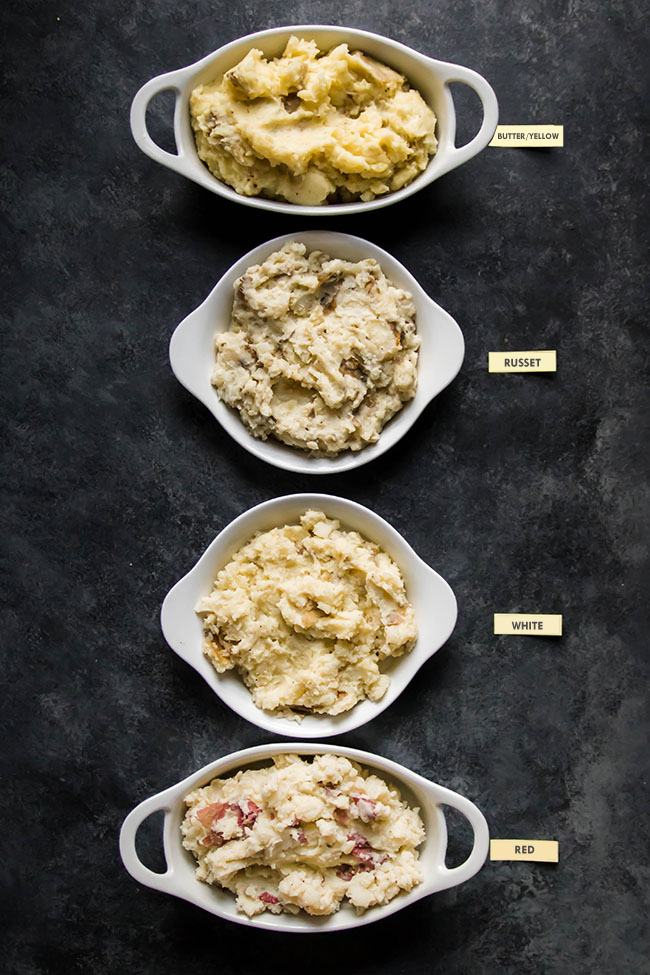
THINGS TO NOTE: You can tell from the photo above that the yellow potatoes were much more, well, YELLOW. My tasters and I also observed some texture differences, which you can see a little better when we take a scoop of each kind of mashed potato:
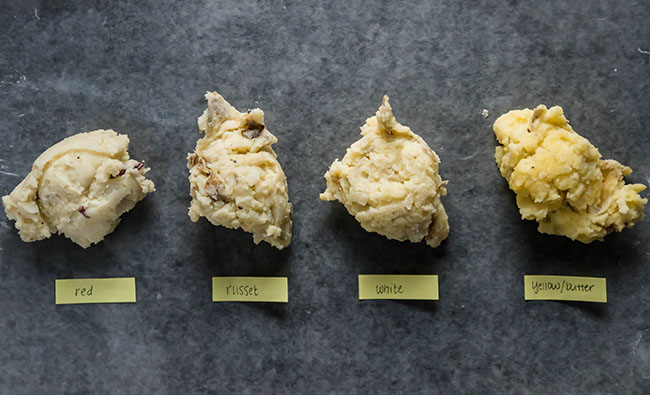
And then use the back of a spoon to spread each scoop out a little bit (also, can we talk about how mashed potatoes are some of the ugliest things to photograph? oof):
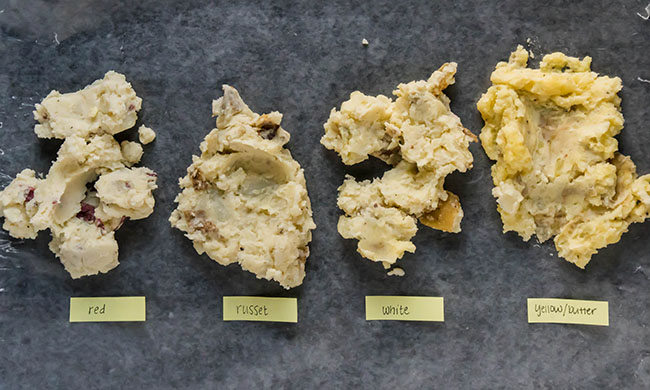
As a reminder, each of these recipes was made with EXACTLY the same amount of potatoes, butter, half and half, seasoning, and even the amount of water they were boiled in.
You can see in the photo that the Russet and Yellow mashed potatoes (2nd from the left and far right, respectively) were more easily spread with a spoon than the other varieties: basically, they were quite a bit creamier than red or white potatoes, even though they had the same amount of fat added.
SO HOW DID THEY TASTE?
In the name of research, I did what any good friend would do: I bribed everyone I knew with free mashed potatoes so they'd come over and blind-taste their way through a giant plate of carbs. I gave everyone a plate with scoops of potato identified only by number and asked them to rank them from best to worst.

The winner: Yellow potatoes.
In a blind tasting, my tasters unanimously chose mashed potatoes made with yellow potatoes (aka butter potatoes or yukon golds) as their favorite. They agreed that mashed yellow potatoes tasted richer, smoother, and more buttery than the other varieties. (It also didn't hurt that the color was so much more vibrant and appealing!)
Russet potatoes took second-ish place (on average - the rankings varied from taster to taster). Compared to yellow mashed potatoes, the russets were good, and very fluffy, but just not quiiiiiite as creamy or flavorful.
Red and white potatoes were the least favorite options compared to the other two. People agreed they just weren't quite as flavorful and were a little too airy or dry.
PS - I could get into a whooooole rant about the role of starch in mashed potatoes here (Basically, starchier potatoes - like yellow and russets - need less work to pummel into a creamy mash, which keeps them lighter and non-gluey) but I've already written 3000-ish words about potatoes, so I'll save the science deep dive for another day (or better, refer you to this article on Serious Eats that does a great job explaining it!) and keep us focused on taste.
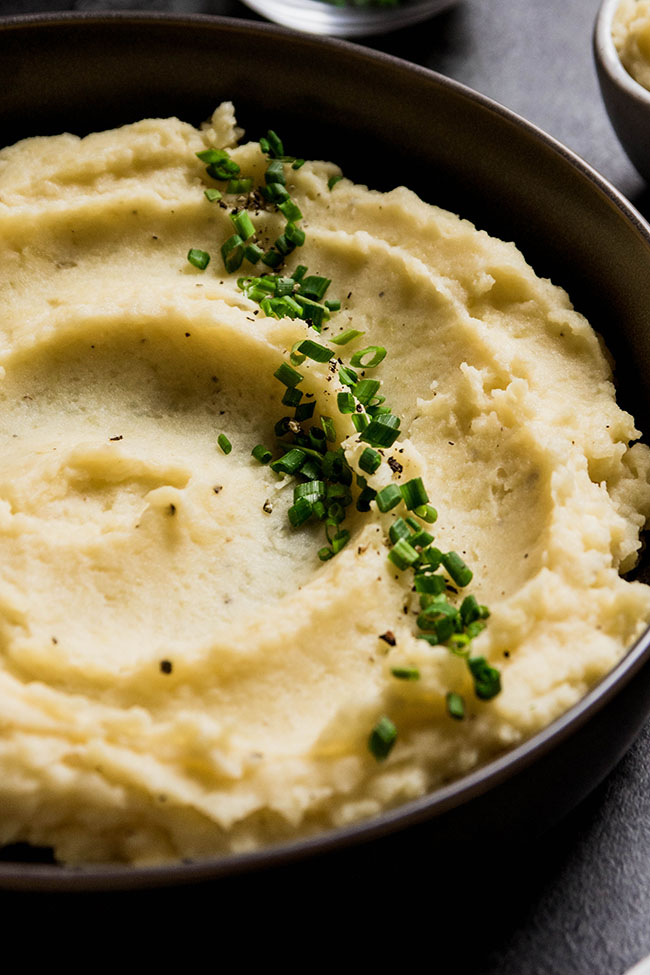
Before we move on, a note: None of these mashed potatoes tasted BAD. We all agreed that if someone put any one of these recipes in front of us at Thanksgiving, we would stuff our faces and be perfectly happy campers. It's really only when you start tasting these potatoes side-by-side that differences begin to emerge.
The REAL takeaway for me here is that some potato types require more doctoring to taste rich and creamy. Since we were sticking to one master recipe, I didn't taste and adjust these recipes the same way I do when I'm just cooking for fun. If it was a regular day in the kitchen, I'd likely have tasted the red and white potatoes, decided they needed some extra pizzazz, and added some extra butter or cream to balance them out a bit.
So, bottom line: if you love making mashed potatoes with red potatoes, keep on keepin' on! But if you're looking for a rich, creamy mashed potato recipe with minimal added butter or cream, yellow potatoes (AKA butter potatoes, AKA Yukon Golds) are probably your best bet.
How to cut and boil potatoes for mashed potatoes
Alright. So we know what TYPE of potatoes we like (or at least, what type of potato I like #TeamYellowPotato). But does it matter how we cook them?
The answer? Kind of.
Let's start with water
For my experiments, I tested each mashed potato recipe with exactly the same quantity of water - 6 cups of water for 2 pounds of potatoes - no matter what size the pot was. I ALSO tested a few batches with varying amounts of water, just to see. I find that it matters more how long you cook your potatoes than how much water you cook them in.
Basically, add enough cold water to cover the potatoes in your pot (don't forget to season the cooking water!), turn the heat to medium (or medium-high if you want to move a little quicker), and start checking the potatoes for doneness at the 20 or 30 minute mark (Note: This is 20-30 minutes after you turn on the heat, not after the potatoes come to a boil). Overcooked potatoes will take on more water, which will affect the end taste and texture. You want to cook your potatoes JUST long enough to be easily pierced with a fork.
Why cold water?
I like to cover my potatoes in cold water for two reasons.
One, it helps them cook more evenly. When you plunge anything - pasta, veggies, potatoes - into hot or boiling water, the outside starts to cook first, which can result in uneven cooking. Bringing the water up to a boil slowly helps avoid overcooking the outside of the potato.
Two, you can keep cut potatoes in cold water for HOURS, which is a great make-ahead trick that I ALWAYS use on holidays or anytime I want to make sure food is all ready at the same time. On Thanksgiving in particular, I peel and cut my potatoes first thing in the morning, throw them in a pot, cover them with cold water, and let them hang out on the stove or the counter until I'm ready to cook them (usually about an hour before we eat). The cold water will keep the potatoes from browning so they look good as new. When you're ready to cook, just add your salt to the water, turn on the burner, and cook normally.
Does size matter?
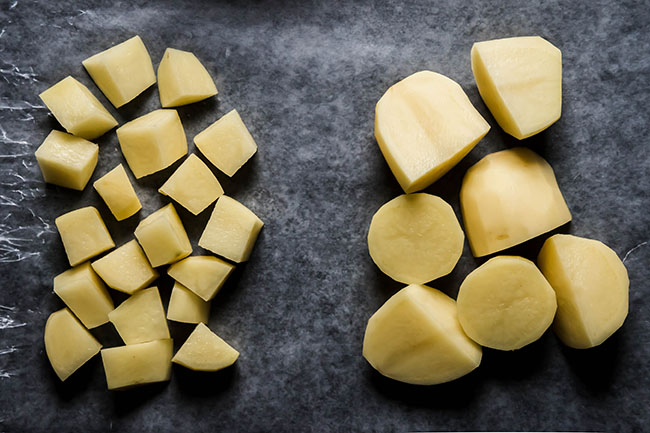
I was taught to cut potatoes in quarters (for large potatoes - smaller potatoes get cut in half) when making mashed potatoes, but I've had a few people ask if cutting them into smaller pieces makes a difference.
To check, I tested two batches of yellow potatoes with my master recipe: one with my standard quarter-and-half pieces (about 2.5" pieces) and one with smaller cubes of potato - about 1" square.
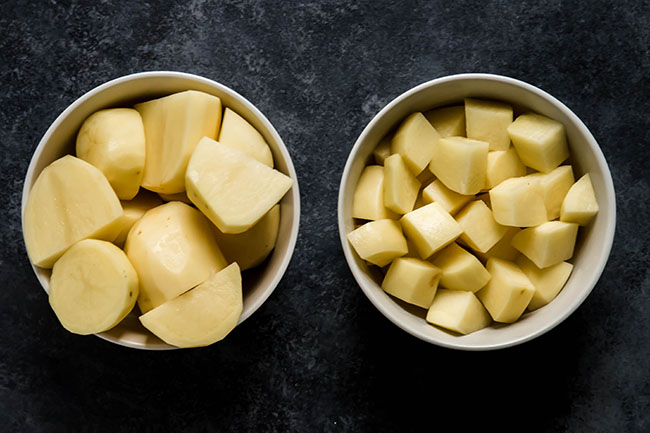
I brought both pots of potatoes to a boil (each took about 20 minutes to come to a boil over medium heat) and drained them as soon as they were easily pierced with a fork.
The smaller potato pieces, predictably, were cooked through about 4 minutes faster than the larger pieces. Once the potatoes were cooked, I put them each through a potato ricer and prepared the rest of the recipe as usual.
Here's what we ended up with:
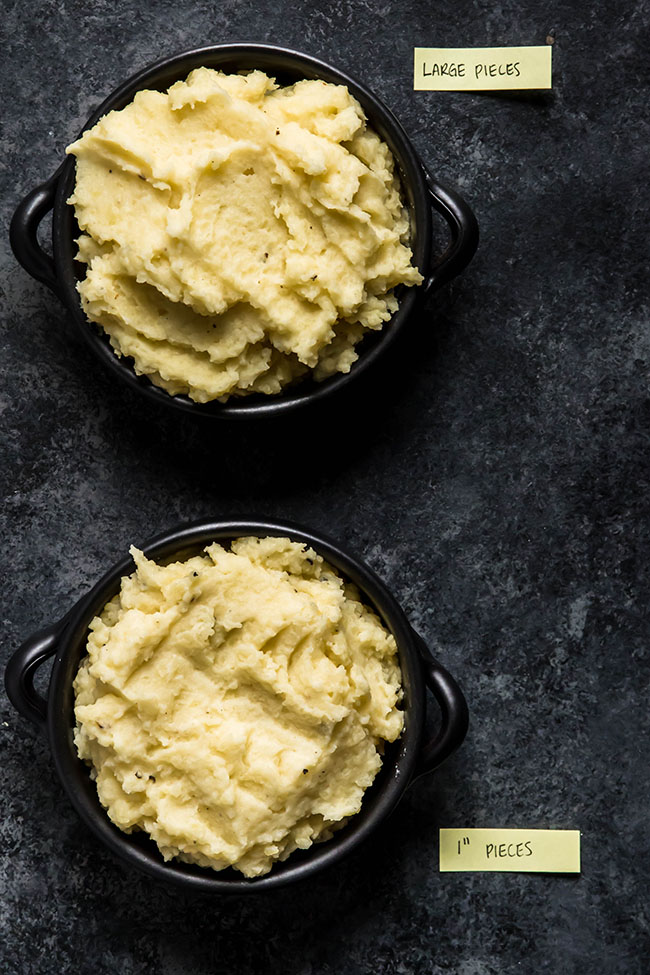
As you can tell, there really isn't much difference in color or texture between the two potato sizes.
There WAS, however, a slight difference in taste: The smaller 1" potato pieces resulted in mashed potatoes that were slightly less flavorful. I would guess that the smaller pieces took on a little more water, producing mashed potatoes that were a little more watery and not quite as rich. Again, this difference was pretty minimal, and I doubt I would have even noticed if I wasn't tasting them side by side.
The verdict:
Stick with larger (half and quarter) potato pieces. The smaller pieces will save you a couple minutes of cooking time, but you'll likely spend a few extra minutes cutting them down to size, so the time savings is pretty negligible. Larger pieces are easier to cut and will give you a creamier, richer end result.
What's the best way to mash mashed potatoes?
Ahhhhhhh, yes. The big, BIG question: How should I mash my mashed potatoes?
I've already talked at you for 4200 words (HIGH FIVE TO YOU if you've read all this way!) so I'm going to jump RIGHT ON IN.
I tested four popular potato mashing methods:
Each method was tested with yellow potatoes and our master recipe, and I peeled all of the potatoes here so I could really pay attention to the texture.
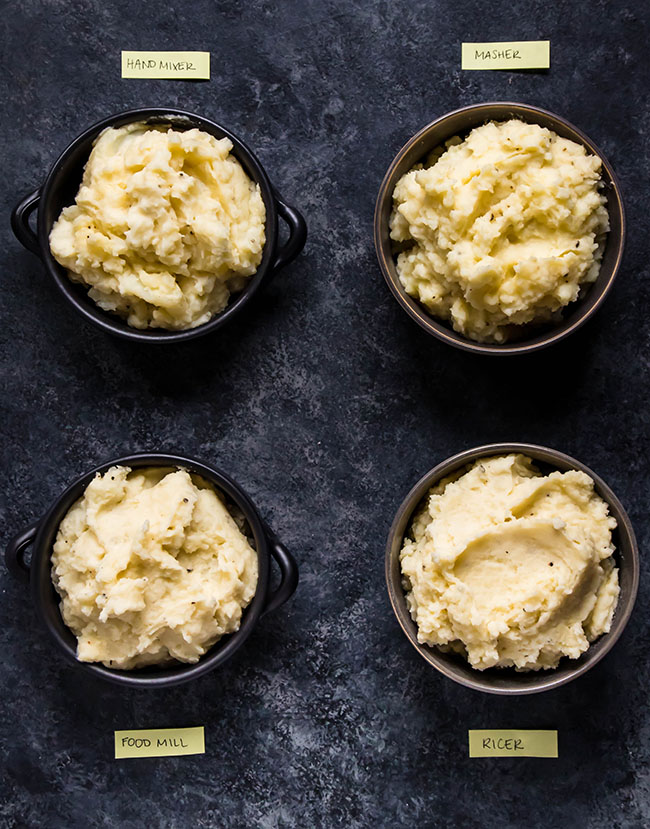
Here's what we ended up with:
Things to note
Right away, you may be able to see a few texture differences between these mashing techniques. The hand mixer and traditional masher (top left and right, respectively) both produced thicker-looking, more textured mashed potatoes, while the food mill and ricer (bottom left and right, respectively) produced a smoother, lighter-looking mash. (See the "Equipment" section above for more info. on each of these tools!)
Let's take a closer look:
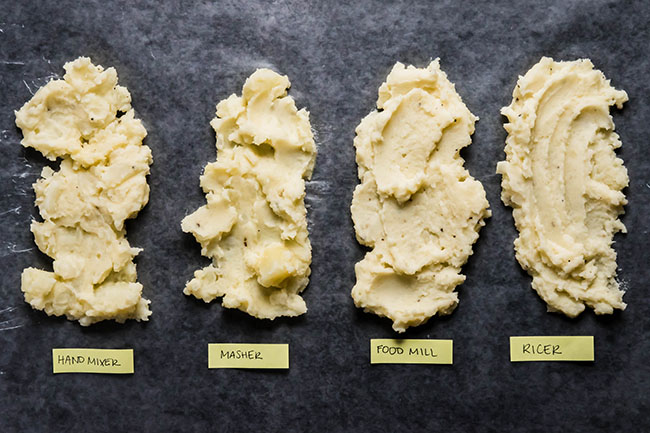
The textural differences are even more apparent here. On the left side of the photo, you may be able to make out chunks of potato in the hand mixer and traditional masher examples. On the right side, you can see how much smoother the food mill and ricer versions are - no lumps at all, and easily spread around with the back of a spoon.
So. Which method is the best?
Here's the (very unhelpful) thing...it depends. All four of these mashing techniques are popular for a reason: They all taste GOOD! When it comes to mashing technique, it honestly just comes down to personal preference. Here are some thoughts from our tasters:
This technique left some lumps in the mashed potatoes, but they were still surprisingly light and fluffy. If you already have one of these in your kitchen and don't feel like springing for new equipment, this is a great solution. Fun fact: this is how my mom always made our mashed potatoes growing up; for me, these potatoes taste like home.
PROS: SO. EASY. Mash your potatoes quickly and easily - great for big batches when you're serving a lot of people. Slightly smoother and fluffier than potatoes made with a traditional masher.
CONS: It's really easy to OVERMIX the potatoes - a hand mixer can easily overbeat your potatoes, which can result in gummy, sticky mashed potatoes (ick), especially when you're adding mix-ins like we do in these smoked gouda mashed potatoes. For best results, move quickly and with a light touch.
I'll always have a special place in my heart for a regular ol' potato masher. It leaves some lumps and takes a bit of muscle, and they're a little denser than potatoes whipped with a hand blender.
PROS: Potato mashers are cheap, don't take up a ton of space, and they do exactly what they're supposed to do. Easy to hold and use.
CONS: They leave some lumps, and there aren't a lot of other uses for this tool. Can be a bit of an arm workout if you're mashing potatoes for a crowd.
A great alternative to a potato ricer (and a great way to use your food mill if you have one for summer canning!) I used the second-biggest disc to mill the potatoes here.
PROS: When it comes to texture, I really like how mashed potatoes made with a food mill taste. They're creamy, lump-free, and very silky.
CONS: This was by far the most annoying way to mash potatoes. The food mill doesn't like big chunks of potato, so if you're boiling potatoes in large pieces, you'll need to cut them down so the food mill can get through them easier. The smaller disc sizes don't work very well, so you'll need a bigger disc, and since the potatoes are so thick you'll need to move the mill back and forth a lot to help it get through all the potatoes. The texture was great, but I'm not sold that the extra time and effort is really worth it.
A great choice if you love smooth, silky, lump-free potatoes!
PROS: Both of the potato ricers I tested were easy to use and clean. They make fairly quick work of the cooked potatoes (faster than the food mill, not as fast as the hand mixer) and result in a creamy, fluffy mashed potato.
CONS: It doesn't have a lot of additional uses, and it works much better if you peel your potatoes first (which is an extra step some people don't always want to take). If you're not used to the texture of riced potatoes, it can taste a little odd at first - even "grainy."
We did it!
HOLY MASHED POTATO, FRIENDS. We just talked about SO. MANY. THINGS. Are you still with me? Do you need a nap? Or a giant bowl of mashed potatoes?
If you're like "UM HI HELLO, I just read 5000 words about mashed potatoes and now my BRAIN is a mashed potato," don't worry. I GOT YOU.
This post was SO much fun to put together! If you have any questions (or a suggestion for our next Cooking 101 post!) drop a note in the comments below and my team and I will do our best to answer. And don't forget to check out my Ultimate Fluffy Mashed Potatoes recipe and my homemade gnocchi with leftover potatoes hack!
Until next time, potato pals!






Kate
WOW! Thank you for such wonderful detailed info!
oksana
incredibly helpful!!
Erin
So much helpful information! I dub thee "Potato Queen."
Jackie @ Life As A Strawberry
Hi Erin, thank you! We'll take it!
Pamela
Thanksgiving GAME CHANGER! Thank you from the bottom of my potato-loving heart!
Coley
This post is everything. Well done Jessie!